Asus SCSI 320-0 Global Array Manager Transition Tool - Page 133
Adding a Physical Drive to an Existing Array, Removing a Physical Drive from an Array
 |
View all Asus SCSI 320-0 manuals
Add to My Manuals
Save this manual to your list of manuals |
Page 133 highlights
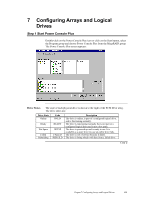
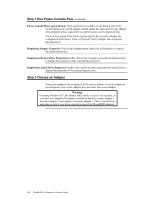
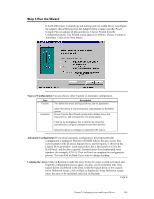
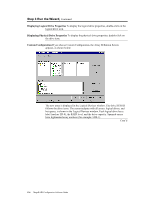
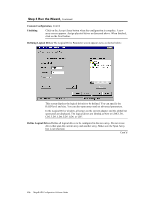
Step 3 Run the Wizard, Continued Custom Configuration, Cont'd Displaying Logical Drive Properties To display the logical drive properties, double-click on the logical drive icon. Adding Physical Drives to a New Array You can assign physical drives to the new array by selecting any combination of physical drives in the Ready status and clicking on the Add to Array button. Displaying Physical Drive Properties To display the physical drive properties, double-click on the drive icon. Adding a Physical Drive to an Existing Array You cannot add a physical drive to an array while running the Configuration Wizard. However, you can add a physical drive to an array from the Power Console Plus main screen by clicking on a physical drive icon (the drive must be in the Ready state), holding down the left mouse button, dragging the drive icon to the icon that represents an array, and then releasing the mouse button. Logical View must be selected before you can do this. See Chapter 6 for more information. Removing a Physical Drive from an Array You can selectively remove hard drives from an existing array only on the main menu. Right click on the drive you want to remove and select Remove. You may have to change the RAID level to remove the hard drive. While running the Configuration Wizard, you can remove a physical drive from an array by changing the array configuration, selecting the array, and then clicking on the Reclaim button. However, if the array has not yet been configured, you can click on the drive icon in the new array and then click on Reclaim. This only works if the new array has not been accepted. You cannot reclaim an array if a logical drive has already been defined in the array. Assigning Hot Spares Select the icon for any physical drive in the Ready state and click on Add Spare to add this drive to the Global Hot Spare Pool. Click on the Next button when done. Adding Physical Drives Choose the icons for any physical drives in the Ready state and click on Add to Array to assign physical drives to the new array. Cont'd Chapter 7 Configuring Arrays and Logical Drives 125
-
 1
1 -
2
-
3
-
4
-
5
-
6
-
7
-
8
-
9
-
10
-
11
-
12
-
13
-
14
-
15
-
16
-
17
-
18
-
19
-
20
-
21
-
22
-
23
-
24
-
25
-
26
-
27
-
28
-
29
-
30
-
31
-
32
-
33
-
34
-
35
-
36
-
37
-
38
-
39
-
40
-
41
-
42
-
43
-
44
-
45
-
46
-
47
-
48
-
49
-
50
-
51
-
52
-
53
-
54
-
55
-
56
-
57
-
58
-
59
-
60
-
61
-
62
-
63
-
64
-
65
-
66
-
67
-
68
-
69
-
70
-
71
-
72
-
73
-
74
-
75
-
76
-
77
-
78
-
79
-
80
-
81
-
82
-
83
-
84
-
85
-
86
-
87
-
88
-
89
-
90
-
91
-
92
-
93
-
94
-
95
-
96
-
97
-
98
-
99
-
100
-
101
-
102
-
103
-
104
-
105
-
106
-
107
-
108
-
109
-
110
-
111
-
112
-
113
-
114
-
115
-
116
-
117
-
118
-
119
-
120
-
121
-
122
-
123
-
124
-
125
-
126
-
127
-
 128
128 -
 129
129 -
 130
130 -
 131
131 -
 132
132 -
 133
133 -
 134
134 -
 135
135 -
 136
136 -
 137
137 -
 138
138 -
139
-
140
-
141
-
142
-
143
-
144
-
145
-
146
-
147
-
148
-
149
-
150
-
151
-
152
-
153
-
154
 |
 |