Asus SCSI 320-0 Global Array Manager Transition Tool - Page 134
Custom Configuration, Finishing, Defining Logical Drives, LD2, LD3, LD4, LD5, LD6, or LD7.
 |
View all Asus SCSI 320-0 manuals
Add to My Manuals
Save this manual to your list of manuals |
Page 134 highlights
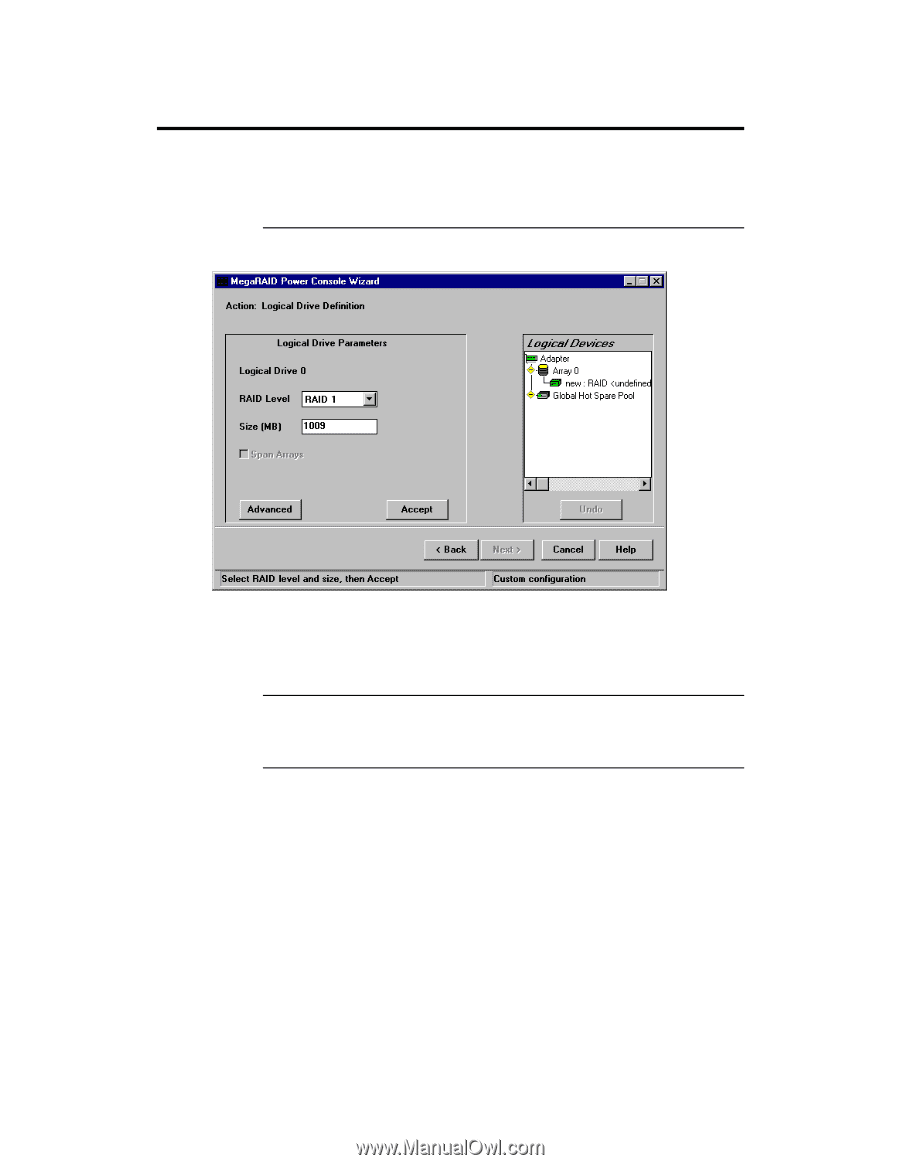
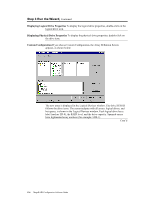
Step 3 Run the Wizard, Continued Custom Configuration, Cont'd Finishing Click on the Accept Array button when the configuration is complete. A new array screen appears. Assign physical drives as discussed above. When finished, click on the Next button. Defining Logical Drives The Logical Drive Parameter screen appears next, as shown below: This screen displays the logical drive(s) to be defined. You can specify the RAID level and size. You can also span arrays and set advanced parameters. In the Logical Drive window, all arrays on the current adapter and the global hot spare pool are displayed. The logical drives are labeled as New or LD0, LD1, LD2, LD3, LD4, LD5, LD6, or LD7. Define Logical Drives Define all logical drives to be configured in the new array. Do not create drives that span the current array and another array. Make sure the Span Array box is not checked. Cont'd 126 MegaRAID Configuration Software Guide
-
 1
1 -
2
-
3
-
4
-
5
-
6
-
7
-
8
-
9
-
10
-
11
-
12
-
13
-
14
-
15
-
16
-
17
-
18
-
19
-
20
-
21
-
22
-
23
-
24
-
25
-
26
-
27
-
28
-
29
-
30
-
31
-
32
-
33
-
34
-
35
-
36
-
37
-
38
-
39
-
40
-
41
-
42
-
43
-
44
-
45
-
46
-
47
-
48
-
49
-
50
-
51
-
52
-
53
-
54
-
55
-
56
-
57
-
58
-
59
-
60
-
61
-
62
-
63
-
64
-
65
-
66
-
67
-
68
-
69
-
70
-
71
-
72
-
73
-
74
-
75
-
76
-
77
-
78
-
79
-
80
-
81
-
82
-
83
-
84
-
85
-
86
-
87
-
88
-
89
-
90
-
91
-
92
-
93
-
94
-
95
-
96
-
97
-
98
-
99
-
100
-
101
-
102
-
103
-
104
-
105
-
106
-
107
-
108
-
109
-
110
-
111
-
112
-
113
-
114
-
115
-
116
-
117
-
118
-
119
-
120
-
121
-
122
-
123
-
124
-
125
-
126
-
127
-
128
-
 129
129 -
 130
130 -
 131
131 -
 132
132 -
 133
133 -
 134
134 -
 135
135 -
 136
136 -
 137
137 -
 138
138 -
 139
139 -
140
-
141
-
142
-
143
-
144
-
145
-
146
-
147
-
148
-
149
-
150
-
151
-
152
-
153
-
154
 |
 |