Asus SCSI 320-0 Global Array Manager Transition Tool - Page 81
Using New Configuration, To use the spanning feature and keep the existing configuration, use View/Add
 |
View all Asus SCSI 320-0 manuals
Add to My Manuals
Save this manual to your list of manuals |
Page 81 highlights
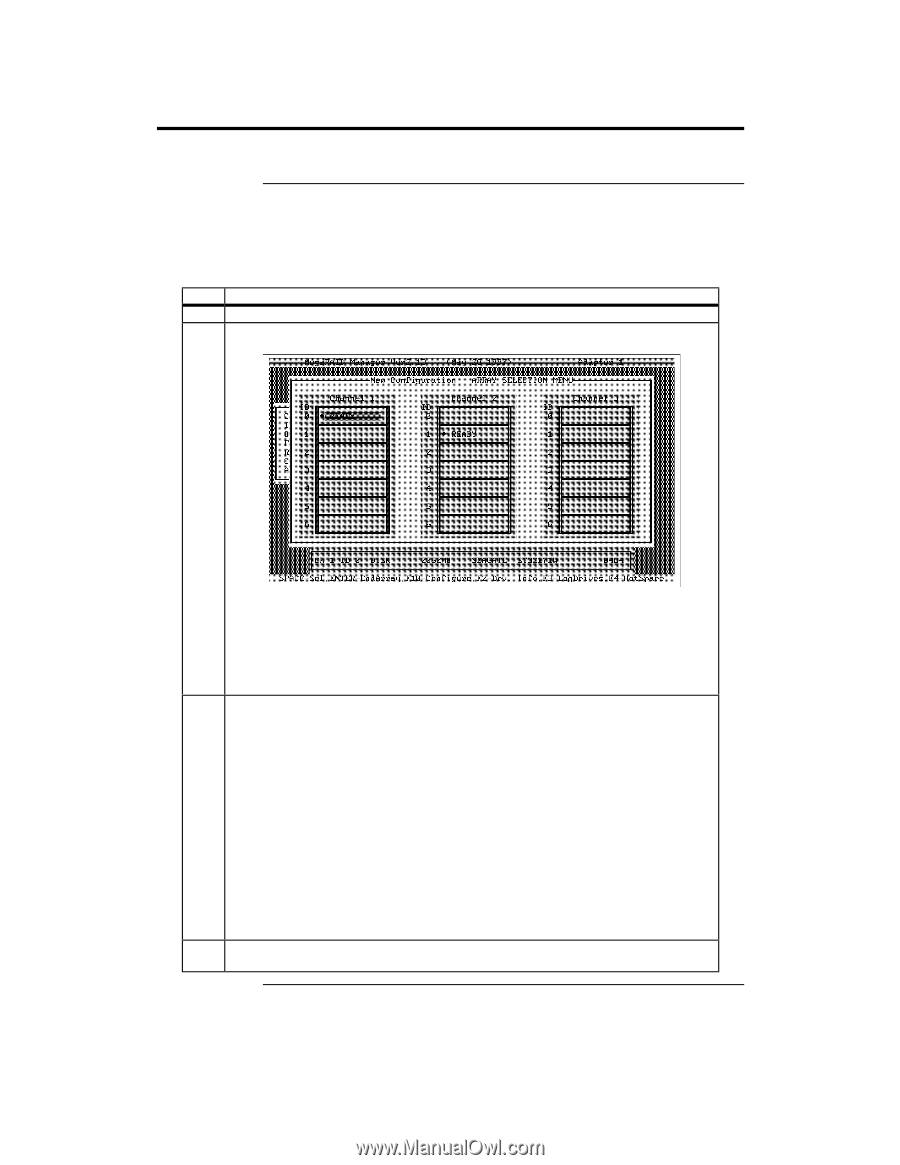
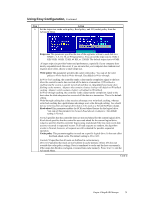
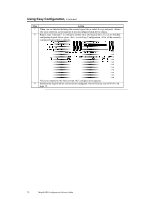
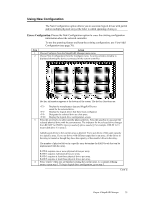
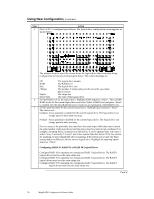
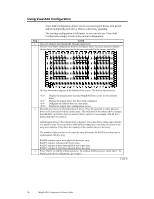
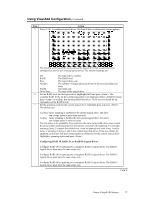
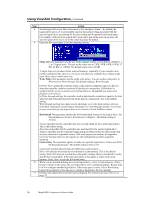
Using New Configuration The New Configuration option allows you to associate logical drives with partial and/or multiple physical arrays (the latter is called spanning of arrays). Erases Configuration Choose the New Configuration option to erase the existing configuration information about the selected controller. To use the spanning feature and keep the existing configuration, use View/Add Configuration (see page 76). Step Action 1 Choose Configure from the MegaRAID Manager main menu. 2 Choose New Configuration from the Configure menu. An array selection window is displayed showing the devices connected to the current controller. Hot key information appears at the bottom of the screen. The hot key functions are: Display the manufacturer data and MegaRAID error count for the selected drive. Display the logical drives that have been configured. Designate the selected drive as a hot spare. Display the logical drive configuration screen. 3 Press the arrow keys to select specific physical drives. Press the spacebar to associate the selected physical drive with the current array. The indicator for the selected drive changes from READY to ONLIN A[array number]-[drive number]. For example, ONLIN A2-3 means disk drive 3 in array 2. Add physical drives to the current array as desired. Try to use drives of the same capacity in a specific array. If you use drives with different capacities in an array, all the drives in the array is treated as though they have the capacity of the smallest drive in the array. The number of physical drives in a specific array determine the RAID levels that can be implemented with the array. RAID 0 requires one or more physical drives per array. RAID 1 requires 2 physical drives per array. RAID 3 requires at least three physical drives per array. RAID 5 requires at least three physical drives per array. 4 Press when you are finished creating the current array. To continue defining arrays, repeat step 3. To begin logical drive configuration, go to step 5. Cont'd Chapter 4 MegaRAID Manager 73
-
 1
1 -
2
-
3
-
4
-
5
-
6
-
7
-
8
-
9
-
10
-
11
-
12
-
13
-
14
-
15
-
16
-
17
-
18
-
19
-
20
-
21
-
22
-
23
-
24
-
25
-
26
-
27
-
28
-
29
-
30
-
31
-
32
-
33
-
34
-
35
-
36
-
37
-
38
-
39
-
40
-
41
-
42
-
43
-
44
-
45
-
46
-
47
-
48
-
49
-
50
-
51
-
52
-
53
-
54
-
55
-
56
-
57
-
58
-
59
-
60
-
61
-
62
-
63
-
64
-
65
-
66
-
67
-
68
-
69
-
70
-
71
-
72
-
73
-
74
-
75
-
 76
76 -
 77
77 -
 78
78 -
 79
79 -
 80
80 -
 81
81 -
 82
82 -
 83
83 -
 84
84 -
 85
85 -
 86
86 -
87
-
88
-
89
-
90
-
91
-
92
-
93
-
94
-
95
-
96
-
97
-
98
-
99
-
100
-
101
-
102
-
103
-
104
-
105
-
106
-
107
-
108
-
109
-
110
-
111
-
112
-
113
-
114
-
115
-
116
-
117
-
118
-
119
-
120
-
121
-
122
-
123
-
124
-
125
-
126
-
127
-
128
-
129
-
130
-
131
-
132
-
133
-
134
-
135
-
136
-
137
-
138
-
139
-
140
-
141
-
142
-
143
-
144
-
145
-
146
-
147
-
148
-
149
-
150
-
151
-
152
-
153
-
154
 |
 |