Asus SCSI 320-0 Global Array Manager Transition Tool - Page 142
Adding Capacity under Window NT 4.x, and Windows 2000
 |
View all Asus SCSI 320-0 manuals
Add to My Manuals
Save this manual to your list of manuals |
Page 142 highlights
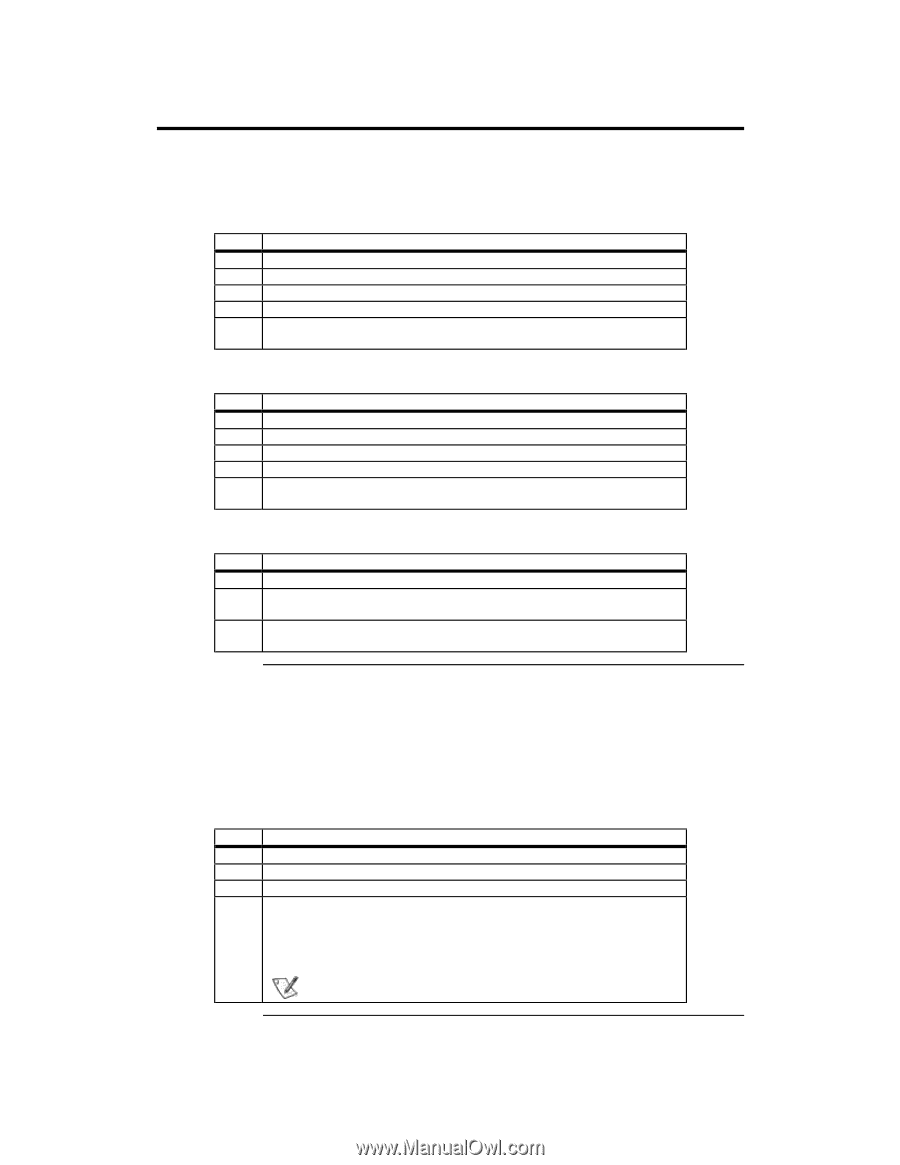
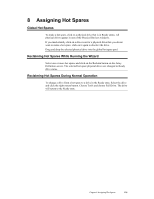
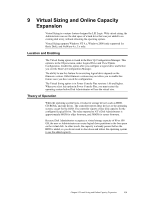
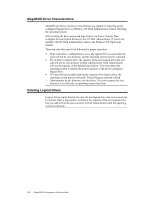
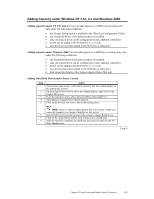
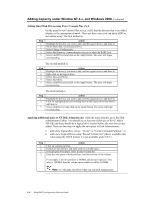
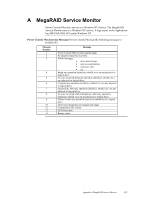
Adding Capacity under Window NT 4.x, and Windows 2000, Continued Adding Hard Disk Drives using Power Console Plus vX.X On the main Power Console Plus screen, verify that the drive(s) that were added display on the appropriate channel. There are three ways you can add a HDD to an existing array. The first method is: Step Action 1 Highlight the drive(s) you want to add, and the logical drive to add them to. 2 On the Menu Bar, select Logical Drive. 3 Select Change Configuration. 4 Select Add Capacity. A menu displays for you to select the RAID level. 5 Select a RAID level and click on the Apply button. The array will begin reconstructing. The second method is: Step Action 1 Highlight the drive(s) you want to add, and the logical drive to add them to. 2 Right click on the logical drive. 3 Select Advanced Menu. 4 Select Add Drive. 5 Select a RAID level and click on the Apply button. The array will begin reconstructing. The third method is: Step Action 1 Highlight the drive(s) you want to add, and the logical drive to add them to. 2 Click on highlighted drive(s) and drag them to the logical drive you want to add them to. 3 Select a RAID Level and click on the Apply button. The array will begin reconstructing. Applying additional space to NT Disk Administrator After the array rebuilds, go to the Disk Administrator Utility. You should see at least one HDD size of 81917 MB or 500 GB, and there should be a logical drive created before the new drive(s) are added. There are two ways to apply the new space to Disk Administrator: • add a new logical drive using - "Create" or "Create Extended Partition", or • add a new Logical Drive using "Extend Volume Set" (this is available only when using the NTFS format; it is not available under FAT.) Step Action 1 Click on existing partition. 2 Hold down the shift key and right click on available space. 2 From the pull down menu, select Extend Volume Set. 3 Enter the total space of both partitions, and the total size of the volume. For example, if the first partition is 500MB, and the new capacity of the array is 1000MB, then the volume space entered would be 1500MB. Note: NT will make you reboot when you exit Disk Administrator. 134 MegaRAID Configuration Software Guide
-
 1
1 -
2
-
3
-
4
-
5
-
6
-
7
-
8
-
9
-
10
-
11
-
12
-
13
-
14
-
15
-
16
-
17
-
18
-
19
-
20
-
21
-
22
-
23
-
24
-
25
-
26
-
27
-
28
-
29
-
30
-
31
-
32
-
33
-
34
-
35
-
36
-
37
-
38
-
39
-
40
-
41
-
42
-
43
-
44
-
45
-
46
-
47
-
48
-
49
-
50
-
51
-
52
-
53
-
54
-
55
-
56
-
57
-
58
-
59
-
60
-
61
-
62
-
63
-
64
-
65
-
66
-
67
-
68
-
69
-
70
-
71
-
72
-
73
-
74
-
75
-
76
-
77
-
78
-
79
-
80
-
81
-
82
-
83
-
84
-
85
-
86
-
87
-
88
-
89
-
90
-
91
-
92
-
93
-
94
-
95
-
96
-
97
-
98
-
99
-
100
-
101
-
102
-
103
-
104
-
105
-
106
-
107
-
108
-
109
-
110
-
111
-
112
-
113
-
114
-
115
-
116
-
117
-
118
-
119
-
120
-
121
-
122
-
123
-
124
-
125
-
126
-
127
-
128
-
129
-
130
-
131
-
132
-
133
-
134
-
135
-
136
-
 137
137 -
 138
138 -
 139
139 -
 140
140 -
 141
141 -
 142
142 -
 143
143 -
 144
144 -
 145
145 -
 146
146 -
 147
147 -
148
-
149
-
150
-
151
-
152
-
153
-
154
 |
 |