Asus SCSI 320-0 Global Array Manager Transition Tool - Page 115
Custom Configuration, Display, Print, Click on Add Spare to add Hot Spare drives.
 |
View all Asus SCSI 320-0 manuals
Add to My Manuals
Save this manual to your list of manuals |
Page 115 highlights
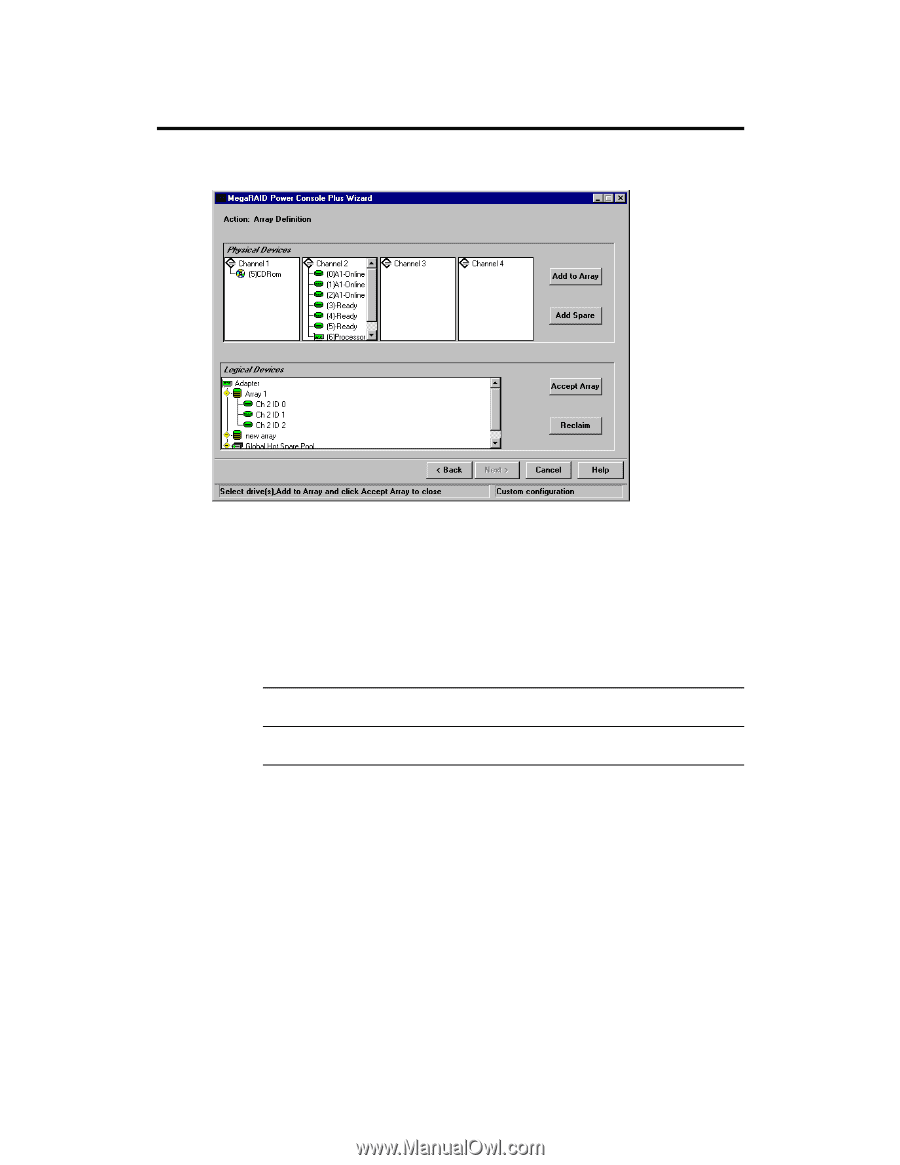
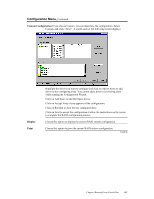
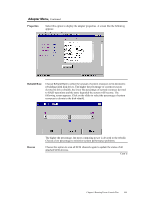
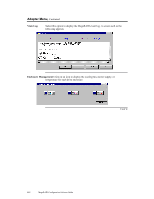
Configuration Menu, Continued Custom Configuration If you choose Custom, you can determine the configuration. Select Custom, and click . A screen such as the following screen displays: Display Print Highlight the drives you want to configure and click on Add to Array to add drives to the configuring array. You cannot add a drive to an existing array while running the Configuration Wizard. Click on Add Spare to add Hot Spare drives. Click on Accept Array if you approve of the configuration. Click on Reclaim to clear the last configured array. Click on Next to accept the configuration. Follow the instructions on the screen to complete the RAID configuration process. Choose this option to display the current RAID system configuration. Choose this option to print the current RAID system configuration. Cont'd Chapter 6 Running Power Console Plus 107
-
 1
1 -
2
-
3
-
4
-
5
-
6
-
7
-
8
-
9
-
10
-
11
-
12
-
13
-
14
-
15
-
16
-
17
-
18
-
19
-
20
-
21
-
22
-
23
-
24
-
25
-
26
-
27
-
28
-
29
-
30
-
31
-
32
-
33
-
34
-
35
-
36
-
37
-
38
-
39
-
40
-
41
-
42
-
43
-
44
-
45
-
46
-
47
-
48
-
49
-
50
-
51
-
52
-
53
-
54
-
55
-
56
-
57
-
58
-
59
-
60
-
61
-
62
-
63
-
64
-
65
-
66
-
67
-
68
-
69
-
70
-
71
-
72
-
73
-
74
-
75
-
76
-
77
-
78
-
79
-
80
-
81
-
82
-
83
-
84
-
85
-
86
-
87
-
88
-
89
-
90
-
91
-
92
-
93
-
94
-
95
-
96
-
97
-
98
-
99
-
100
-
101
-
102
-
103
-
104
-
105
-
106
-
107
-
108
-
109
-
 110
110 -
 111
111 -
 112
112 -
 113
113 -
 114
114 -
 115
115 -
 116
116 -
 117
117 -
 118
118 -
 119
119 -
 120
120 -
121
-
122
-
123
-
124
-
125
-
126
-
127
-
128
-
129
-
130
-
131
-
132
-
133
-
134
-
135
-
136
-
137
-
138
-
139
-
140
-
141
-
142
-
143
-
144
-
145
-
146
-
147
-
148
-
149
-
150
-
151
-
152
-
153
-
154
 |
 |