Asus SCSI 320-0 Global Array Manager Transition Tool - Page 32
The RAID level, MegaRAID Hardware Guide
 |
View all Asus SCSI 320-0 manuals
Add to My Manuals
Save this manual to your list of manuals |
Page 32 highlights
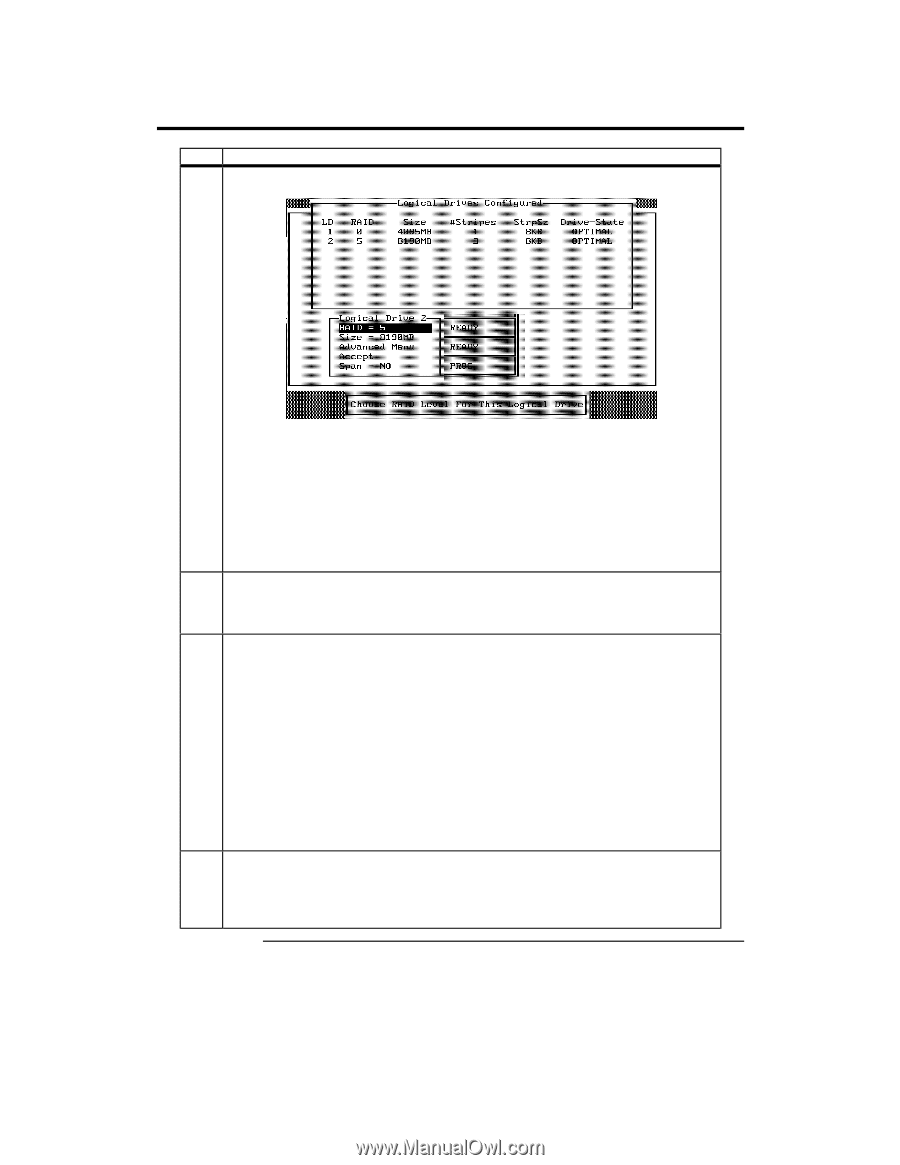
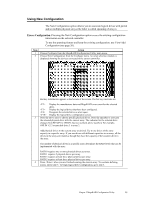
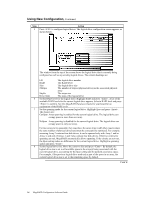
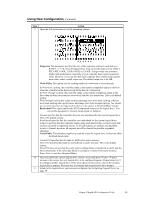
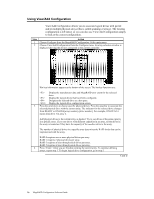
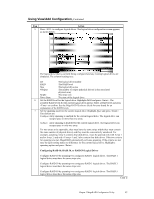
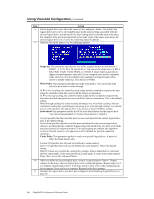
Using New Configuration, Continued Step Action 5 Press to configure logical drives. The logical drive configuration screen appears, as shown below: The window from the top of the screen shows the logical drive that is currently being configured as well as any existing logical drives. The column headings are: LD The logical drive number RAID The RAID level Size The logical drive size #Stripes The number of stripes (physical drives) in the associated physical array StrpSz The stripe size Drive-State The state of the logical drive 6 Set the RAID level for the logical drive. Highlight RAID and press . A list of the available RAID levels for the current logical drive appears. Select a RAID level and press to confirm. See the MegaRAID Hardware Guide for your board for an explanation of the RAID levels. 7 Set the spanning mode for the current logical drive. Highlight Span and press . The choices are: CanSpan Array spanning is enabled for the current logical drive. The logical drive can occupy space in more than one array. NoSpan Array spanning is disabled for the current logical drive. The logical drive can occupy space in only one array. For two arrays to be spannable, they must have the same stripe width (they must contain the same number of physical drives) and must be consecutively numbered. For example, assuming Array 2 contains four disk drives, it can be spanned only with Array 1 and/or Array 3, and only if Arrays 1 and 3 also contain four disk drives. If the two criteria for spanning are met, MegaRAID automatically allows spanning. If the criteria are not met, the Span setting makes no difference for the current logical drive. Highlight a spanning option and press . 8 Set the logical drive size. Move the cursor to Size and press . By default, the logical drive size is set to all available space in the array(s) being associated with the current logical drive, accounting for the Span setting and for partially used array space. For example, if the previous logical drive used only a part of the space in an array, the current logical drive size is set to the remaining space by default. Cont'd 24 MegaRAID Configuration Software Guide
-
 1
1 -
2
-
3
-
4
-
5
-
6
-
7
-
8
-
9
-
10
-
11
-
12
-
13
-
14
-
15
-
16
-
17
-
18
-
19
-
20
-
21
-
22
-
23
-
24
-
25
-
26
-
 27
27 -
 28
28 -
 29
29 -
 30
30 -
 31
31 -
 32
32 -
 33
33 -
 34
34 -
 35
35 -
 36
36 -
 37
37 -
38
-
39
-
40
-
41
-
42
-
43
-
44
-
45
-
46
-
47
-
48
-
49
-
50
-
51
-
52
-
53
-
54
-
55
-
56
-
57
-
58
-
59
-
60
-
61
-
62
-
63
-
64
-
65
-
66
-
67
-
68
-
69
-
70
-
71
-
72
-
73
-
74
-
75
-
76
-
77
-
78
-
79
-
80
-
81
-
82
-
83
-
84
-
85
-
86
-
87
-
88
-
89
-
90
-
91
-
92
-
93
-
94
-
95
-
96
-
97
-
98
-
99
-
100
-
101
-
102
-
103
-
104
-
105
-
106
-
107
-
108
-
109
-
110
-
111
-
112
-
113
-
114
-
115
-
116
-
117
-
118
-
119
-
120
-
121
-
122
-
123
-
124
-
125
-
126
-
127
-
128
-
129
-
130
-
131
-
132
-
133
-
134
-
135
-
136
-
137
-
138
-
139
-
140
-
141
-
142
-
143
-
144
-
145
-
146
-
147
-
148
-
149
-
150
-
151
-
152
-
153
-
154
 |
 |