Asus SCSI 320-0 Global Array Manager Transition Tool - Page 131
Step 3 Run the Wizard, Types of Configuration, Automatic Configuration, Undoing the Array
 |
View all Asus SCSI 320-0 manuals
Add to My Manuals
Save this manual to your list of manuals |
Page 131 highlights
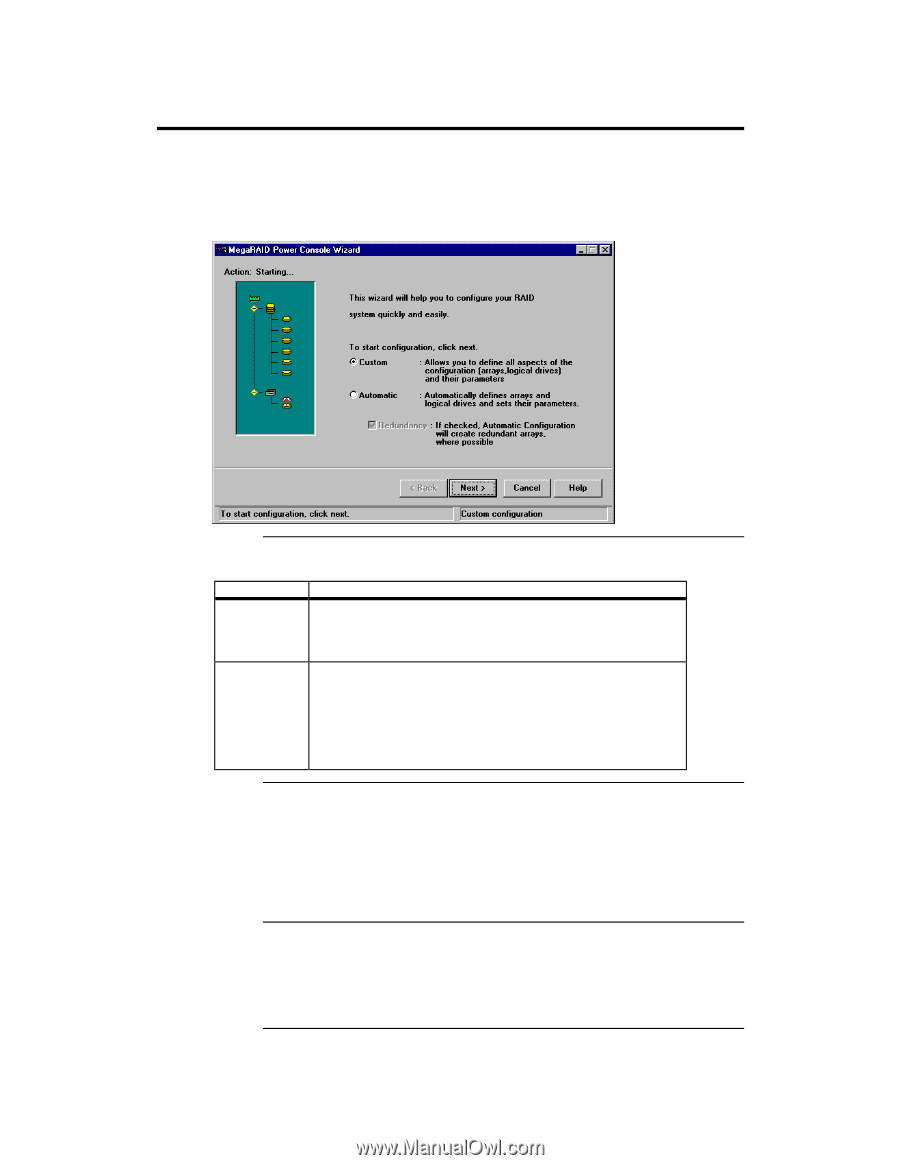
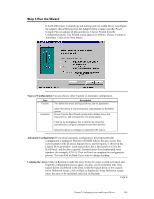
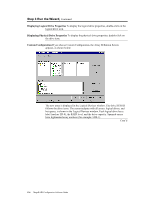
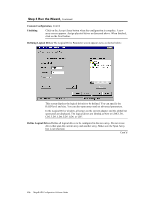
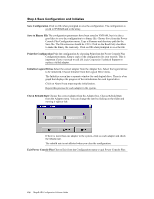
Step 3 Run the Wizard If the RAID system is already up and running and you would like to reconfigure the adapter, choose Rescan from the Adapter menu to make sure that Power Console Plus recognizes all physical drives. Choose Wizard from the Configuration menu. The Wizard screen appears as follows. Choose Custom or Automatic. Click on the Next button. Types of Configuration You can choose either Custom or Automatic configuration. Type Custom Description You define the arrays and logical drives, and set parameters. Automatic Select this option if you have specific requirements for the RAID system. Power Console Plus Wizard automatically defines arrays and logical drives, and automatically sets all parameters. Click on the Redundancy box to instruct the Wizard to automatically configure redundant arrays when possible. Select this option to configure an optimal RAID system. Automatic Configuration If you chose automatic configuration, the proposed RAID configuration is displayed. The drive SCSI ID follows the drive icons. The current adapter with all arrays, logical drives, and hot spares, is shown in the Logical Devices window. Each logical drive has a label (such as LD1), the RAID level, and the drive capacity. Spanned arrays have hyphenated array numbers (for example: LD1-1). Click on Finish to complete the configuration process. You can click on Back if you want to change anything. Undoing the Array Click on Reclaim to undo the array. It may be easier to click on Cancel and begin the configuration process again. An array can be reclaimed only if no logical drives are defined in the array. Undo the logical drive on the Logical Drive Definition screen, click on Back to display the Array Definition screen, select the array to be reclaimed, and click on Reclaim. Cont'd Chapter 7 Configuring Arrays and Logical Drives 123
-
 1
1 -
2
-
3
-
4
-
5
-
6
-
7
-
8
-
9
-
10
-
11
-
12
-
13
-
14
-
15
-
16
-
17
-
18
-
19
-
20
-
21
-
22
-
23
-
24
-
25
-
26
-
27
-
28
-
29
-
30
-
31
-
32
-
33
-
34
-
35
-
36
-
37
-
38
-
39
-
40
-
41
-
42
-
43
-
44
-
45
-
46
-
47
-
48
-
49
-
50
-
51
-
52
-
53
-
54
-
55
-
56
-
57
-
58
-
59
-
60
-
61
-
62
-
63
-
64
-
65
-
66
-
67
-
68
-
69
-
70
-
71
-
72
-
73
-
74
-
75
-
76
-
77
-
78
-
79
-
80
-
81
-
82
-
83
-
84
-
85
-
86
-
87
-
88
-
89
-
90
-
91
-
92
-
93
-
94
-
95
-
96
-
97
-
98
-
99
-
100
-
101
-
102
-
103
-
104
-
105
-
106
-
107
-
108
-
109
-
110
-
111
-
112
-
113
-
114
-
115
-
116
-
117
-
118
-
119
-
120
-
121
-
122
-
123
-
124
-
125
-
 126
126 -
 127
127 -
 128
128 -
 129
129 -
 130
130 -
 131
131 -
 132
132 -
 133
133 -
 134
134 -
 135
135 -
 136
136 -
137
-
138
-
139
-
140
-
141
-
142
-
143
-
144
-
145
-
146
-
147
-
148
-
149
-
150
-
151
-
152
-
153
-
154
 |
 |