Asus SCSI 320-0 Global Array Manager Transition Tool - Page 125
Check Consistency, Properties, Change Config
 |
View all Asus SCSI 320-0 manuals
Add to My Manuals
Save this manual to your list of manuals |
Page 125 highlights
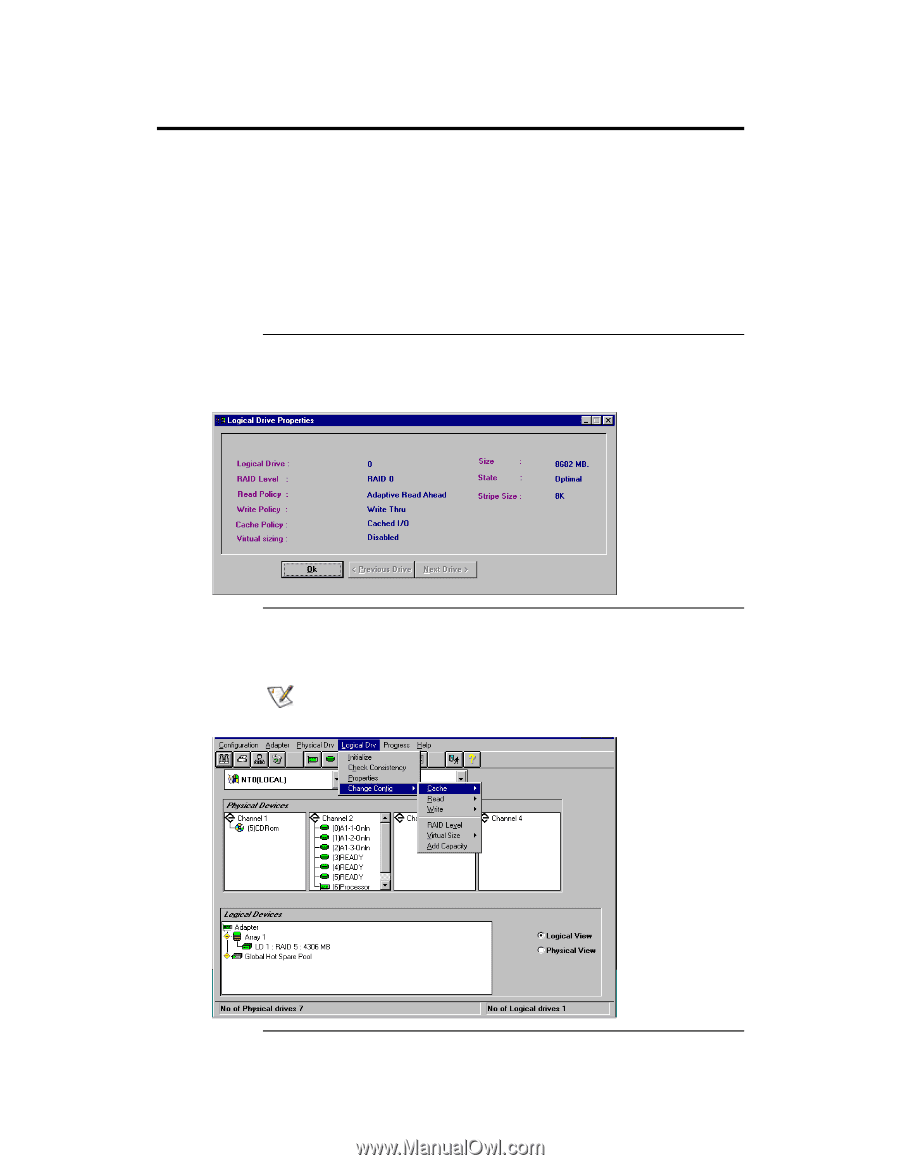
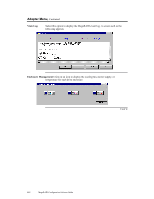
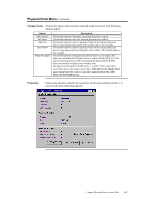
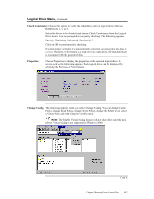
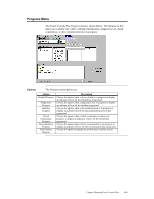
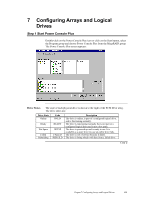
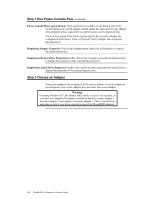
Logical Drive Menu, Continued Check Consistency Choose this option to verify the redundancy data in logical drives that use RAID levels 1, 3, or 5. Select the drives to be checked and choose Check Consistency from the Logical Drive menu. You are prompted to run parity checking. The following appears: Parity Checking Selected Device(s)? Click on OK to perform parity checking. If a discrepancy is found, it is automatically corrected, assuming that the data is correct. However, if the failure is a read error on a data drive, the bad data block is reassigned with the generated data. Properties Choose Properties to display the properties of the selected logical drive. A screen such as the following appears. Each logical drive can be displayed by selecting the Previous or Next buttons. Change Config The following appears when you select Change Config. You can change Cache Policy, change Read Policy, change Write Policy, change the RAID level, select a Virtual Size, and Add Capacity via this menu. Note: The Enable Virtual Sizing feature will not take effect until the next reboot. Virtual sizing is not supported in Windows 2000. Cont'd Chapter 6 Running Power Console Plus 117
-
 1
1 -
2
-
3
-
4
-
5
-
6
-
7
-
8
-
9
-
10
-
11
-
12
-
13
-
14
-
15
-
16
-
17
-
18
-
19
-
20
-
21
-
22
-
23
-
24
-
25
-
26
-
27
-
28
-
29
-
30
-
31
-
32
-
33
-
34
-
35
-
36
-
37
-
38
-
39
-
40
-
41
-
42
-
43
-
44
-
45
-
46
-
47
-
48
-
49
-
50
-
51
-
52
-
53
-
54
-
55
-
56
-
57
-
58
-
59
-
60
-
61
-
62
-
63
-
64
-
65
-
66
-
67
-
68
-
69
-
70
-
71
-
72
-
73
-
74
-
75
-
76
-
77
-
78
-
79
-
80
-
81
-
82
-
83
-
84
-
85
-
86
-
87
-
88
-
89
-
90
-
91
-
92
-
93
-
94
-
95
-
96
-
97
-
98
-
99
-
100
-
101
-
102
-
103
-
104
-
105
-
106
-
107
-
108
-
109
-
110
-
111
-
112
-
113
-
114
-
115
-
116
-
117
-
118
-
119
-
 120
120 -
 121
121 -
 122
122 -
 123
123 -
 124
124 -
 125
125 -
 126
126 -
 127
127 -
 128
128 -
 129
129 -
 130
130 -
131
-
132
-
133
-
134
-
135
-
136
-
137
-
138
-
139
-
140
-
141
-
142
-
143
-
144
-
145
-
146
-
147
-
148
-
149
-
150
-
151
-
152
-
153
-
154
 |
 |