Brother International PR-620 Users Manual - English - Page 178
Sewing a pattern aligned with, a mark on the fabric
 |
View all Brother International PR-620 manuals
Add to My Manuals
Save this manual to your list of manuals |
Page 178 highlights
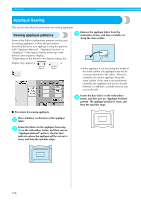
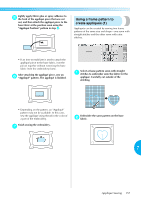
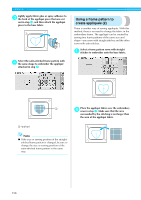
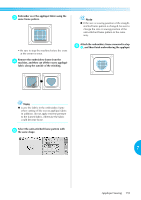
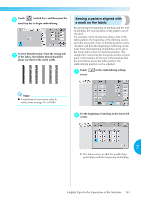
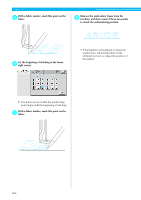
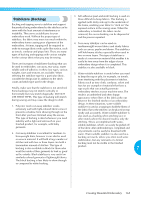
Touch (unlock key), and then press the 6 start/stop key to begin embroidering. Correct thread tension. From the wrong side 7 of the fabric, the bobbin thread should be about one third of the stitch width. Sewing a pattern aligned with a mark on the fabric By specifying the beginning of stitching and the end of stitching, the exact position of the pattern can be checked. For example, when sewing text along a line in the fabric pattern, the beginning of the stitching can be set in the lower-left corner so that the position can be checked, and then the beginning of stitching can be reset. Next, the beginning of stitching can be set in the lower-right corner to check the position. The straight line connecting the first point and the second point is the baseline for the text. If the baseline that the text follows leaves the fabric pattern, the embroidering position can be adjusted. Touch 1 screen. in the embroidering settings Note ● If adjustment is necessary, refer to instructions on page 45 or 85/86. Set the beginning of stitching in the lower-left 2 corner. 7 X The frame moves so that the needle drop point aligns with the beginning of stitching. Helpful Tips for the Operation of the Machine 161
-
 1
1 -
2
-
3
-
4
-
5
-
6
-
7
-
8
-
9
-
10
-
11
-
12
-
13
-
14
-
15
-
16
-
17
-
18
-
19
-
20
-
21
-
22
-
23
-
24
-
25
-
26
-
27
-
28
-
29
-
30
-
31
-
32
-
33
-
34
-
35
-
36
-
37
-
38
-
39
-
40
-
41
-
42
-
43
-
44
-
45
-
46
-
47
-
48
-
49
-
50
-
51
-
52
-
53
-
54
-
55
-
56
-
57
-
58
-
59
-
60
-
61
-
62
-
63
-
64
-
65
-
66
-
67
-
68
-
69
-
70
-
71
-
72
-
73
-
74
-
75
-
76
-
77
-
78
-
79
-
80
-
81
-
82
-
83
-
84
-
85
-
86
-
87
-
88
-
89
-
90
-
91
-
92
-
93
-
94
-
95
-
96
-
97
-
98
-
99
-
100
-
101
-
102
-
103
-
104
-
105
-
106
-
107
-
108
-
109
-
110
-
111
-
112
-
113
-
114
-
115
-
116
-
117
-
118
-
119
-
120
-
121
-
122
-
123
-
124
-
125
-
126
-
127
-
128
-
129
-
130
-
131
-
132
-
133
-
134
-
135
-
136
-
137
-
138
-
139
-
140
-
141
-
142
-
143
-
144
-
145
-
146
-
147
-
148
-
149
-
150
-
151
-
152
-
153
-
154
-
155
-
156
-
157
-
158
-
159
-
160
-
161
-
162
-
163
-
164
-
165
-
166
-
167
-
168
-
169
-
170
-
171
-
172
-
 173
173 -
 174
174 -
 175
175 -
 176
176 -
 177
177 -
 178
178 -
 179
179 -
 180
180 -
 181
181 -
 182
182 -
 183
183 -
184
-
185
-
186
-
187
-
188
-
189
-
190
-
191
-
192
-
193
-
194
-
195
-
196
-
197
-
198
-
199
-
200
-
201
-
202
-
203
-
204
-
205
-
206
-
207
-
208
-
209
-
210
-
211
-
212
-
213
-
214
-
215
-
216
-
217
-
218
-
219
-
220
-
221
-
222
-
223
-
224
-
225
-
226
-
227
-
228
-
229
-
230
-
231
-
232
-
233
-
234
-
235
-
236
-
237
 |
 |
