Brother International PR-620 Users Manual - English - Page 197
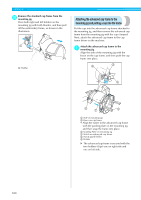
Attaching the advanced cap frame to the, mounting jig and putting a cap into the frame
 |
View all Brother International PR-620 manuals
Add to My Manuals
Save this manual to your list of manuals |
Page 197 highlights
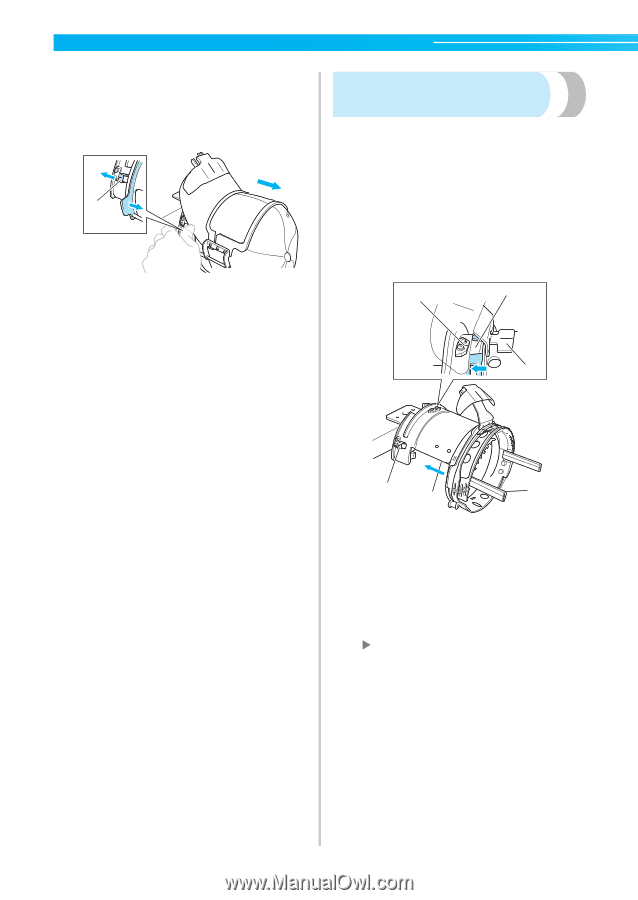
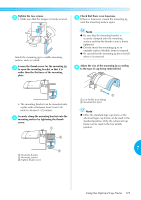
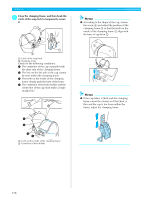
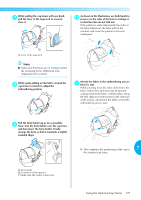
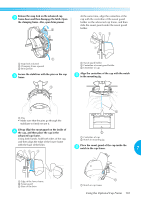
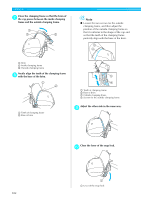
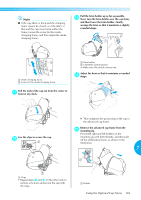
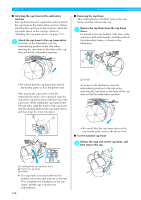
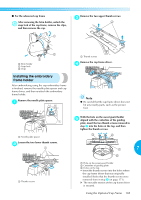
APPENDIX Remove the standard cap frame from the b mounting jig. Press both right and left holders on the mounting jig with both thumbs, and then pull off the embroidery frame, as shown in the illustration. 1 1 Holder Attaching the advanced cap frame to the mounting jig and putting a cap into the frame Put the cap into the advanced cap frame attached to the mounting jig, and then remove the advanced cap frame from the mounting jig with the cap clamped. Next, attach the advanced cap frame to the cap frame driver on the machine. Attach the advanced cap frame to the 1 mounting jig. Align the side of the mounting jig with the brace on the cap frame, and then push the cap frame into place. 3 4 5 6 1 2 1 Side of mounting jig 2 Brace on cap frame • Align the notch in the advanced cap frame with the guiding plate on the mounting jig, and then snap the frame into place. 3 Guiding Plate on mounting jig 4 Notch on advanced cap frame 5 Sweat guard holder 6 Holder X The advanced cap frame is secured with the two holders (clips) one on right side and one on left side. 180
-
 1
1 -
2
-
3
-
4
-
5
-
6
-
7
-
8
-
9
-
10
-
11
-
12
-
13
-
14
-
15
-
16
-
17
-
18
-
19
-
20
-
21
-
22
-
23
-
24
-
25
-
26
-
27
-
28
-
29
-
30
-
31
-
32
-
33
-
34
-
35
-
36
-
37
-
38
-
39
-
40
-
41
-
42
-
43
-
44
-
45
-
46
-
47
-
48
-
49
-
50
-
51
-
52
-
53
-
54
-
55
-
56
-
57
-
58
-
59
-
60
-
61
-
62
-
63
-
64
-
65
-
66
-
67
-
68
-
69
-
70
-
71
-
72
-
73
-
74
-
75
-
76
-
77
-
78
-
79
-
80
-
81
-
82
-
83
-
84
-
85
-
86
-
87
-
88
-
89
-
90
-
91
-
92
-
93
-
94
-
95
-
96
-
97
-
98
-
99
-
100
-
101
-
102
-
103
-
104
-
105
-
106
-
107
-
108
-
109
-
110
-
111
-
112
-
113
-
114
-
115
-
116
-
117
-
118
-
119
-
120
-
121
-
122
-
123
-
124
-
125
-
126
-
127
-
128
-
129
-
130
-
131
-
132
-
133
-
134
-
135
-
136
-
137
-
138
-
139
-
140
-
141
-
142
-
143
-
144
-
145
-
146
-
147
-
148
-
149
-
150
-
151
-
152
-
153
-
154
-
155
-
156
-
157
-
158
-
159
-
160
-
161
-
162
-
163
-
164
-
165
-
166
-
167
-
168
-
169
-
170
-
171
-
172
-
173
-
174
-
175
-
176
-
177
-
178
-
179
-
180
-
181
-
182
-
183
-
184
-
185
-
186
-
187
-
188
-
189
-
190
-
191
-
 192
192 -
 193
193 -
 194
194 -
 195
195 -
 196
196 -
 197
197 -
 198
198 -
 199
199 -
 200
200 -
 201
201 -
 202
202 -
203
-
204
-
205
-
206
-
207
-
208
-
209
-
210
-
211
-
212
-
213
-
214
-
215
-
216
-
217
-
218
-
219
-
220
-
221
-
222
-
223
-
224
-
225
-
226
-
227
-
228
-
229
-
230
-
231
-
232
-
233
-
234
-
235
-
236
-
237
 |
 |