Brother International PR-620 Users Manual - English - Page 89
Changing the Embroidering Position
 |
View all Brother International PR-620 manuals
Add to My Manuals
Save this manual to your list of manuals |
Page 89 highlights
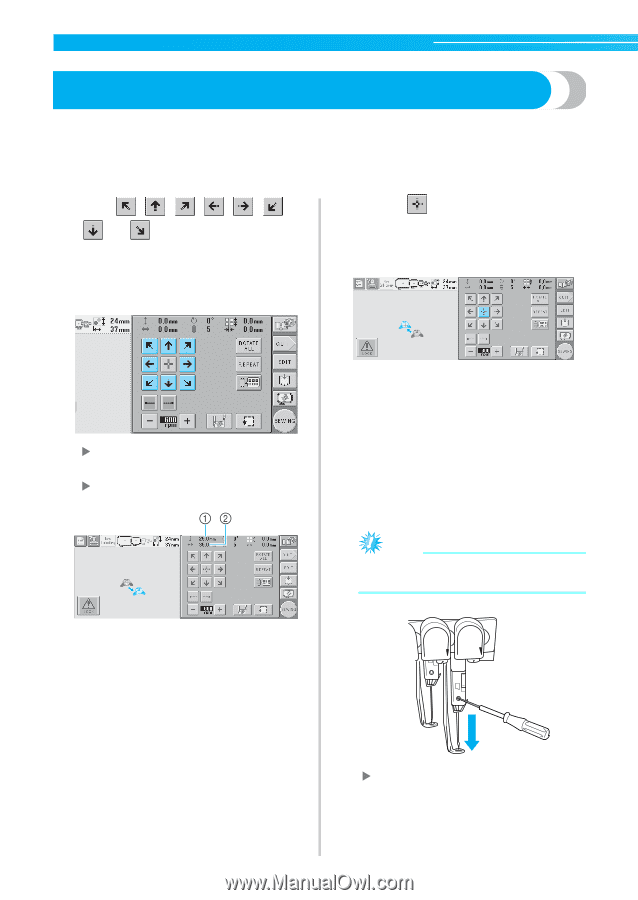
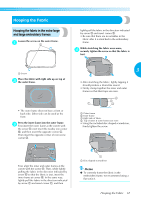
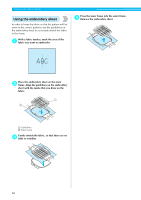
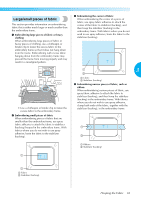
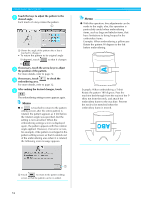
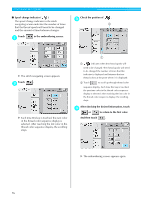
OTHER BASIC PROCEDURES Changing the Embroidering Position When the embroidery machine is purchased, it was adjusted so that the beginning of the stitching was from the center of the pattern. Therefore, move the frame and adjust the embroidering position so that the center of the pattern aligns with the needle drop point at the sewing position. In addition, the angle of the entire pattern can be adjusted if the fabric cannot be hooped evenly within the embroidery frame and the pattern is positioned at an angle on the fabric. Touch , , , , , , 1 and in the embroidering settings screen. Move the embroidery frame so that the needle drop point is at the center of the area where you wish to embroider. • Touch to move the embroidery frame back to its original position (where the center of the embroidery frame is aligned with the needle drop point at the sewing position). X The embroidery frame moves in the opposite direction of the arrow. X The pattern in the pattern display area moves in the same direction of the arrow. ■ Finding the sewing position By locking the needle bar (securing the needle and presser foot in the down position), the needle drop point can easily be seen. As shown in the illustration, insert the allen 1 screwdriver into the square hole in the needle clamp to slowly lower the needle bar down till needle bar stops then clicks into the lock position. Note ● Make sure that the needle is not lowered beyond the positioning click into the fabric. 1 Shows the vertical distance moved 2 Shows the horizontal distance moved X The needle and presser foot are locked in the down position. 72
-
 1
1 -
2
-
3
-
4
-
5
-
6
-
7
-
8
-
9
-
10
-
11
-
12
-
13
-
14
-
15
-
16
-
17
-
18
-
19
-
20
-
21
-
22
-
23
-
24
-
25
-
26
-
27
-
28
-
29
-
30
-
31
-
32
-
33
-
34
-
35
-
36
-
37
-
38
-
39
-
40
-
41
-
42
-
43
-
44
-
45
-
46
-
47
-
48
-
49
-
50
-
51
-
52
-
53
-
54
-
55
-
56
-
57
-
58
-
59
-
60
-
61
-
62
-
63
-
64
-
65
-
66
-
67
-
68
-
69
-
70
-
71
-
72
-
73
-
74
-
75
-
76
-
77
-
78
-
79
-
80
-
81
-
82
-
83
-
 84
84 -
 85
85 -
 86
86 -
 87
87 -
 88
88 -
 89
89 -
 90
90 -
 91
91 -
 92
92 -
 93
93 -
 94
94 -
95
-
96
-
97
-
98
-
99
-
100
-
101
-
102
-
103
-
104
-
105
-
106
-
107
-
108
-
109
-
110
-
111
-
112
-
113
-
114
-
115
-
116
-
117
-
118
-
119
-
120
-
121
-
122
-
123
-
124
-
125
-
126
-
127
-
128
-
129
-
130
-
131
-
132
-
133
-
134
-
135
-
136
-
137
-
138
-
139
-
140
-
141
-
142
-
143
-
144
-
145
-
146
-
147
-
148
-
149
-
150
-
151
-
152
-
153
-
154
-
155
-
156
-
157
-
158
-
159
-
160
-
161
-
162
-
163
-
164
-
165
-
166
-
167
-
168
-
169
-
170
-
171
-
172
-
173
-
174
-
175
-
176
-
177
-
178
-
179
-
180
-
181
-
182
-
183
-
184
-
185
-
186
-
187
-
188
-
189
-
190
-
191
-
192
-
193
-
194
-
195
-
196
-
197
-
198
-
199
-
200
-
201
-
202
-
203
-
204
-
205
-
206
-
207
-
208
-
209
-
210
-
211
-
212
-
213
-
214
-
215
-
216
-
217
-
218
-
219
-
220
-
221
-
222
-
223
-
224
-
225
-
226
-
227
-
228
-
229
-
230
-
231
-
232
-
233
-
234
-
235
-
236
-
237
 |
 |