HP Officejet 5500 HP Officejet 5500 series All-in-One - (English) Reference Gu - Page 119
send a photo or image using your hp officejet (Macintosh), use a scanned image
 |
View all HP Officejet 5500 manuals
Add to My Manuals
Save this manual to your list of manuals |
Page 119 highlights
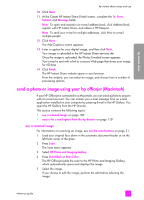
hp instant share hp instant share setup and use 10 Click Next. 11 At the Create HP Instant Share E-Mail screen, complete the To, From, Subject, and Message fields. Note: To open and maintain an e-mail address book, click Address Book, register with HP Instant Share, and obtain a HP Passport. Note: To send your e-mail to multiple addresses, click How to e-mail multiple people. 12 Click Next. The Add Captions screen appears. 13 Enter a caption for your digital image, and then click Next. Your image is uploaded to the HP Instant Share services site. Once the image is uploaded, the Photos E-mailed screen appears. Your e-mail is sent with a link to a secure Web page that stores your image for 60 days. 14 Click Finish. The HP Instant Share website opens in your browser. From the website, you can select an image, and choose from a number of processing options. send a photo or image using your hp officejet (Macintosh) If your HP Officejet is connected to a Macintosh, you can send a photo to anyone with an e-mail account. You can initiate your e-mail message from an e-mail application installed on your computer by pressing E-mail in the HP Gallery. You open the HP Gallery from the HP Director. This section contains the following topics: • use a scanned image on page 109 • access the e-mail option from the hp director on page 110 use a scanned image For information on scanning an image, see use the scan features on page 31. 1 Load your original face down in the automatic document feeder or on the left front corner of the glass. 2 Press Scan. The Scan menu appears. 3 Select HP Photo and Imaging Gallery. 4 Press Start Black or Start Color. The HP Officejet sends the scan to the HP Photo and Imaging Gallery, which automatically opens and displays the image. 5 Select the image. If you choose to edit the image, perform the edit before selecting the image. reference guide 109
-
 1
1 -
2
-
3
-
4
-
5
-
6
-
7
-
8
-
9
-
10
-
11
-
12
-
13
-
14
-
15
-
16
-
17
-
18
-
19
-
20
-
21
-
22
-
23
-
24
-
25
-
26
-
27
-
28
-
29
-
30
-
31
-
32
-
33
-
34
-
35
-
36
-
37
-
38
-
39
-
40
-
41
-
42
-
43
-
44
-
45
-
46
-
47
-
48
-
49
-
50
-
51
-
52
-
53
-
54
-
55
-
56
-
57
-
58
-
59
-
60
-
61
-
62
-
63
-
64
-
65
-
66
-
67
-
68
-
69
-
70
-
71
-
72
-
73
-
74
-
75
-
76
-
77
-
78
-
79
-
80
-
81
-
82
-
83
-
84
-
85
-
86
-
87
-
88
-
89
-
90
-
91
-
92
-
93
-
94
-
95
-
96
-
97
-
98
-
99
-
100
-
101
-
102
-
103
-
104
-
105
-
106
-
107
-
108
-
109
-
110
-
111
-
112
-
113
-
 114
114 -
 115
115 -
 116
116 -
 117
117 -
 118
118 -
 119
119 -
 120
120 -
 121
121 -
 122
122 -
 123
123 -
 124
124 -
125
-
126
-
127
-
128
-
129
-
130
-
131
-
132
-
133
-
134
-
135
-
136
-
137
-
138
-
139
-
140
 |
 |