HP Officejet 5500 HP Officejet 5500 series All-in-One - (English) Reference Gu - Page 22
load an original photo on the glass, load paper - reviews
 |
View all HP Officejet 5500 manuals
Add to My Manuals
Save this manual to your list of manuals |
Page 22 highlights
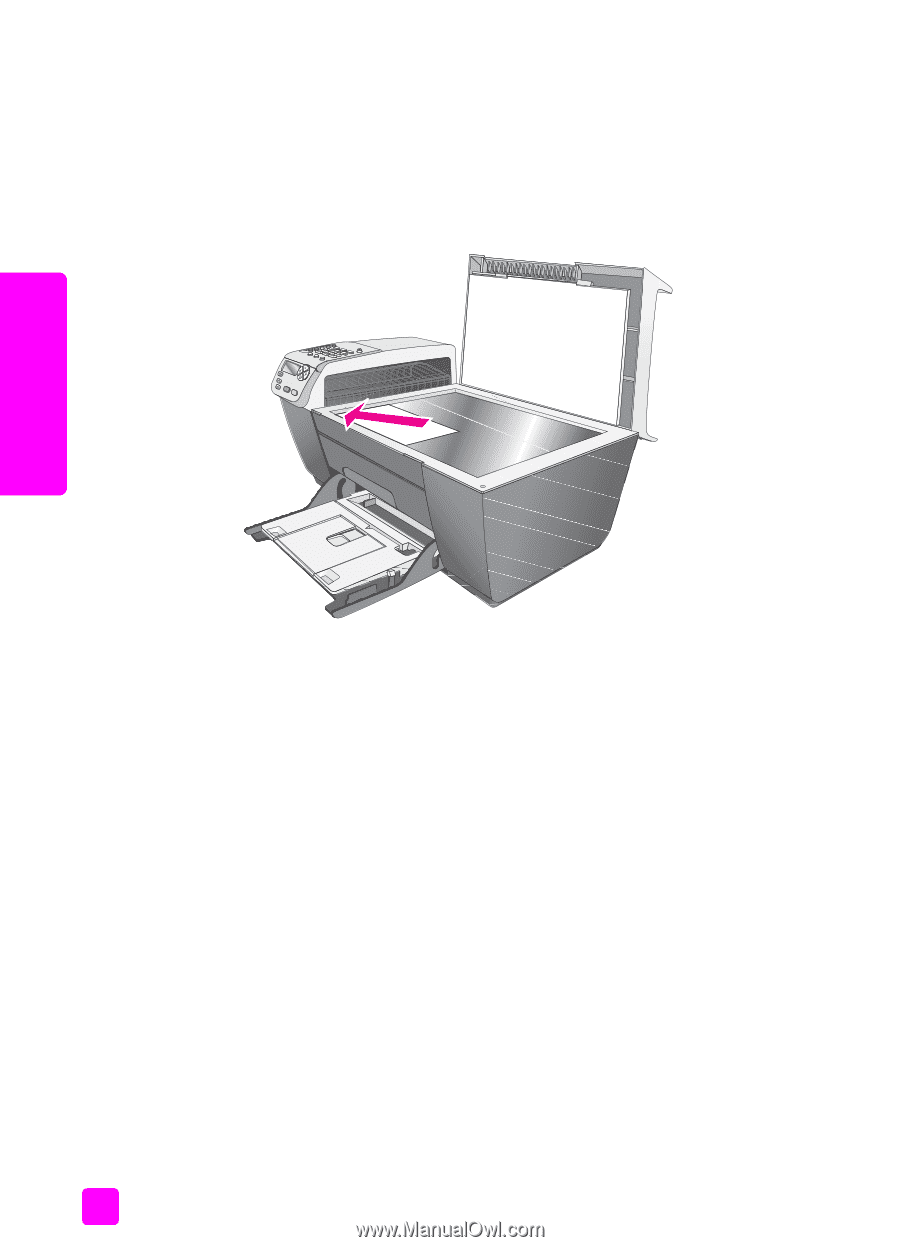
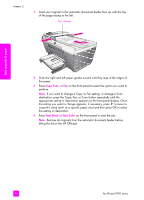
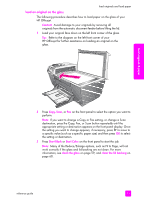
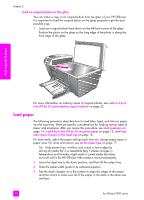
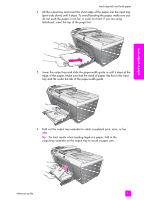
chapter 2 load an original photo on the glass You can make a copy of an original photo from the glass of your HP Officejet. It is important to load the original photo on the glass properly to get the best possible copy. 1 Load your original photo face down on the left front corner of the glass. Position the photo on the glass so the long edge of the photo is along the front edge of the glass. load originals & paper For more information on making copies of original photos, see make a 4 by 6 inch (10 by 15 cm) borderless copy of a photo on page 22. load paper The following procedure describes how to load letter, legal, and A4 size paper into the input tray. There are specific considerations for loading certain types of paper and envelopes. After you review this procedure, see load envelopes on page 14, load 4 by 6 inch (10 by 15 cm) photo paper on page 15, and load other types of paper in the input tray on page 16. For best results, adjust the paper settings each time you change paper types or paper sizes. For more information, see set the paper type on page 17. Tip: Help prevent rips, wrinkles, and curled or bent edges by storing all media flat in a resealable bag. Extreme changes in temperature and humidity might result in curled media that does not work well in the HP Officejet if the media is not stored properly. 1 Lower the input tray to the down position, and then lift the output tray. 2 Slide the paper-width guide to its outermost position. 3 Tap the stack of paper on a flat surface to align the edges of the paper, and then check to make sure all of the paper in the stack is the same size and type. 12 hp officejet 5500 series
-
 1
1 -
2
-
3
-
4
-
5
-
6
-
7
-
8
-
9
-
10
-
11
-
12
-
13
-
14
-
15
-
16
-
 17
17 -
 18
18 -
 19
19 -
 20
20 -
 21
21 -
 22
22 -
 23
23 -
 24
24 -
 25
25 -
 26
26 -
 27
27 -
28
-
29
-
30
-
31
-
32
-
33
-
34
-
35
-
36
-
37
-
38
-
39
-
40
-
41
-
42
-
43
-
44
-
45
-
46
-
47
-
48
-
49
-
50
-
51
-
52
-
53
-
54
-
55
-
56
-
57
-
58
-
59
-
60
-
61
-
62
-
63
-
64
-
65
-
66
-
67
-
68
-
69
-
70
-
71
-
72
-
73
-
74
-
75
-
76
-
77
-
78
-
79
-
80
-
81
-
82
-
83
-
84
-
85
-
86
-
87
-
88
-
89
-
90
-
91
-
92
-
93
-
94
-
95
-
96
-
97
-
98
-
99
-
100
-
101
-
102
-
103
-
104
-
105
-
106
-
107
-
108
-
109
-
110
-
111
-
112
-
113
-
114
-
115
-
116
-
117
-
118
-
119
-
120
-
121
-
122
-
123
-
124
-
125
-
126
-
127
-
128
-
129
-
130
-
131
-
132
-
133
-
134
-
135
-
136
-
137
-
138
-
139
-
140
 |
 |