HP Officejet 5500 HP Officejet 5500 series All-in-One - (English) Reference Gu - Page 25
load 4 by 6 inch (10 by 15 cm) photo paper
 |
View all HP Officejet 5500 manuals
Add to My Manuals
Save this manual to your list of manuals |
Page 25 highlights
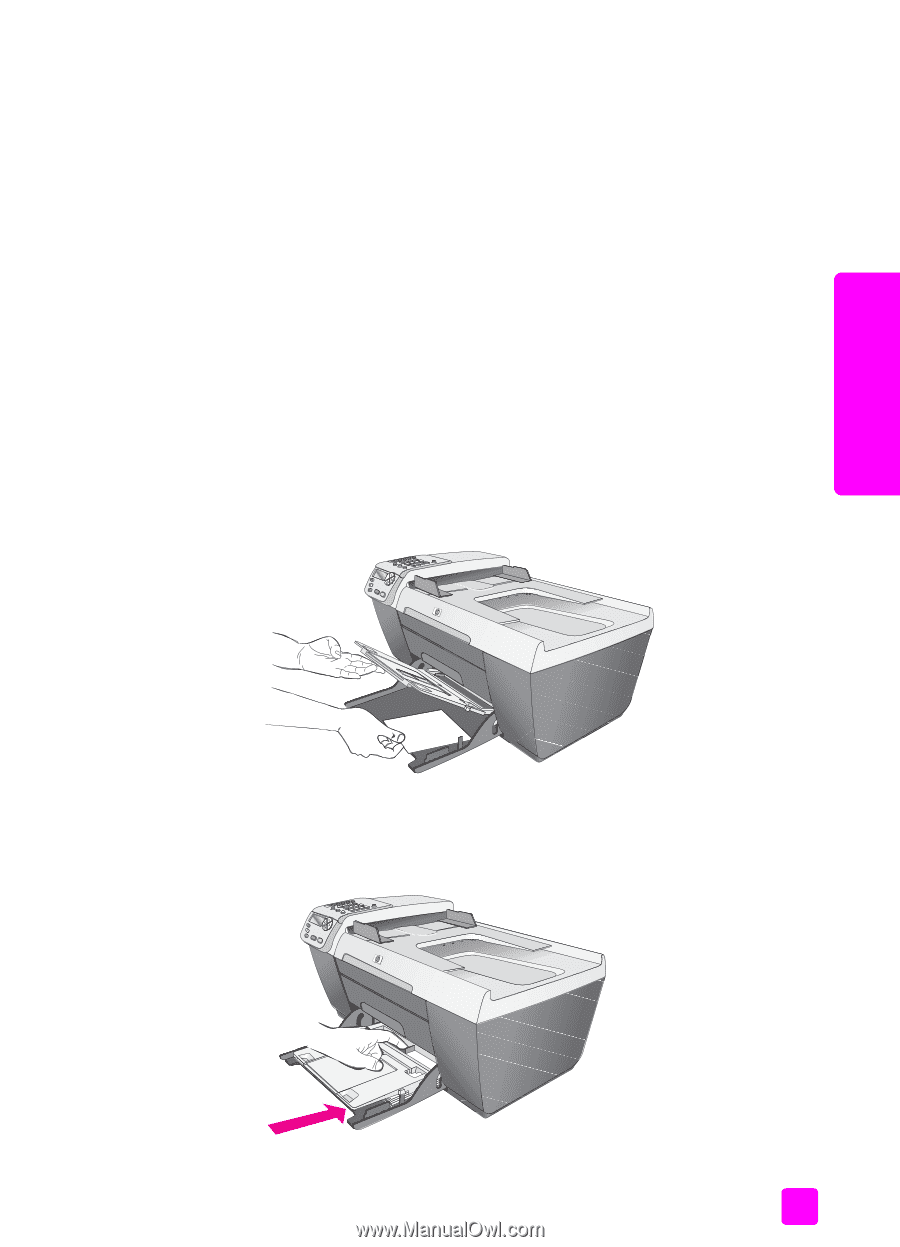
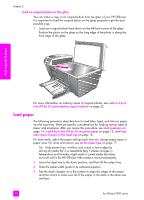
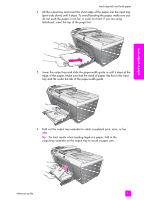
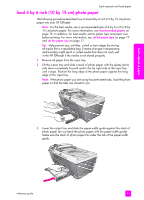
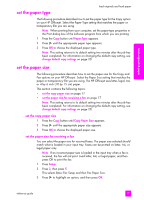
load originals & paper load originals and load paper load 4 by 6 inch (10 by 15 cm) photo paper The following procedure describes how to load 4 by 6 inch (10 by 15 cm) photo paper into your HP Officejet. Note: For the best results, use a recommended type of 4 by 6 inch (10 by 15 cm) photo paper. For more information, see recommended papers on page 16. In addition, for best results, set the paper type and paper size before printing. For more information, see set the paper type on page 17 and set the paper size on page 17. Tip: Help prevent rips, wrinkles, curled or bent edges by storing all media flat in a resealable bag. Extreme changes in temperature and humidity might result in curled media that does not work well in the HP Officejet if the media is not stored properly. 1 Remove all paper from the input tray. 2 Lift the output tray and slide a stack of photo paper with the glossy (print) side down completely forward and to the far right side of the input tray until it stops. Position the long edge of the photo paper against the long edge of the input tray. Note: If the photo paper you are using has perforated tabs, load the photo paper so that the tabs are closest to you. 3 Lower the output tray and slide the paper-width guide against the stack of photo paper (do not bend the photo paper with the paper-width guide). Make sure the stack of photo paper fits under the tab of the paper-width guide. reference guide 15
-
 1
1 -
2
-
3
-
4
-
5
-
6
-
7
-
8
-
9
-
10
-
11
-
12
-
13
-
14
-
15
-
16
-
17
-
18
-
19
-
 20
20 -
 21
21 -
 22
22 -
 23
23 -
 24
24 -
 25
25 -
 26
26 -
 27
27 -
 28
28 -
 29
29 -
 30
30 -
31
-
32
-
33
-
34
-
35
-
36
-
37
-
38
-
39
-
40
-
41
-
42
-
43
-
44
-
45
-
46
-
47
-
48
-
49
-
50
-
51
-
52
-
53
-
54
-
55
-
56
-
57
-
58
-
59
-
60
-
61
-
62
-
63
-
64
-
65
-
66
-
67
-
68
-
69
-
70
-
71
-
72
-
73
-
74
-
75
-
76
-
77
-
78
-
79
-
80
-
81
-
82
-
83
-
84
-
85
-
86
-
87
-
88
-
89
-
90
-
91
-
92
-
93
-
94
-
95
-
96
-
97
-
98
-
99
-
100
-
101
-
102
-
103
-
104
-
105
-
106
-
107
-
108
-
109
-
110
-
111
-
112
-
113
-
114
-
115
-
116
-
117
-
118
-
119
-
120
-
121
-
122
-
123
-
124
-
125
-
126
-
127
-
128
-
129
-
130
-
131
-
132
-
133
-
134
-
135
-
136
-
137
-
138
-
139
-
140
 |
 |