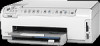
HP Photosmart C6200 User Manual - Page 123
To establish an active network connection, Cause, Solution, Related topics
 |
View all HP Photosmart C6200 manuals
Add to My Manuals
Save this manual to your list of manuals |
Page 123 highlights
Chapter 14 To establish an active network connection 1. Check the cable connections from the HP All-in-One to your gateway, router, or hub to ensure connections are secure. 2. If the connections are secure, press the On button on the control panel to turn the HP All-in-One off. Then turn off the power on your router or hub. Turn on the router or hub first, and then press the On button to turn the HP All-in-One on. Cause: You were able to connect the HP All-in-One to the network previously, but now it will not connect. Solution: Turn off the HP All-in-One, the computer, and the router. Wait a few seconds. Turn on the router first, and then turn on the HP All-in-One and the computer. Cause: The HP All-in-One and computer are not connected to the same network. Solution: Try accessing the Embedded Web Server on the HP All-in-One. To find the IP address, print a network configuration page. Related topics • "View and print network settings" on page 23 • "Use the Embedded Web Server" on page 25 The Printer not Found screen appears during installation Cause: The HP All-in-One is not turned on. Solution: Turn on the HP All-in-One. Cause: You do not have an active network connection. Solution: Make sure you have an active network connection. To make sure your network connection is active 1. If the connections are secure, turn off the power on the HP All-in-One, and then turn it on again. Press the On button on the control panel to turn the HP All-inOne off, and press it again to turn the device on. Also, turn off the power on your router or hub, and then turn it on again. 2. Check the cable connections from the HP All-in-One to your gateway, router, or hub to ensure connections are secure. 3. Make sure the HP All-in-One is connected to the network with a CAT-5 Ethernet cable. Cause: Cables are not connected properly. Troubleshooting 122 Troubleshooting
-
 1
1 -
2
-
3
-
4
-
5
-
6
-
7
-
8
-
9
-
10
-
11
-
12
-
13
-
14
-
15
-
16
-
17
-
18
-
19
-
20
-
21
-
22
-
23
-
24
-
25
-
26
-
27
-
28
-
29
-
30
-
31
-
32
-
33
-
34
-
35
-
36
-
37
-
38
-
39
-
40
-
41
-
42
-
43
-
44
-
45
-
46
-
47
-
48
-
49
-
50
-
51
-
52
-
53
-
54
-
55
-
56
-
57
-
58
-
59
-
60
-
61
-
62
-
63
-
64
-
65
-
66
-
67
-
68
-
69
-
70
-
71
-
72
-
73
-
74
-
75
-
76
-
77
-
78
-
79
-
80
-
81
-
82
-
83
-
84
-
85
-
86
-
87
-
88
-
89
-
90
-
91
-
92
-
93
-
94
-
95
-
96
-
97
-
98
-
99
-
100
-
101
-
102
-
103
-
104
-
105
-
106
-
107
-
108
-
109
-
110
-
111
-
112
-
113
-
114
-
115
-
116
-
117
-
 118
118 -
 119
119 -
 120
120 -
 121
121 -
 122
122 -
 123
123 -
 124
124 -
 125
125 -
 126
126 -
 127
127 -
 128
128 -
129
-
130
-
131
-
132
-
133
-
134
-
135
-
136
-
137
-
138
-
139
-
140
-
141
-
142
-
143
-
144
-
145
-
146
-
147
-
148
-
149
-
150
-
151
-
152
-
153
-
154
-
155
-
156
-
157
-
158
-
159
-
160
-
161
-
162
-
163
-
164
-
165
-
166
-
167
-
168
-
169
-
170
-
171
-
172
-
173
-
174
-
175
-
176
-
177
-
178
-
179
-
180
-
181
-
182
-
183
-
184
-
185
-
186
-
187
-
188
-
189
 |
 |
