HP Photosmart C6200 User Manual - Page 50
Change the orientation, Scale the document size, Change the saturation, brightness, or color tone
 |
View all HP Photosmart C6200 manuals
Add to My Manuals
Save this manual to your list of manuals |
Page 50 highlights
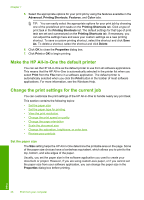
6. In the Print Quality drop-down list, select the appropriate quality setting for your project. NOTE: To view the maximum dpi that the HP All-in-One will print, click Resolution. 7. In the Paper Type drop-down list, select the type of paper that you have loaded. Change the page orientation The page orientation setting allows you to print your document vertically or horizontally on the page. Usually, you set the page orientation in the software application you used to create your document or project. However, if you are using custom-size or special HP paper, or if you cannot set the page orientation from your software application, you can change the page orientation in the Properties dialog box before printing. To change the page orientation 1. Make sure you have paper loaded in the input tray. 2. On the File menu in your software application, click Print. 3. Make sure the HP All-in-One is the selected printer. 4. Click the button that opens the Properties dialog box. Depending on your software application, this button might be called Properties, Options, Printer Setup, Printer, or Preferences. 5. Click the Features tab. 6. In the Basic Options area, click one of the following: • Click Portrait to print the document vertically on the page. • Click Landscape to print the document horizontally on the page. Scale the document size The HP All-in-One allows you to print the document at a different size than the original. To scale the document size 1. Make sure you have paper loaded in the input tray. 2. On the File menu in your software application, click Print. 3. Make sure the HP All-in-One is the selected printer. 4. Click the button that opens the Properties dialog box. Depending on your software application, this button might be called Properties, Options, Printer Setup, Printer, or Preferences. 5. Click the Features tab. 6. In the Resizing options area, click Scale to paper size, and then click the appropriate paper size from the drop-down list. Change the saturation, brightness, or color tone You can change the intensity of colors and the level of darkness in your printout by adjusting the Saturation, Brightness, or Color Tone options. Print Change the print settings for the current job 49
-
 1
1 -
2
-
3
-
4
-
5
-
6
-
7
-
8
-
9
-
10
-
11
-
12
-
13
-
14
-
15
-
16
-
17
-
18
-
19
-
20
-
21
-
22
-
23
-
24
-
25
-
26
-
27
-
28
-
29
-
30
-
31
-
32
-
33
-
34
-
35
-
36
-
37
-
38
-
39
-
40
-
41
-
42
-
43
-
44
-
 45
45 -
 46
46 -
 47
47 -
 48
48 -
 49
49 -
 50
50 -
 51
51 -
 52
52 -
 53
53 -
 54
54 -
 55
55 -
56
-
57
-
58
-
59
-
60
-
61
-
62
-
63
-
64
-
65
-
66
-
67
-
68
-
69
-
70
-
71
-
72
-
73
-
74
-
75
-
76
-
77
-
78
-
79
-
80
-
81
-
82
-
83
-
84
-
85
-
86
-
87
-
88
-
89
-
90
-
91
-
92
-
93
-
94
-
95
-
96
-
97
-
98
-
99
-
100
-
101
-
102
-
103
-
104
-
105
-
106
-
107
-
108
-
109
-
110
-
111
-
112
-
113
-
114
-
115
-
116
-
117
-
118
-
119
-
120
-
121
-
122
-
123
-
124
-
125
-
126
-
127
-
128
-
129
-
130
-
131
-
132
-
133
-
134
-
135
-
136
-
137
-
138
-
139
-
140
-
141
-
142
-
143
-
144
-
145
-
146
-
147
-
148
-
149
-
150
-
151
-
152
-
153
-
154
-
155
-
156
-
157
-
158
-
159
-
160
-
161
-
162
-
163
-
164
-
165
-
166
-
167
-
168
-
169
-
170
-
171
-
172
-
173
-
174
-
175
-
176
-
177
-
178
-
179
-
180
-
181
-
182
-
183
-
184
-
185
-
186
-
187
-
188
-
189
 |
 |
