HP Photosmart C6200 User Manual - Page 8
Control panel features, Label, Name and Description - help
 |
View all HP Photosmart C6200 manuals
Add to My Manuals
Save this manual to your list of manuals |
Page 8 highlights
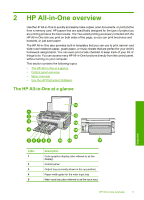
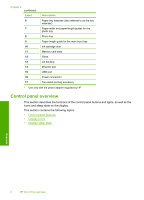
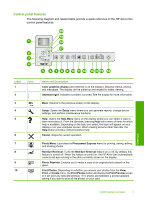
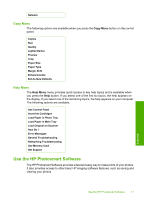
Control panel features The following diagram and related table provide a quick reference to the HP All-in-One control panel features. Ethernet Label 1 2 3 4 5 Icon 6 7 8 9 10 Name and Description Color graphics display (also referred to as the display): Displays menus, photos, and messages. The display can be pulled up and angled for better viewing. Attention light: Indicates a problem occurred. See the display for more information. Back: Returns to the previous screen on the display. Setup: Opens the Setup menu where you can generate reports, change device settings, and perform maintenance functions. Help: Opens the Help Menu menu on the display where you can select a topic to learn more about it. From the idle state, pressing Help lists a menu of items for which help is available. Depending on the topic you select, the topic will appear on your display or on your computer screen. When viewing screens other than Idle, the Help button provides context sensitive help. Cancel: Stops the current operation. Photo Menu: Launches the Photosmart Express menu for printing, saving, editing, and sharing photos. Red Eye Removal: Turns the Red Eye Removal feature on or off. By default, this feature is turned off. When the feature is turned on, the HP All-in-One automatically corrects red eye coloring in the photo currently shown on the display. Photo Reprints: Enables you to make a copy of an original photo placed on the glass. Print Photos: Depending on whether you access your photos from the View, Print, or Create menu, the Print Photos button will display the Print Preview screen or it will print any selected photo(s). If no photos are selected, a prompt appears asking if you want to print all the photos on your card. Control panel overview 7 Overview
-
 1
1 -
2
-
 3
3 -
 4
4 -
 5
5 -
 6
6 -
 7
7 -
 8
8 -
 9
9 -
 10
10 -
 11
11 -
 12
12 -
 13
13 -
14
-
15
-
16
-
17
-
18
-
19
-
20
-
21
-
22
-
23
-
24
-
25
-
26
-
27
-
28
-
29
-
30
-
31
-
32
-
33
-
34
-
35
-
36
-
37
-
38
-
39
-
40
-
41
-
42
-
43
-
44
-
45
-
46
-
47
-
48
-
49
-
50
-
51
-
52
-
53
-
54
-
55
-
56
-
57
-
58
-
59
-
60
-
61
-
62
-
63
-
64
-
65
-
66
-
67
-
68
-
69
-
70
-
71
-
72
-
73
-
74
-
75
-
76
-
77
-
78
-
79
-
80
-
81
-
82
-
83
-
84
-
85
-
86
-
87
-
88
-
89
-
90
-
91
-
92
-
93
-
94
-
95
-
96
-
97
-
98
-
99
-
100
-
101
-
102
-
103
-
104
-
105
-
106
-
107
-
108
-
109
-
110
-
111
-
112
-
113
-
114
-
115
-
116
-
117
-
118
-
119
-
120
-
121
-
122
-
123
-
124
-
125
-
126
-
127
-
128
-
129
-
130
-
131
-
132
-
133
-
134
-
135
-
136
-
137
-
138
-
139
-
140
-
141
-
142
-
143
-
144
-
145
-
146
-
147
-
148
-
149
-
150
-
151
-
152
-
153
-
154
-
155
-
156
-
157
-
158
-
159
-
160
-
161
-
162
-
163
-
164
-
165
-
166
-
167
-
168
-
169
-
170
-
171
-
172
-
173
-
174
-
175
-
176
-
177
-
178
-
179
-
180
-
181
-
182
-
183
-
184
-
185
-
186
-
187
-
188
-
189
 |
 |
