HP Xw5000 hp workstation xw5000 Technical Reference (309233-001 10/02) - Page 48
Installing an Optical Drive, - workstation audio driver
 |
UPC - 613326803318
View all HP Xw5000 manuals
Add to My Manuals
Save this manual to your list of manuals |
Page 48 highlights
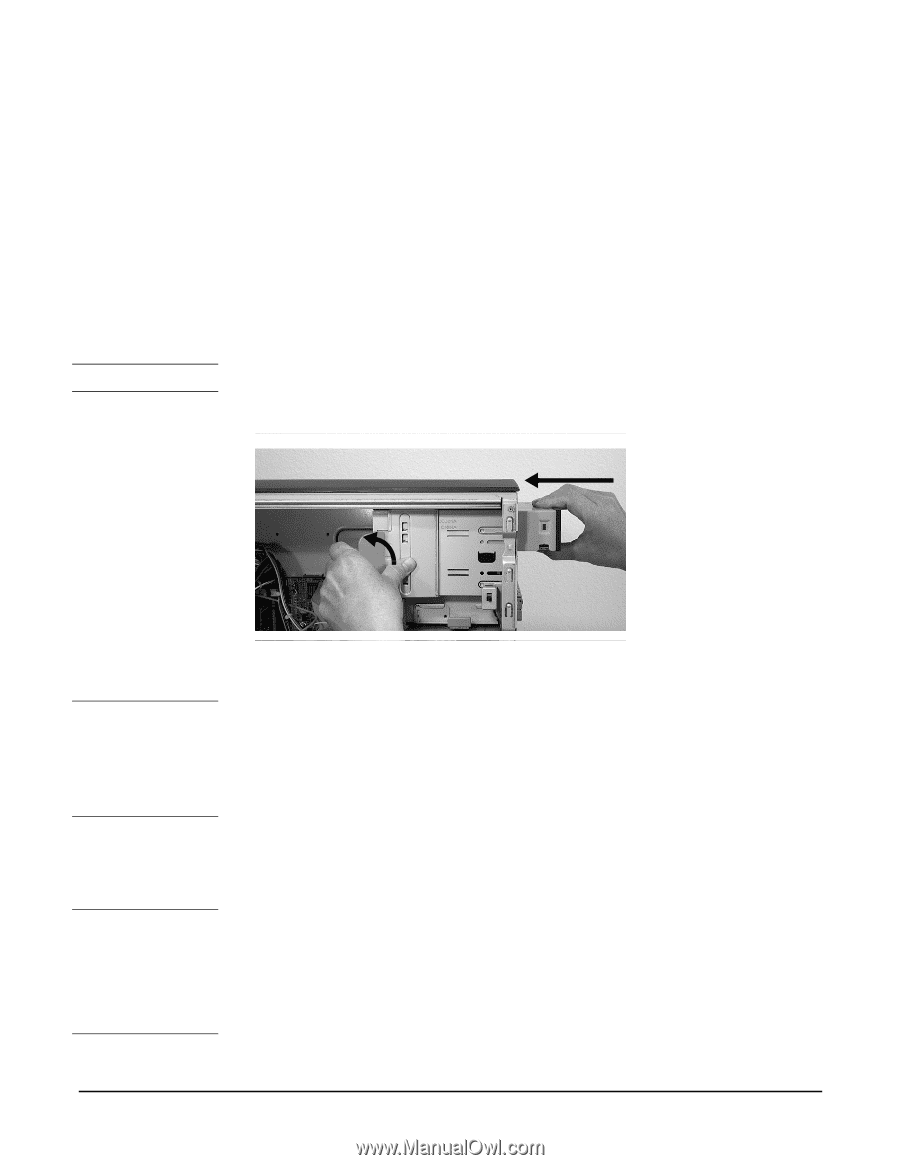
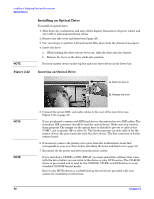
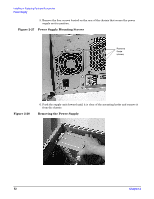
Figure 2-22 Installing an Optical Drive To install an optical drive: 1. Shut down the workstation and turn off the display. Disconnect all power cables and any LAN or telecommunications cables. 2. Remove the side cover and front bezel (page 29). 3. Use your finger to pull the 5.25-inch metal filler plate from the chassis if necessary. 4. Insert the drive: a. While holding the drive release lever out, slide the drive into the chassis. b. Release the lever so the drive clicks into position. Put your master device in the top bay and your slave device in the lower bay. Inserting an Optical Drive 5. Connect the power, IDE, and audio cables to the rear of the new drive (see Figure 2-20 on page 47). If you purchased a system with IDE hard drives, the system has two IDE cables. The secondary IDE connector should be used for optical drives. Make sure you connect them properly. The jumper on the optical drive is should be pre-set to cable select (CSEC), not to master (M) or slave (S). The black connector on each cable is for the master device; the gray connector is for the slave device. The blue connector is for the system board. 6. If necessary, remove the plastic cover piece from the workstation's bezel that corresponds to your new drive before attaching the bezel and front cover (page 31). 7. Reconnect all the power and telecommunications cables. If you installed a CD-RW or DVD+RW/+R, you must install the software that came with the drive before you can write to the device or play DVD movies. The CD-ROM driver is pre-loaded and is used by the CD-ROM, CD-RW, and DVD drives to read standard CD-ROM format media. Refer to the HP Workstation xw5000 Getting Started Guide provided with your system for installation instructions.
-
 1
1 -
2
-
3
-
4
-
5
-
6
-
7
-
8
-
9
-
10
-
11
-
12
-
13
-
14
-
15
-
16
-
17
-
18
-
19
-
20
-
21
-
22
-
23
-
24
-
25
-
26
-
27
-
28
-
29
-
30
-
31
-
32
-
33
-
34
-
35
-
36
-
37
-
38
-
39
-
40
-
41
-
42
-
 43
43 -
 44
44 -
 45
45 -
 46
46 -
 47
47 -
 48
48 -
 49
49 -
 50
50 -
 51
51 -
 52
52 -
 53
53 -
54
-
55
-
56
-
57
-
58
-
59
-
60
-
61
-
62
-
63
-
64
-
65
-
66
-
67
-
68
-
69
-
70
-
71
-
72
-
73
-
74
-
75
-
76
-
77
-
78
-
79
-
80
-
81
-
82
-
83
-
84
-
85
-
86
-
87
-
88
-
89
-
90
-
91
-
92
-
93
-
94
-
95
-
96
-
97
-
98
-
99
-
100
-
101
-
102
-
103
-
104
-
105
-
106
-
107
-
108
-
109
-
110
-
111
-
112
-
113
-
114
-
115
-
116
-
117
-
118
 |
 |