HP Xw5000 hp workstation xw5000 Technical Reference (309233-001 10/02) - Page 66
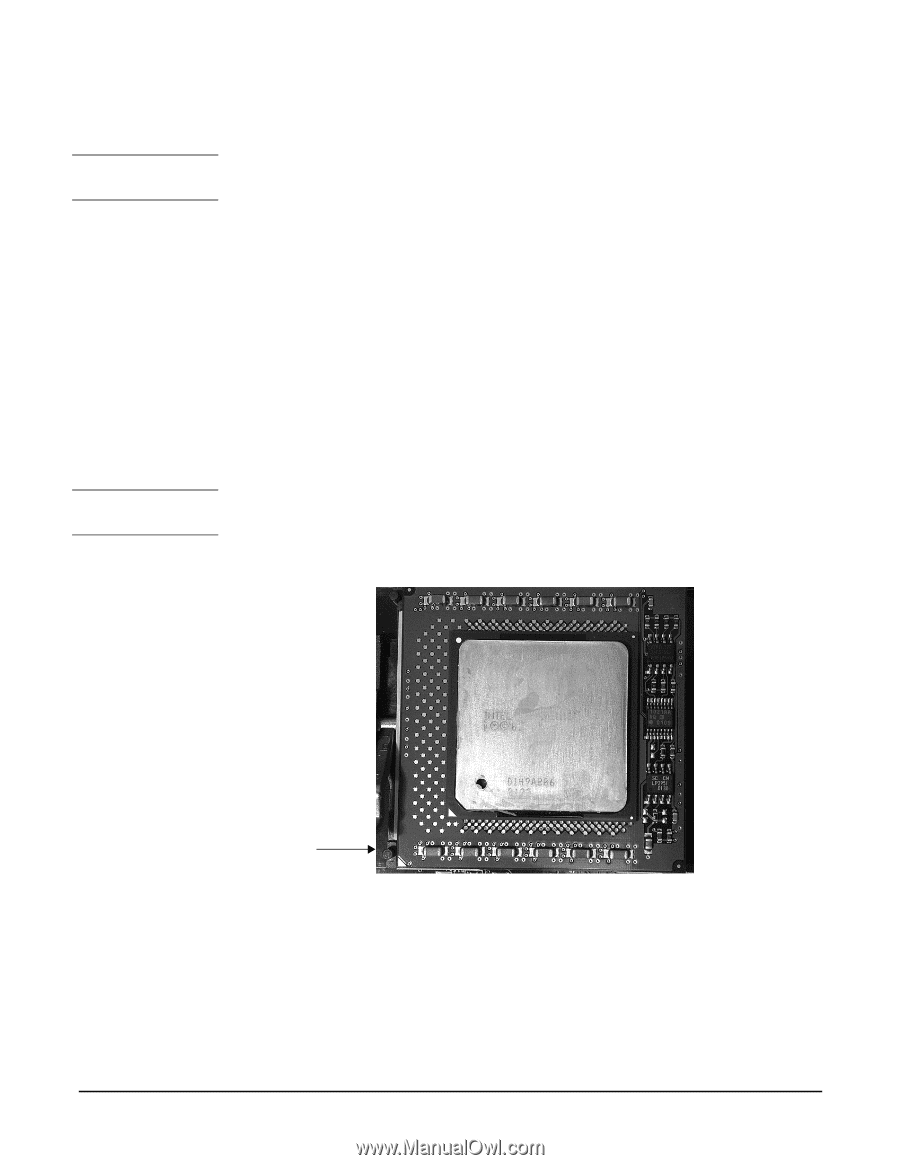
Installing a Processor, Aligning the Processor
 |
UPC - 613326803318
View all HP Xw5000 manuals
Add to My Manuals
Save this manual to your list of manuals |
Page 66 highlights
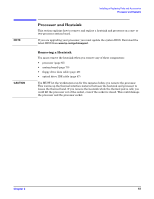
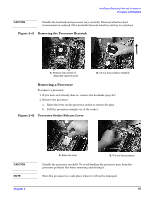
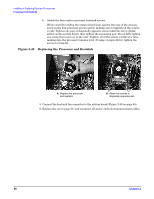
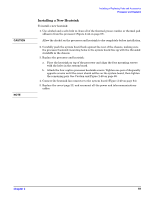
Figure 2-43 Installing a Processor The processor, heatsink, and thermal interface material are separate parts. If you are installing a new processor, make sure you have all of these parts before you begin. To install a processor: 1. Shut down the workstation and turn off the display. Disconnect all power cables and any LAN or telecommunications cables. 2. Remove the side cover (page 29). 3. Place the workstation on its side for better access. 4. Remove the old processor (page 65) and heatsink (page 63). 5. Raise the lever of the processor socket (Figure 2-42 on page 65). 6. Orient the processor by matching the notches on the processor to the notches on the CPU socket. 7. Carefully lower the new processor into place. When the processor is fully inserted, close the lever. Be extremely careful when you insert the processor. If you bend one of the pins, it will not go into the socket. Aligning the Processor 8. Replace the heatsink (page 67) or install a new heatsink (page 69).
-
 1
1 -
2
-
3
-
4
-
5
-
6
-
7
-
8
-
9
-
10
-
11
-
12
-
13
-
14
-
15
-
16
-
17
-
18
-
19
-
20
-
21
-
22
-
23
-
24
-
25
-
26
-
27
-
28
-
29
-
30
-
31
-
32
-
33
-
34
-
35
-
36
-
37
-
38
-
39
-
40
-
41
-
42
-
43
-
44
-
45
-
46
-
47
-
48
-
49
-
50
-
51
-
52
-
53
-
54
-
55
-
56
-
57
-
58
-
59
-
60
-
 61
61 -
 62
62 -
 63
63 -
 64
64 -
 65
65 -
 66
66 -
 67
67 -
 68
68 -
 69
69 -
 70
70 -
 71
71 -
72
-
73
-
74
-
75
-
76
-
77
-
78
-
79
-
80
-
81
-
82
-
83
-
84
-
85
-
86
-
87
-
88
-
89
-
90
-
91
-
92
-
93
-
94
-
95
-
96
-
97
-
98
-
99
-
100
-
101
-
102
-
103
-
104
-
105
-
106
-
107
-
108
-
109
-
110
-
111
-
112
-
113
-
114
-
115
-
116
-
117
-
118
 |
 |