HP Xw5000 hp workstation xw5000 Technical Reference (309233-001 10/02) - Page 49
Floppy Drive, Removing a Floppy Drive
 |
UPC - 613326803318
View all HP Xw5000 manuals
Add to My Manuals
Save this manual to your list of manuals |
Page 49 highlights
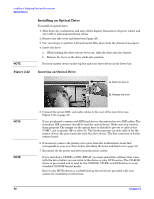
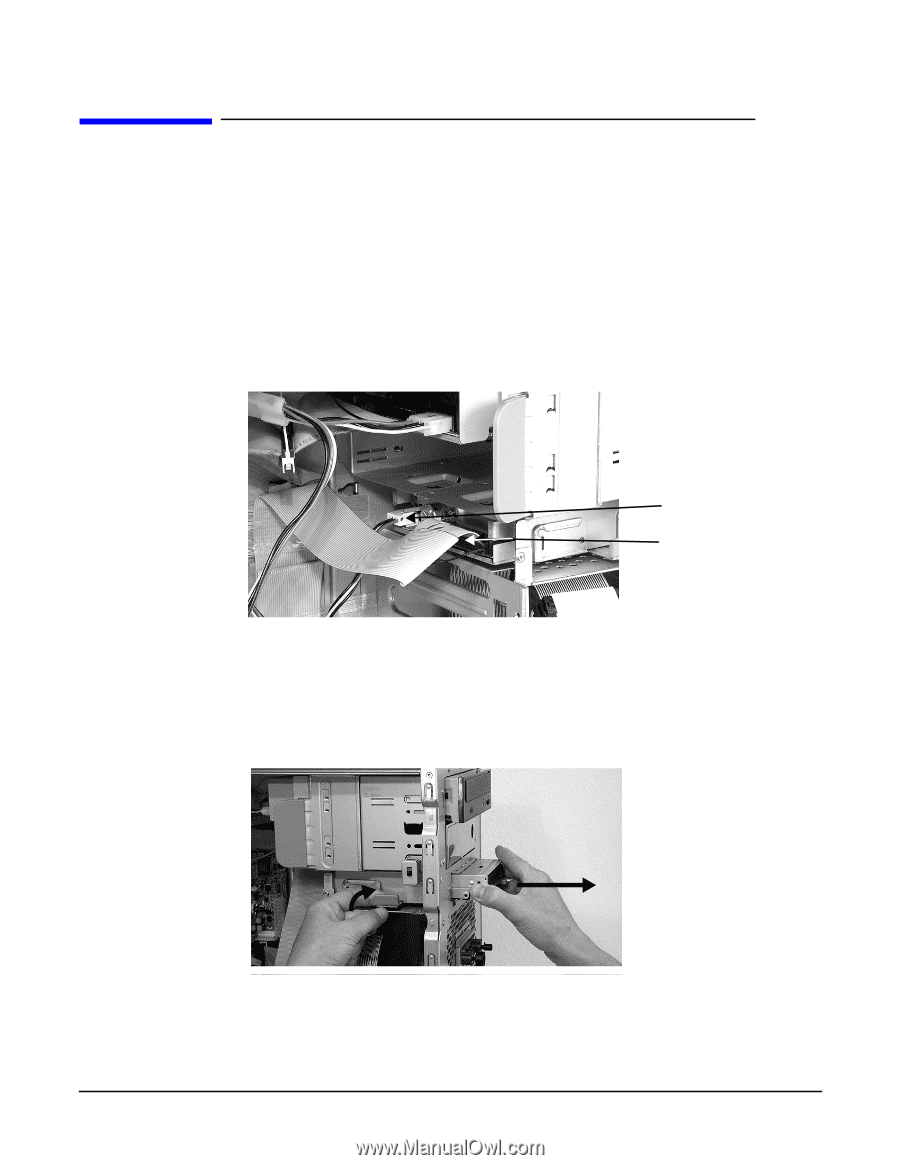
Figure 2-23 Floppy Drive Removing a Floppy Drive To remove a floppy drive: 1. Shut down the workstation and turn off the display. Disconnect all power cables and any LAN or telecommunications cables. 2. Remove the side cover and front bezel (page 29). 3. Remove the power and data cables from the drive. Floppy Drive Connectors Figure 2-24 4. Remove the drive: a. Release the drive by pulling the drive release lever. b. Slide the drive out the front of the chassis. Removing the Floppy Drive 5. Install a replacement drive (page 50).
-
 1
1 -
2
-
3
-
4
-
5
-
6
-
7
-
8
-
9
-
10
-
11
-
12
-
13
-
14
-
15
-
16
-
17
-
18
-
19
-
20
-
21
-
22
-
23
-
24
-
25
-
26
-
27
-
28
-
29
-
30
-
31
-
32
-
33
-
34
-
35
-
36
-
37
-
38
-
39
-
40
-
41
-
42
-
43
-
 44
44 -
 45
45 -
 46
46 -
 47
47 -
 48
48 -
 49
49 -
 50
50 -
 51
51 -
 52
52 -
 53
53 -
 54
54 -
55
-
56
-
57
-
58
-
59
-
60
-
61
-
62
-
63
-
64
-
65
-
66
-
67
-
68
-
69
-
70
-
71
-
72
-
73
-
74
-
75
-
76
-
77
-
78
-
79
-
80
-
81
-
82
-
83
-
84
-
85
-
86
-
87
-
88
-
89
-
90
-
91
-
92
-
93
-
94
-
95
-
96
-
97
-
98
-
99
-
100
-
101
-
102
-
103
-
104
-
105
-
106
-
107
-
108
-
109
-
110
-
111
-
112
-
113
-
114
-
115
-
116
-
117
-
118
 |
 |
¹º¿·½ÀÀ¾ºÁ¸³²¸ÂÃÄÀ½¶¾ºÁ¸±½²·¿¸½º´ Ŷ¶Ã¿¿³²¾Ã¿
Öò½½ÄºÕ³¸È¾
ÂÆÇÈÉÊ˲±
´¹
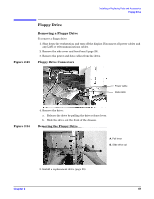
Floppy Drive
Removing a Floppy Drive
To remove a floppy drive:
1. Shut down the workstation and turn off the display. Disconnect all power cables and
any LAN or telecommunications cables.
2. Remove the side cover and front bezel (page 29).
3. Remove the power and data cables from the drive.
Figure 2-23
Floppy Drive Connectors
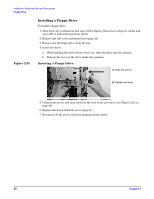
4. Remove the drive:
a.
Release the drive by pulling the drive release lever.
b.
Slide the drive out the front of the chassis.
Figure 2-24
Removing the Floppy Drive
5. Install a replacement drive (page 50).
³´µ¶·²¿Å¸Ó
ÃźŲ¿Å¸Ó
»Í²
³¹ÓӲӶƶ·
çÍ
²ÖÓ¾Ú¶²Ú·¾Æ¶²´¹º
ç
»