HP Z210 HP Z210 CMT Workstation Maintenance and Service Guide - Page 145
Status tab, Select All
 |
View all HP Z210 manuals
Add to My Manuals
Save this manual to your list of manuals |
Page 145 highlights
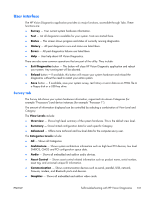
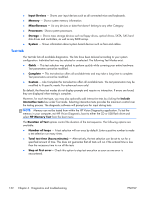
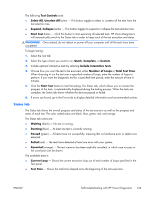
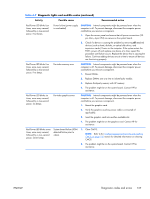
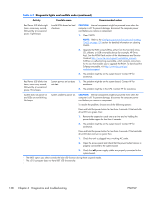
The following Test Controls exist: ● Select All, Unselect All button - This button toggles to select or unselect all the tests from the test selection tree. ● Expand, Collapse button - This button toggles to expand or collapse the test selection tree. ● Start Test button - Click this button to start executing all selected tests. HP Vision Diagnostics will automatically switch to the Status tab in order to keep track of the test execution and status. WARNING! Once started, do not reboot or power off your computer until all the tests have been completed. To begin testing: 1. Select the Test tab. 2. Select the type of tests you want to run: Quick, Complete, or Custom. 3. Include optional interactive tests by selecting Include interactive tests. 4. Choose how you want the test to be executed, either Number of Loops or Total Test Time. When choosing to run the test over a specified number of loops, enter the number of loops to perform. If you want the diagnostic test for a specified time period, enter the amount of time in minutes. 5. Click the Start Test button to start the testing. The Status tab, which allows you to monitor the progress of the tests, is automatically displayed during the testing process. When the tests are complete, the Status tab shows whether the devices passed or failed. 6. If errors are found, go to the Errors tab to display detailed information and recommended actions. Status tab The Status tab shows the overall progress and status of the test scenario as well as the progress and status of each test. The color coded status are black, blue, green, red, and orange. The Status tab colors are: ● Waiting (black) - No test is running. ● Running (blue) - At least one test is currently running. ● Passed (green) - All tests have run successfully, meaning that no hardware error or defect was detected. ● Failed (red) - The tests have detected at least one error with your system. ● Canceled (orange) - The test scenario has been explicitly canceled, in which case no pass or fail conclusion can be drawn. The available data is: ● Current Loop - Shows the current execution loop out of total number of loops specified in the Test panel. ● Test Time - Shows the total time elapsed since the beginning of the test execution. ENWW Self-troubleshooting with HP Vision Diagnostics 133
-
 1
1 -
2
-
3
-
4
-
5
-
6
-
7
-
8
-
9
-
10
-
11
-
12
-
13
-
14
-
15
-
16
-
17
-
18
-
19
-
20
-
21
-
22
-
23
-
24
-
25
-
26
-
27
-
28
-
29
-
30
-
31
-
32
-
33
-
34
-
35
-
36
-
37
-
38
-
39
-
40
-
41
-
42
-
43
-
44
-
45
-
46
-
47
-
48
-
49
-
50
-
51
-
52
-
53
-
54
-
55
-
56
-
57
-
58
-
59
-
60
-
61
-
62
-
63
-
64
-
65
-
66
-
67
-
68
-
69
-
70
-
71
-
72
-
73
-
74
-
75
-
76
-
77
-
78
-
79
-
80
-
81
-
82
-
83
-
84
-
85
-
86
-
87
-
88
-
89
-
90
-
91
-
92
-
93
-
94
-
95
-
96
-
97
-
98
-
99
-
100
-
101
-
102
-
103
-
104
-
105
-
106
-
107
-
108
-
109
-
110
-
111
-
112
-
113
-
114
-
115
-
116
-
117
-
118
-
119
-
120
-
121
-
122
-
123
-
124
-
125
-
126
-
127
-
128
-
129
-
130
-
131
-
132
-
133
-
134
-
135
-
136
-
137
-
138
-
139
-
 140
140 -
 141
141 -
 142
142 -
 143
143 -
 144
144 -
 145
145 -
 146
146 -
 147
147 -
 148
148 -
 149
149 -
 150
150 -
151
-
152
-
153
-
154
-
155
-
156
-
157
-
158
-
159
-
160
-
161
-
162
-
163
-
164
-
165
-
166
-
167
-
168
-
169
-
170
-
171
-
172
-
173
-
174
-
175
-
176
-
177
-
178
-
179
-
180
-
181
-
182
-
183
-
184
-
185
 |
 |