HP Z210 HP Z210 CMT Workstation Maintenance and Service Guide - Page 87
Optical disk drive (desktop configuration), Removing an optical drive (desktop configuration) - minitower
 |
View all HP Z210 manuals
Add to My Manuals
Save this manual to your list of manuals |
Page 87 highlights
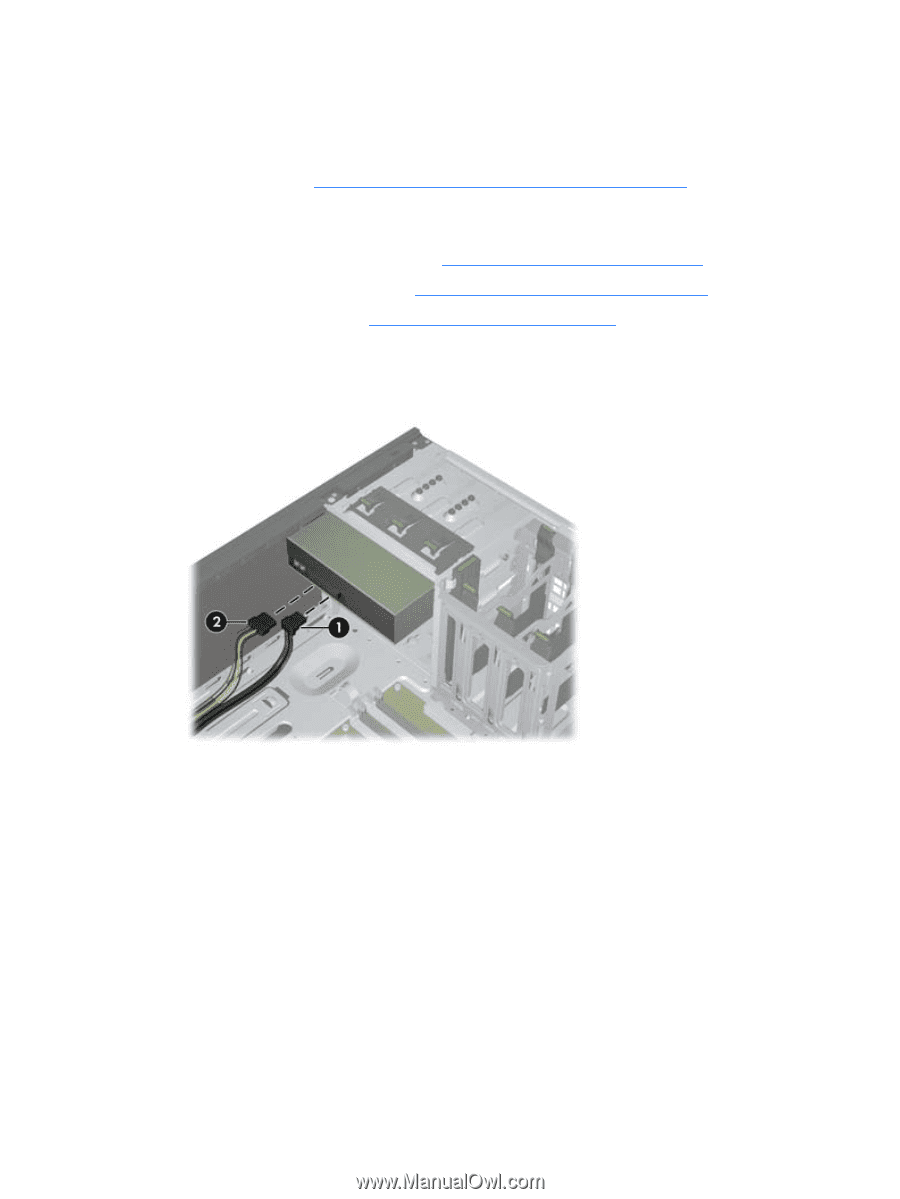
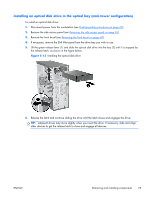
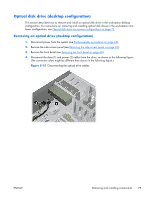
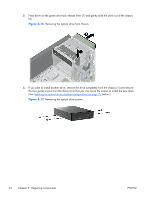
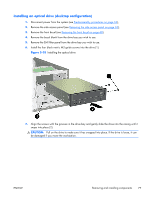
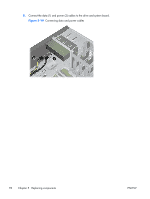
Optical disk drive (desktop configuration) This section describes how to remove and install an optical disk drive in the workstation desktop configuration. For instructions on removing and installing optical disk drives in the workstation minitower configuration, see Optical disk drive (mini-tower configuration) on page 71. Removing an optical drive (desktop configuration) 1. Disconnect power from the system (see Predisassembly procedures on page 62), 2. Remove the side access panel (see Removing the side access panel on page 65). 3. Remove the front bezel (see Removing the front bezel on page 68). 4. Disconnect the data (1) and power (2) cables from the drive, as shown in the following figure. (The connector colors might be different than shown in the following figure.) Figure 5-15 Disconnecting the optical drive cables ENWW Removing and installing components 75
-
 1
1 -
2
-
3
-
4
-
5
-
6
-
7
-
8
-
9
-
10
-
11
-
12
-
13
-
14
-
15
-
16
-
17
-
18
-
19
-
20
-
21
-
22
-
23
-
24
-
25
-
26
-
27
-
28
-
29
-
30
-
31
-
32
-
33
-
34
-
35
-
36
-
37
-
38
-
39
-
40
-
41
-
42
-
43
-
44
-
45
-
46
-
47
-
48
-
49
-
50
-
51
-
52
-
53
-
54
-
55
-
56
-
57
-
58
-
59
-
60
-
61
-
62
-
63
-
64
-
65
-
66
-
67
-
68
-
69
-
70
-
71
-
72
-
73
-
74
-
75
-
76
-
77
-
78
-
79
-
80
-
81
-
 82
82 -
 83
83 -
 84
84 -
 85
85 -
 86
86 -
 87
87 -
 88
88 -
 89
89 -
 90
90 -
 91
91 -
 92
92 -
93
-
94
-
95
-
96
-
97
-
98
-
99
-
100
-
101
-
102
-
103
-
104
-
105
-
106
-
107
-
108
-
109
-
110
-
111
-
112
-
113
-
114
-
115
-
116
-
117
-
118
-
119
-
120
-
121
-
122
-
123
-
124
-
125
-
126
-
127
-
128
-
129
-
130
-
131
-
132
-
133
-
134
-
135
-
136
-
137
-
138
-
139
-
140
-
141
-
142
-
143
-
144
-
145
-
146
-
147
-
148
-
149
-
150
-
151
-
152
-
153
-
154
-
155
-
156
-
157
-
158
-
159
-
160
-
161
-
162
-
163
-
164
-
165
-
166
-
167
-
168
-
169
-
170
-
171
-
172
-
173
-
174
-
175
-
176
-
177
-
178
-
179
-
180
-
181
-
182
-
183
-
184
-
185
 |
 |