Karcher HGE 36-60 Battery Operating instructions 2 - Page 16
Device description, Initial startup, Operation - hedge trimmer set
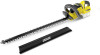 |
View all Karcher HGE 36-60 Battery manuals
Add to My Manuals
Save this manual to your list of manuals |
Page 16 highlights
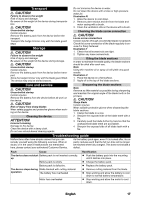
Do not subject the device to rain or moist conditions. Always hold the device with both hands. The guaranteed sound pressure level specified on the label is 93 dB. Device description The maximum amount of equipment is described in these operating instructions. Depending on the model used, there are differences in the scope of delivery (see packaging). See graphics page for illustrations Illustration A 1 Handle, rear 2 Power switch unlocking button 3 Handle unlocking button 4 Speed control selector switch 5 Handle, front 6 Power switch 7 Hand guard 8 Hedge broom 9 Blade 10 Blade guard 11 *Rechargeable battery pack 36/25 12 *Fast Charger Battery Power 36V 13 Battery pack unlocking button 14 Type plate * optional Rechargeable battery pack The device can be operated with a 36V Kärcher Battery Power battery pack. Initial startup ṇ WARNING Uncontrolled startup Risk of fatal injury from incision injuries Remove the battery from the device for all preparatory work. Inserting the battery pack ATTENTION Dirty contacts Damage to the device and battery Check the battery mount and the contacts for soiling and clean them as necessary before inserting the battery. Note Use only fully charged batteries. Illustration C 1. Push the battery into the mounting in the device until it audibly latches into place. Operation New users should be instructed by an experienced person and practice handling and techniques before carrying out any work. Basic operation 1. Check the cutting material for foreign bodies, such as paper, films or wires, and remove them as necessary. 2. Install the hedge broom. Illustration C 3. Remove the blade guard. 4. Hold the hedge trimmer firmly with both hands. Switch on the device 1. Press the trigger lockout button. Illustration G 2. Press the trigger. The device starts up. 3. Release the trigger. The device stops. Speed control The device is equipped with a speed control. Illustration I 1. Set the desired blade speed with the selector switch. 1= High/normal speed 2= Reduced speed Working techniques Note Use a snapping line to achieve an even cut. 1. Switch on the device and move it towards the cutting material. 2. Cut leaves and thin branches with an oscillating movement. Illustration K 3. For thicker branches, use a sawing movement, but do not stab into the plant. 4. Cut bushes and hedges from the bottom upwards. 5. When cutting tips, make a large swinging movement and tilt the blade slightly in the process. 6. Hold the blade horizontally to cut lower-lying plants such as groundcovers. Turning the handle The rear handle can be turned to work more comfortably on vertical surfaces. 1. Pull the handle unlocking button to the top. Illustration M 2. Turn the handle into the desired position until it au- dibly latches into place. Removing the battery ṇ WARNING Uncontrolled startup Risk of injury Remove the battery pack from the device during work breaks and before carrying out any service or care work. Illustration O 1. Pull the unlocking button towards the battery. 2. Press the unlocking button inward to unlock the bat- tery. 3. Remove the battery from the device. 16 English
-
 1
1 -
2
-
3
-
4
-
5
-
6
-
7
-
8
-
9
-
10
-
 11
11 -
 12
12 -
 13
13 -
 14
14 -
 15
15 -
 16
16 -
 17
17 -
 18
18 -
 19
19 -
 20
20 -
 21
21 -
22
-
23
-
24
-
25
-
26
-
27
-
28
-
29
-
30
-
31
-
32
-
33
-
34
-
35
-
36
-
37
-
38
-
39
-
40
-
41
-
42
-
43
-
44
-
45
-
46
-
47
-
48
-
49
-
50
-
51
-
52
-
53
-
54
-
55
-
56
-
57
-
58
-
59
-
60
-
61
-
62
-
63
-
64
-
65
-
66
-
67
-
68
-
69
-
70
-
71
-
72
-
73
-
74
-
75
-
76
-
77
-
78
-
79
-
80
-
81
-
82
-
83
-
84
-
85
-
86
-
87
-
88
-
89
-
90
-
91
-
92
-
93
-
94
-
95
-
96
-
97
-
98
-
99
-
100
-
101
-
102
-
103
-
104
-
105
-
106
-
107
-
108
-
109
-
110
-
111
-
112
-
113
-
114
-
115
-
116
-
117
-
118
-
119
-
120
-
121
-
122
-
123
-
124
-
125
-
126
-
127
-
128
-
129
-
130
-
131
-
132
-
133
-
134
-
135
-
136
-
137
-
138
-
139
-
140
-
141
-
142
-
143
-
144
-
145
-
146
-
147
-
148
-
149
-
150
-
151
-
152
-
153
-
154
-
155
-
156
-
157
-
158
-
159
-
160
-
161
-
162
-
163
-
164
-
165
-
166
-
167
-
168
-
169
-
170
-
171
-
172
-
173
-
174
-
175
-
176
-
177
-
178
-
179
-
180
-
181
-
182
-
183
-
184
-
185
-
186
-
187
-
188
-
189
-
190
-
191
-
192
-
193
-
194
-
195
-
196
-
197
-
198
-
199
-
200
-
201
-
202
-
203
-
204
-
205
-
206
-
207
-
208
-
209
-
210
-
211
-
212
-
213
-
214
-
215
-
216
 |
 |
