Nokia E63 Nokia E63 User Guide in English / Spanish - Page 118
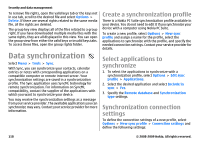
Data synchronization, Create a synchronization profile, Select applications to synchronize
 |
UPC - 758478017708
View all Nokia E63 manuals
Add to My Manuals
Save this manual to your list of manuals |
Page 118 highlights
Security and data management To remove file rights, open the valid keys tab or the keys not in use tab, scroll to the desired file and select Options > Delete. If there are several rights related to the same media file, all the rights are deleted. The group key view displays all of the files related to a group right. If you have downloaded multiple media files with the same rights, they are all displayed in this view. You can open the group view from either the valid keys or invalid keys tabs. To access these files, open the group rights folder. Data synchronization Select Menu > Tools > Sync. With Sync, you can synchronize your contacts, calendar entries or notes with corresponding applications on a compatible computer or remote internet server. Your synchronization settings are saved in a synchronization profile. The Sync application uses SyncML technology for remote synchronization. For information on SyncML compatibility, contact the supplier of the applications with which you want to synchronize your device. You may receive the synchronization settings as a message from your service provider. The available applications you can synchronize may vary. Contact your service provider for more information. Create a synchronization profile There is a Nokia PC Suite synchronization profile available in your device. You do not need to edit it if you synchronize your device with a computer using Nokia PC Suite. To create a new profile, select Options > New sync profile and assign a name for the profile, select the applications to synchronize with the profile, and specify the needed connection settings. Contact your service provider for details. Select applications to synchronize 1. To select the applications to synchronize with a synchronization profile, select Options > Edit sync profile > Applications. 2. Select the desired application and select Include in sync > Yes. 3. Specify the Remote database and Synchronization type settings. Synchronization connection settings To define the connection settings of a new profile, select Options > New sync profile > Connection settings and define the following settings: 118 © 2008-2009 Nokia. All rights reserved.
-
 1
1 -
2
-
3
-
4
-
5
-
6
-
7
-
8
-
9
-
10
-
11
-
12
-
13
-
14
-
15
-
16
-
17
-
18
-
19
-
20
-
21
-
22
-
23
-
24
-
25
-
26
-
27
-
28
-
29
-
30
-
31
-
32
-
33
-
34
-
35
-
36
-
37
-
38
-
39
-
40
-
41
-
42
-
43
-
44
-
45
-
46
-
47
-
48
-
49
-
50
-
51
-
52
-
53
-
54
-
55
-
56
-
57
-
58
-
59
-
60
-
61
-
62
-
63
-
64
-
65
-
66
-
67
-
68
-
69
-
70
-
71
-
72
-
73
-
74
-
75
-
76
-
77
-
78
-
79
-
80
-
81
-
82
-
83
-
84
-
85
-
86
-
87
-
88
-
89
-
90
-
91
-
92
-
93
-
94
-
95
-
96
-
97
-
98
-
99
-
100
-
101
-
102
-
103
-
104
-
105
-
106
-
107
-
108
-
109
-
110
-
111
-
112
-
 113
113 -
 114
114 -
 115
115 -
 116
116 -
 117
117 -
 118
118 -
 119
119 -
 120
120 -
 121
121 -
 122
122 -
 123
123 -
124
-
125
-
126
-
127
-
128
-
129
-
130
-
131
-
132
-
133
-
134
-
135
-
136
-
137
-
138
-
139
-
140
-
141
-
142
-
143
-
144
-
145
-
146
-
147
-
148
-
149
-
150
-
151
-
152
-
153
-
154
-
155
-
156
-
157
-
158
-
159
-
160
-
161
-
162
-
163
-
164
-
165
-
166
-
167
-
168
-
169
-
170
-
171
-
172
-
173
-
174
-
175
-
176
-
177
-
178
-
179
-
180
-
181
-
182
-
183
-
184
-
185
-
186
-
187
-
188
-
189
-
190
-
191
-
192
-
193
-
194
-
195
-
196
-
197
-
198
-
199
-
200
-
201
-
202
-
203
-
204
-
205
-
206
-
207
-
208
-
209
-
210
-
211
-
212
-
213
-
214
-
215
-
216
-
217
-
218
-
219
-
220
-
221
-
222
-
223
-
224
-
225
-
226
-
227
-
228
-
229
-
230
-
231
-
232
-
233
-
234
-
235
-
236
-
237
-
238
-
239
-
240
-
241
-
242
-
243
-
244
-
245
-
246
-
247
-
248
-
249
-
250
-
251
-
252
-
253
-
254
-
255
-
256
-
257
-
258
-
259
-
260
-
261
-
262
-
263
-
264
-
265
-
266
-
267
-
268
-
269
-
270
-
271
-
272
-
273
-
274
-
275
-
276
-
277
-
278
-
279
-
280
-
281
-
282
-
283
-
284
-
285
-
286
-
287
-
288
-
289
-
290
-
291
-
292
-
293
-
294
-
295
-
296
-
297
-
298
-
299
-
300
-
301
-
302
-
303
-
304
-
305
-
306
-
307
-
308
-
309
-
310
-
311
-
312
-
313
-
314
-
315
-
316
-
317
-
318
-
319
-
320
-
321
-
322
-
323
-
324
-
325
-
326
-
327
-
328
-
329
 |
 |
