Nokia E63 Nokia E63 User Guide in English / Spanish - Page 120
Create VPN access points, Use a VPN connection in an application, VPN log, Connection name, VPN policy
 |
UPC - 758478017708
View all Nokia E63 manuals
Add to My Manuals
Save this manual to your list of manuals |
Page 120 highlights
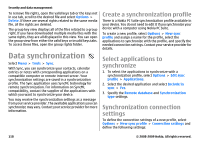
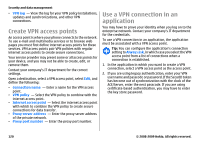
Security and data management • VPN log - View the log for your VPN policy installations, updates and synchronizations, and other VPN connections. Create VPN access points An access point is where your phone connects to the network. To use e-mail and multimedia services or to browse web pages you must first define internet access points for these services. VPN access points pair VPN policies with regular internet access points to create secure connections. Your service provider may preset some or all access points for your device, and you may not be able to create, edit, or remove them. Contact your company's IT department for the correct settings. Open a destination, select a VPN access point, select Edit, and define the following: • Connection name - Enter a name for the VPN access point. • VPN policy - Select the VPN policy to combine with the internet access point. • Internet access point - Select the internet access point with which to combine the VPN policy to create secure connections for data transfer. • Proxy server address - Enter the proxy server address of the private network. • Proxy port number - Enter the proxy port number. Use a VPN connection in an application You may have to prove your identity when you log on to the enterprise network. Contact your company's IT department for the credentials. To use a VPN connection in an application, the application must be associated with a VPN access point. Tip: You can configure the application's connection setting to Always ask, in which case you select the VPN access point from a list of connections when a connection is established. 1. In the application in which you want to create a VPN connection, select a VPN access point as the access point. 2. If you are using legacy authentication, enter your VPN user name and passcode or password. If the SecurID token has become out of synchronization with the clock of the ACE/Server, enter the next passcode. If you are using certificate-based authentication, you may have to enter the key store password. 120 © 2008-2009 Nokia. All rights reserved.
-
 1
1 -
2
-
3
-
4
-
5
-
6
-
7
-
8
-
9
-
10
-
11
-
12
-
13
-
14
-
15
-
16
-
17
-
18
-
19
-
20
-
21
-
22
-
23
-
24
-
25
-
26
-
27
-
28
-
29
-
30
-
31
-
32
-
33
-
34
-
35
-
36
-
37
-
38
-
39
-
40
-
41
-
42
-
43
-
44
-
45
-
46
-
47
-
48
-
49
-
50
-
51
-
52
-
53
-
54
-
55
-
56
-
57
-
58
-
59
-
60
-
61
-
62
-
63
-
64
-
65
-
66
-
67
-
68
-
69
-
70
-
71
-
72
-
73
-
74
-
75
-
76
-
77
-
78
-
79
-
80
-
81
-
82
-
83
-
84
-
85
-
86
-
87
-
88
-
89
-
90
-
91
-
92
-
93
-
94
-
95
-
96
-
97
-
98
-
99
-
100
-
101
-
102
-
103
-
104
-
105
-
106
-
107
-
108
-
109
-
110
-
111
-
112
-
113
-
114
-
 115
115 -
 116
116 -
 117
117 -
 118
118 -
 119
119 -
 120
120 -
 121
121 -
 122
122 -
 123
123 -
 124
124 -
 125
125 -
126
-
127
-
128
-
129
-
130
-
131
-
132
-
133
-
134
-
135
-
136
-
137
-
138
-
139
-
140
-
141
-
142
-
143
-
144
-
145
-
146
-
147
-
148
-
149
-
150
-
151
-
152
-
153
-
154
-
155
-
156
-
157
-
158
-
159
-
160
-
161
-
162
-
163
-
164
-
165
-
166
-
167
-
168
-
169
-
170
-
171
-
172
-
173
-
174
-
175
-
176
-
177
-
178
-
179
-
180
-
181
-
182
-
183
-
184
-
185
-
186
-
187
-
188
-
189
-
190
-
191
-
192
-
193
-
194
-
195
-
196
-
197
-
198
-
199
-
200
-
201
-
202
-
203
-
204
-
205
-
206
-
207
-
208
-
209
-
210
-
211
-
212
-
213
-
214
-
215
-
216
-
217
-
218
-
219
-
220
-
221
-
222
-
223
-
224
-
225
-
226
-
227
-
228
-
229
-
230
-
231
-
232
-
233
-
234
-
235
-
236
-
237
-
238
-
239
-
240
-
241
-
242
-
243
-
244
-
245
-
246
-
247
-
248
-
249
-
250
-
251
-
252
-
253
-
254
-
255
-
256
-
257
-
258
-
259
-
260
-
261
-
262
-
263
-
264
-
265
-
266
-
267
-
268
-
269
-
270
-
271
-
272
-
273
-
274
-
275
-
276
-
277
-
278
-
279
-
280
-
281
-
282
-
283
-
284
-
285
-
286
-
287
-
288
-
289
-
290
-
291
-
292
-
293
-
294
-
295
-
296
-
297
-
298
-
299
-
300
-
301
-
302
-
303
-
304
-
305
-
306
-
307
-
308
-
309
-
310
-
311
-
312
-
313
-
314
-
315
-
316
-
317
-
318
-
319
-
320
-
321
-
322
-
323
-
324
-
325
-
326
-
327
-
328
-
329
 |
 |