Nokia E63 Nokia E63 User Guide in English / Spanish - Page 130
Edit registration servers, Net call settings, Configuration settings, Restrict packet data
 |
UPC - 758478017708
View all Nokia E63 manuals
Add to My Manuals
Save this manual to your list of manuals |
Page 130 highlights
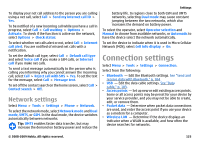
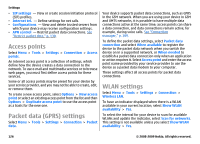
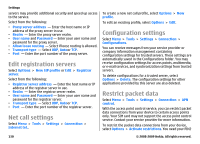
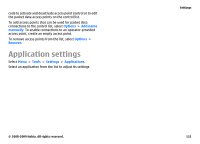
Settings servers may provide additional security and speed up access to the service. Select from the following: • Proxy server address - Enter the host name or IP address of the proxy server in use. • Realm - Enter the proxy server realm. • User name and Password - Enter your user name and password for the proxy server. • Allow loose routing - Select if loose routing is allowed. • Transport type - Select UDP, Autoor TCP. • Port - Enter the port number of the proxy server. Edit registration servers Select Options > New SIP profile or Edit > Registrar server. Select from the following: • Registrar server address - Enter the host name or IP address of the registrar server in use. • Realm - Enter the registrar server realm. • User name and Password - Enter your user name and password for the registrar server. • Transport type - Select UDP, Autoor TCP. • Port - Enter the port number of the registrar server. Net call settings Select Menu > Tools > Settings > Connection > Internet tel.. To create a new net call profile, select Options > New profile. To edit an existing profile, select Options > Edit. Configuration settings Select Menu > Tools > Settings > Connection > Configurations. You can receive messages from your service provider or company information management containing configuration settings for trusted servers. These settings are automatically saved in the Configurations folder. You may receive configuration settings for access points, multimedia, or e-mail services, and synchronization settings from trusted servers. To delete configurations for a trusted server, select Options > Delete. The configuration settings for other applications provided by this server are also deleted. Restrict packet data Select Menu > Tools > Settings > Connection > APN control. With the access point control service, you can restrict packet data connections from your device to certain access points only. Your SIM card may not support the access point control service. Contact your service provider for more information. To restrict the packet data connections from your device, select Options > Activate restrictions. You need your PIN2 130 © 2008-2009 Nokia. All rights reserved.
-
 1
1 -
2
-
3
-
4
-
5
-
6
-
7
-
8
-
9
-
10
-
11
-
12
-
13
-
14
-
15
-
16
-
17
-
18
-
19
-
20
-
21
-
22
-
23
-
24
-
25
-
26
-
27
-
28
-
29
-
30
-
31
-
32
-
33
-
34
-
35
-
36
-
37
-
38
-
39
-
40
-
41
-
42
-
43
-
44
-
45
-
46
-
47
-
48
-
49
-
50
-
51
-
52
-
53
-
54
-
55
-
56
-
57
-
58
-
59
-
60
-
61
-
62
-
63
-
64
-
65
-
66
-
67
-
68
-
69
-
70
-
71
-
72
-
73
-
74
-
75
-
76
-
77
-
78
-
79
-
80
-
81
-
82
-
83
-
84
-
85
-
86
-
87
-
88
-
89
-
90
-
91
-
92
-
93
-
94
-
95
-
96
-
97
-
98
-
99
-
100
-
101
-
102
-
103
-
104
-
105
-
106
-
107
-
108
-
109
-
110
-
111
-
112
-
113
-
114
-
115
-
116
-
117
-
118
-
119
-
120
-
121
-
122
-
123
-
124
-
 125
125 -
 126
126 -
 127
127 -
 128
128 -
 129
129 -
 130
130 -
 131
131 -
 132
132 -
 133
133 -
 134
134 -
 135
135 -
136
-
137
-
138
-
139
-
140
-
141
-
142
-
143
-
144
-
145
-
146
-
147
-
148
-
149
-
150
-
151
-
152
-
153
-
154
-
155
-
156
-
157
-
158
-
159
-
160
-
161
-
162
-
163
-
164
-
165
-
166
-
167
-
168
-
169
-
170
-
171
-
172
-
173
-
174
-
175
-
176
-
177
-
178
-
179
-
180
-
181
-
182
-
183
-
184
-
185
-
186
-
187
-
188
-
189
-
190
-
191
-
192
-
193
-
194
-
195
-
196
-
197
-
198
-
199
-
200
-
201
-
202
-
203
-
204
-
205
-
206
-
207
-
208
-
209
-
210
-
211
-
212
-
213
-
214
-
215
-
216
-
217
-
218
-
219
-
220
-
221
-
222
-
223
-
224
-
225
-
226
-
227
-
228
-
229
-
230
-
231
-
232
-
233
-
234
-
235
-
236
-
237
-
238
-
239
-
240
-
241
-
242
-
243
-
244
-
245
-
246
-
247
-
248
-
249
-
250
-
251
-
252
-
253
-
254
-
255
-
256
-
257
-
258
-
259
-
260
-
261
-
262
-
263
-
264
-
265
-
266
-
267
-
268
-
269
-
270
-
271
-
272
-
273
-
274
-
275
-
276
-
277
-
278
-
279
-
280
-
281
-
282
-
283
-
284
-
285
-
286
-
287
-
288
-
289
-
290
-
291
-
292
-
293
-
294
-
295
-
296
-
297
-
298
-
299
-
300
-
301
-
302
-
303
-
304
-
305
-
306
-
307
-
308
-
309
-
310
-
311
-
312
-
313
-
314
-
315
-
316
-
317
-
318
-
319
-
320
-
321
-
322
-
323
-
324
-
325
-
326
-
327
-
328
-
329
 |
 |
