Pioneer AVIC-5000NEX Owner's Manual - Page 143
Setting the video signal, Switching the operation, screen, Using an AUX source
 |
View all Pioneer AVIC-5000NEX manuals
Add to My Manuals
Save this manual to your list of manuals |
Page 143 highlights
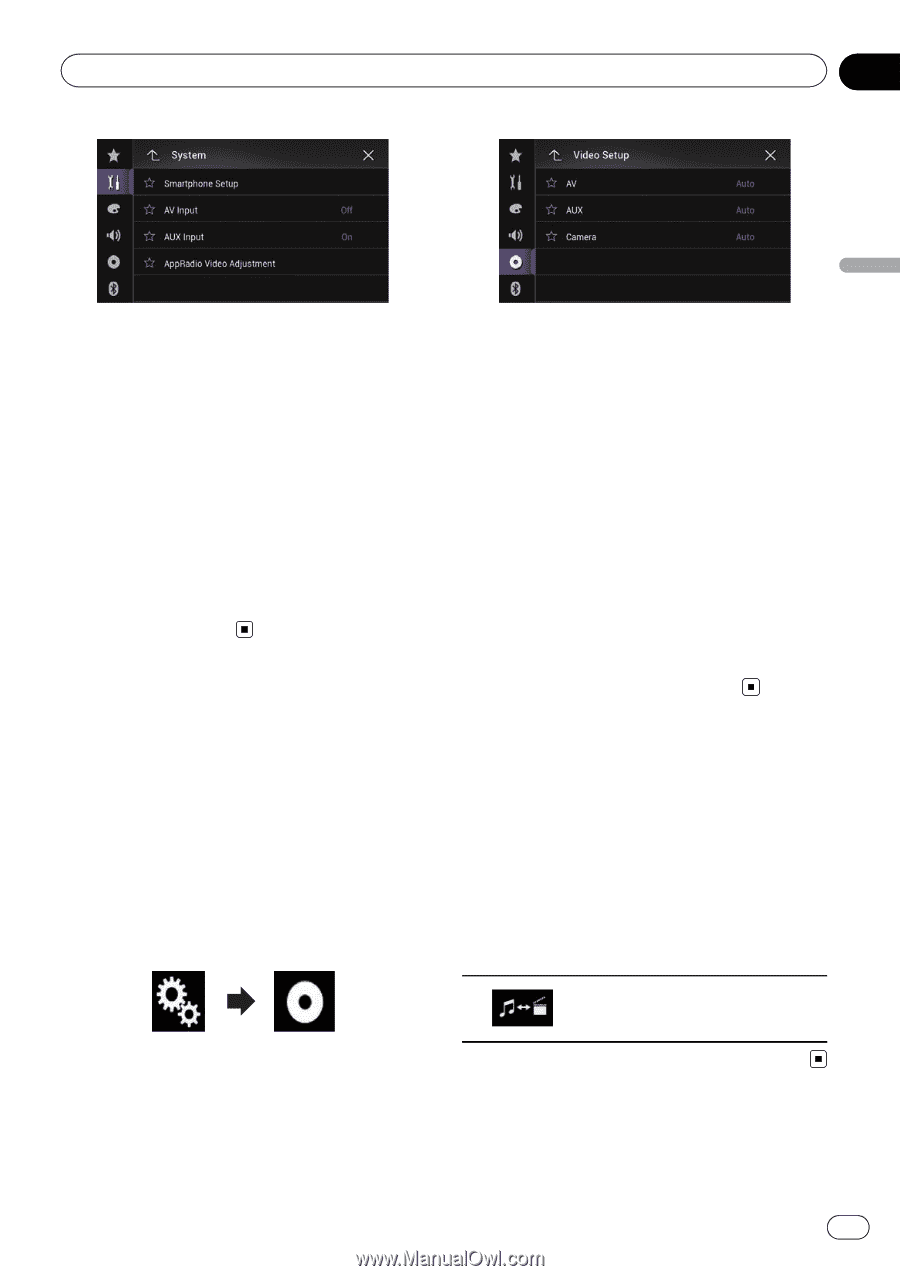
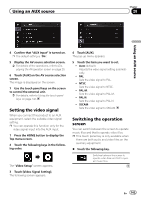
Using an AUX source Chapter 28 Using an AUX source 4 Confirm that "AUX Input" is turned on. p The default setting is "On". 5 Display the AV source selection screen. = For details of the operations, refer to Displaying the AV operation screen on page 20. 6 Touch [AUX] on the AV source selection screen. The image is displayed on the screen. 7 Use the touch panel keys on the screen to control the external unit. = For details, refer to Using the touch panel keys on page 142. Setting the video signal When you connect this product to an AUX equipment, select the suitable video signal setting. p You can operate this function only for the video signal input into the AUX input. 1 Press the HOME button to display the Top menu screen. 2 Touch the following keys in the following order. The "Video Setup" screen appears. 3 Touch [Video Signal Setting]. The following screen appears. 4 Touch [AUX]. The pop-up menu appears. 5 Touch the item you want to set. ! Auto (default): Adjusts the video signal setting automatically. ! PAL: Sets the video signal to PAL. ! NTSC: Sets the video signal to NTSC. ! PAL-M: Sets the video signal to PAL-M. ! PAL-N: Sets the video signal to PAL-N. ! SECAM: Sets the video signal to SECAM. Switching the operation screen You can switch between the screen to operate music files and that to operate video files. p This touch panel key is only available when there are both audio and video files on the auxiliary equipment. % Touch the following key. Switches between the screen to operate video files and that to operate music files. En 143
-
 1
1 -
2
-
3
-
4
-
5
-
6
-
7
-
8
-
9
-
10
-
11
-
12
-
13
-
14
-
15
-
16
-
17
-
18
-
19
-
20
-
21
-
22
-
23
-
24
-
25
-
26
-
27
-
28
-
29
-
30
-
31
-
32
-
33
-
34
-
35
-
36
-
37
-
38
-
39
-
40
-
41
-
42
-
43
-
44
-
45
-
46
-
47
-
48
-
49
-
50
-
51
-
52
-
53
-
54
-
55
-
56
-
57
-
58
-
59
-
60
-
61
-
62
-
63
-
64
-
65
-
66
-
67
-
68
-
69
-
70
-
71
-
72
-
73
-
74
-
75
-
76
-
77
-
78
-
79
-
80
-
81
-
82
-
83
-
84
-
85
-
86
-
87
-
88
-
89
-
90
-
91
-
92
-
93
-
94
-
95
-
96
-
97
-
98
-
99
-
100
-
101
-
102
-
103
-
104
-
105
-
106
-
107
-
108
-
109
-
110
-
111
-
112
-
113
-
114
-
115
-
116
-
117
-
118
-
119
-
120
-
121
-
122
-
123
-
124
-
125
-
126
-
127
-
128
-
129
-
130
-
131
-
132
-
133
-
134
-
135
-
136
-
137
-
 138
138 -
 139
139 -
 140
140 -
 141
141 -
 142
142 -
 143
143 -
 144
144 -
 145
145 -
 146
146 -
 147
147 -
 148
148 -
149
-
150
-
151
-
152
-
153
-
154
-
155
-
156
-
157
-
158
-
159
-
160
-
161
-
162
-
163
-
164
-
165
-
166
-
167
-
168
-
169
-
170
-
171
-
172
-
173
-
174
-
175
-
176
-
177
-
178
-
179
-
180
-
181
-
182
-
183
-
184
-
185
-
186
-
187
-
188
-
189
-
190
-
191
-
192
-
193
-
194
-
195
-
196
-
197
-
198
-
199
-
200
-
201
-
202
-
203
-
204
-
205
-
206
-
207
-
208
-
209
-
210
-
211
-
212
-
213
-
214
-
215
-
216
-
217
-
218
-
219
-
220
-
221
-
222
-
223
-
224
-
225
-
226
-
227
-
228
 |
 |