Samsung Galaxy Victory User Manual - Page 68
Add a Corporate Email Account, Compose and Send Email, Settings, Add account
 |
View all Samsung Galaxy Victory manuals
Add to My Manuals
Save this manual to your list of manuals |
Page 68 highlights
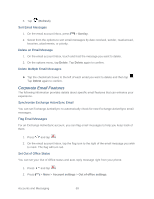
4. Tap Done. Add a Corporate Email Account The Email app also provides access to your Microsoft Exchange server via your phone. If your company uses Microsoft Exchange Server 2003, 2007, or 2010 as the corporate email system, you can use this email application to wirelessly synchronize your email, Contacts, and Task information directly with your company's Exchange server. You can set up multiple Microsoft Exchange accounts on your phone. Important! Email synchronizes with your Microsoft Exchange account over the wireless network, and not via a direct connection. Use the following procedure to synchronize your phone with a corporate email account. 1. Press > > Settings > Add account > Microsoft Exchange ActiveSync. Note: You can also add email and corporate email accounts from the Email application. 2. Enter your Email address and Password information, and then tap Next. Tapping Next starts "automatic" email setup. If you have custom settings you need to configure, tap Manual setup and enter the settings. These may include Domain/username, Password, Exchange server, and other security settings. 3. Follow the on-screen prompts to configure your account.. 4. Tap Done to complete setup. Compose and Send Email Compose and send email using any account you have set up on your phone. Increase your productivity by attaching files such as pictures, videos, or documents to your email messages. 1. Press and tap . 2. From the Inbox, tap . If you have multiple accounts set up on your phone, tap the From field and then select an account. 3. Enter the recipient's email address in the To field. You can add as many message recipients as you want. To send a carbon copy (Cc) or a blind carbon copy (Bcc) of the email to other recipients, tap > Add Cc/Bcc. 4. Tap the Subject field and enter the email subject. 5. Tap the text entry field and compose your email. Accounts and Messaging 67
-
 1
1 -
2
-
3
-
4
-
5
-
6
-
7
-
8
-
9
-
10
-
11
-
12
-
13
-
14
-
15
-
16
-
17
-
18
-
19
-
20
-
21
-
22
-
23
-
24
-
25
-
26
-
27
-
28
-
29
-
30
-
31
-
32
-
33
-
34
-
35
-
36
-
37
-
38
-
39
-
40
-
41
-
42
-
43
-
44
-
45
-
46
-
47
-
48
-
49
-
50
-
51
-
52
-
53
-
54
-
55
-
56
-
57
-
58
-
59
-
60
-
61
-
62
-
 63
63 -
 64
64 -
 65
65 -
 66
66 -
 67
67 -
 68
68 -
 69
69 -
 70
70 -
 71
71 -
 72
72 -
 73
73 -
74
-
75
-
76
-
77
-
78
-
79
-
80
-
81
-
82
-
83
-
84
-
85
-
86
-
87
-
88
-
89
-
90
-
91
-
92
-
93
-
94
-
95
-
96
-
97
-
98
-
99
-
100
-
101
-
102
-
103
-
104
-
105
-
106
-
107
-
108
-
109
-
110
-
111
-
112
-
113
-
114
-
115
-
116
-
117
-
118
-
119
-
120
-
121
-
122
-
123
-
124
-
125
-
126
-
127
-
128
-
129
-
130
-
131
-
132
-
133
-
134
-
135
-
136
-
137
-
138
-
139
-
140
-
141
-
142
-
143
-
144
-
145
-
146
-
147
-
148
-
149
-
150
-
151
-
152
-
153
-
154
-
155
-
156
-
157
-
158
-
159
-
160
-
161
-
162
-
163
-
164
 |
 |
