Bernina Artista 730E User Guide - Page 134
Beginning and Ending Threads
 |
View all Bernina Artista 730E manuals
Add to My Manuals
Save this manual to your list of manuals |
Page 134 highlights
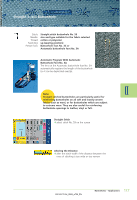
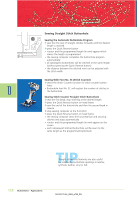
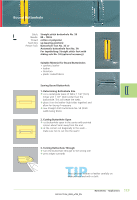
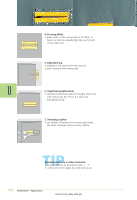
Button Sew-on Program Stitch: Stitch width: Needle: Thread: Feed dog: Presser foot: Button sew-on program No. 60 depends on the distance between the holes size and type suitable for the fabric selected cotton or polyester down (darning position) Button sew-on foot No. 18 Note: Buttons with 2 and 4 holes can be attached with presser foot No. 18. The shank (thread length between button and fabric) can be made shorter or longer as desired. Buttons sewn on for decorative purposes only are stitched without a thread shank. 132 Buttonholes - Applications Button Sew-on Program ™ select stitch No. 60 on the screen Sewing 2 Hole Button ™ check distance between holes with the handwheel and adjust stitch width if necessary ™ hold the threads when starting to sew ™ sew on button • the sewing computer stops automatically when program is completed and is immediately ready for the next button Sewing 4 Hole Button ™ sew the front holes first ™ carefully move the button forward ™ sew the back holes with the same program Beginning and Ending Threads ™ the threads are secured and can be trimmed For Secure Results ™ pull both bobbin threads until the ends of the upper thread are visible on the wrong side (knot if required) ™ trim threads TIPS Sewing on buttons A real time saver, especially when several of the same type buttons must be sewn on, e.g. blouses, bedding, etc. For work which is subject to heavy wear or washing, sew Button sew-on program twice.
-
 1
1 -
2
-
3
-
4
-
5
-
6
-
7
-
8
-
9
-
10
-
11
-
12
-
13
-
14
-
15
-
16
-
17
-
18
-
19
-
20
-
21
-
22
-
23
-
24
-
25
-
26
-
27
-
28
-
29
-
30
-
31
-
32
-
33
-
34
-
35
-
36
-
37
-
38
-
39
-
40
-
41
-
42
-
43
-
44
-
45
-
46
-
47
-
48
-
49
-
50
-
51
-
52
-
53
-
54
-
55
-
56
-
57
-
58
-
59
-
60
-
61
-
62
-
63
-
64
-
65
-
66
-
67
-
68
-
69
-
70
-
71
-
72
-
73
-
74
-
75
-
76
-
77
-
78
-
79
-
80
-
81
-
82
-
83
-
84
-
85
-
86
-
87
-
88
-
89
-
90
-
91
-
92
-
93
-
94
-
95
-
96
-
97
-
98
-
99
-
100
-
101
-
102
-
103
-
104
-
105
-
106
-
107
-
108
-
109
-
110
-
111
-
112
-
113
-
114
-
115
-
116
-
117
-
118
-
119
-
120
-
121
-
122
-
123
-
124
-
125
-
126
-
127
-
128
-
 129
129 -
 130
130 -
 131
131 -
 132
132 -
 133
133 -
 134
134 -
 135
135 -
 136
136 -
 137
137 -
 138
138 -
 139
139 -
140
-
141
-
142
-
143
-
144
-
145
-
146
-
147
-
148
-
149
-
150
-
151
-
152
-
153
-
154
-
155
-
156
-
157
-
158
-
159
-
160
-
161
-
162
-
163
-
164
-
165
-
166
-
167
-
168
-
169
-
170
-
171
-
172
-
173
-
174
-
175
-
176
-
177
-
178
-
179
-
180
-
181
-
182
-
183
-
184
-
185
-
186
-
187
-
188
-
189
-
190
-
191
-
192
-
193
-
194
-
195
-
196
-
197
-
198
-
199
-
200
-
201
-
202
-
203
-
204
-
205
-
206
-
207
-
208
-
209
-
210
-
211
-
212
-
213
-
214
-
215
-
216
-
217
-
218
-
219
-
220
-
221
-
222
-
223
-
224
-
225
-
226
-
227
-
228
-
229
-
230
-
231
-
232
-
233
-
234
-
235
-
236
-
237
-
238
-
239
-
240
-
241
-
242
-
243
-
244
-
245
-
246
-
247
-
248
-
249
-
250
-
251
-
252
-
253
-
254
-
255
-
256
-
257
-
258
-
259
-
260
-
261
-
262
-
263
-
264
-
265
-
266
-
267
-
268
-
269
-
270
-
271
-
272
-
273
-
274
-
275
-
276
-
277
-
278
-
279
-
280
-
281
-
282
-
283
-
284
-
285
 |
 |
