Bernina Artista 730E User Guide - Page 152
Free Hand Quilting Without BSR
 |
View all Bernina Artista 730E manuals
Add to My Manuals
Save this manual to your list of manuals |
Page 152 highlights
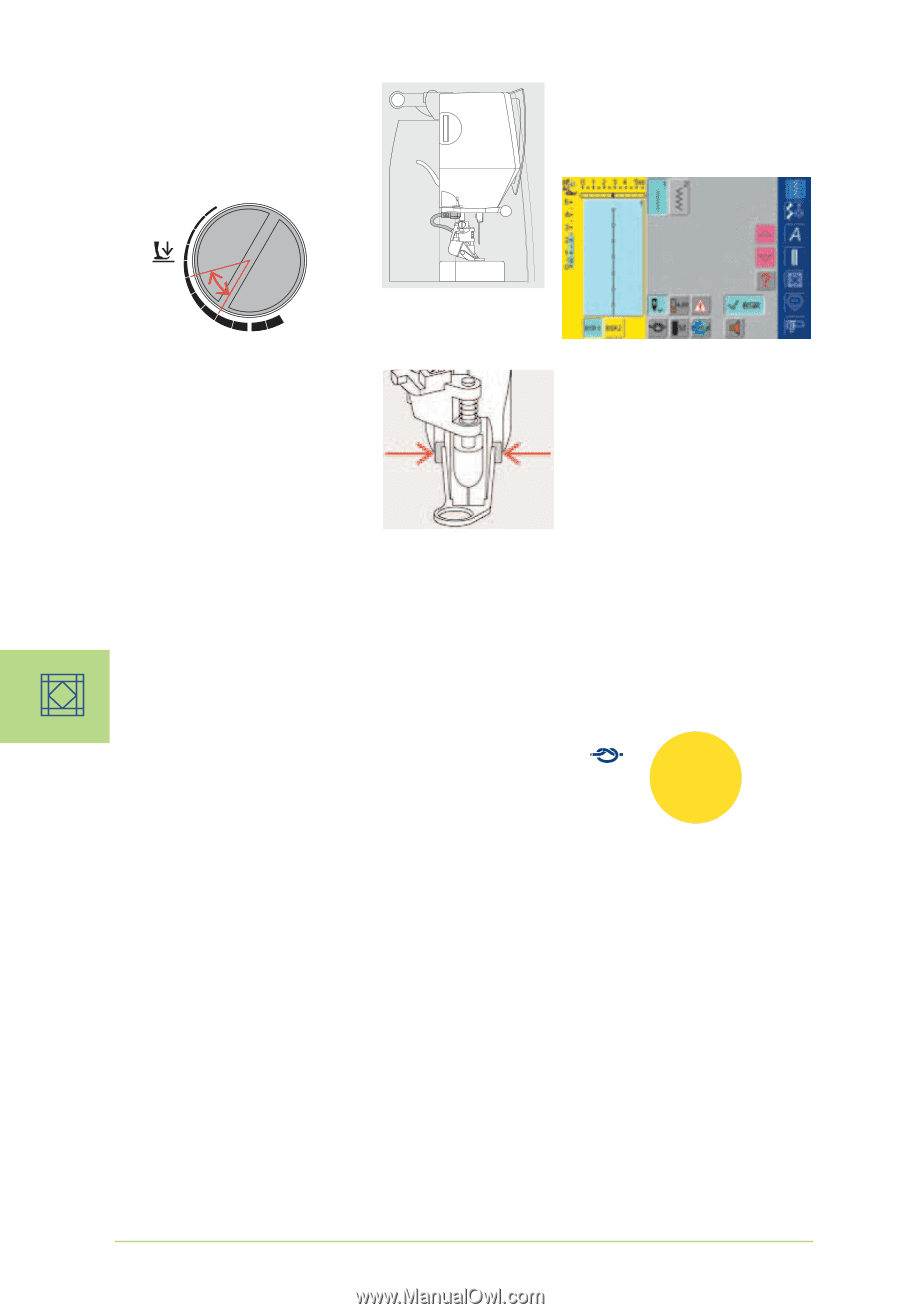
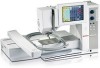
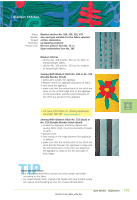
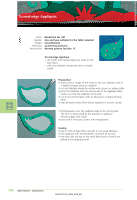
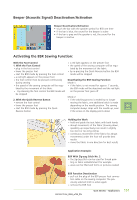
Preparation Securing Function (only Mode 2) • lower the feed dog • the presser foot pressure must be reduced • attach the BSR presser foot to the sewing computer and plug the cable into the green socket until it clicks into place • use slide-on table • attach the desired presser foot sole to the BSR presser foot • removing sole: press both buttons (see arrows) on each side of the foot • slide the sole down the groove at an angle • attaching the sole: slide the sole up in the groove until it clicks into place • the «BSR» screen opens automatically • the BSR mode 1 is activated (BSR1 is standard) • the basic stitch length setting is 2mm • set the desired stitch length • when sewing small forms and stippling, stitch length of 1mm 1.5mm is suggested Using the following functions in the BSR mode: Needle Stop Down (Default) • the arrow points down on the display = the sewing computer stops with needle down, when taking foot off foot control Needle Stop Up • press "Needlestop up/down" func- tion. The arrow points up = the sewing/embroidery computer stops with the needle up on releasing the foot control Raise or Lower the Needle • by pressing the heel on the foot control, the needle can be lowered or raised • re-start the BSR mode by pressing the Quick Reverse button to continue the stitching process Securing Function (only Mode 2) • press the «Securing Function» button • press the foot control or the Quick Reverse button • short securing stitch sequence will be sewn as soon as the fabric is moved under the presser foot. After the sequence is sewn the set stitch length will be activated and the securing function will be automatically deactivated Securing With the Quick Reverse Button (only Mode 1) • unplug the foot control • place the fabric under the presser foot, lower presser foot • hold upper and lower thread tight and press Quick Reverse button to start BSR mode • sew 5 to 6 securing stitches • stop the BSR mode by pressing the Quick Reverse button • cut threads Free Hand Quilting Without BSR Activation • touch the BSR button (on the left side on the display) • the BSR mode is deactivated, the buttons «BSR1» and «BSR2» on the left side on the display go off • normal free hand quilting can now be sewn with the BSR foot, without automatic regular stitch length When exceeding a certain speed, adhering to regular stitch length cannot be guaranteed. Make sure that the lens on the bottom of the BSR foot is not dirty (fingerprints, etc.). Clean lens periodically with soft, slightly damp cloth. 150 Quilt Stitches - Applications
-
 1
1 -
2
-
3
-
4
-
5
-
6
-
7
-
8
-
9
-
10
-
11
-
12
-
13
-
14
-
15
-
16
-
17
-
18
-
19
-
20
-
21
-
22
-
23
-
24
-
25
-
26
-
27
-
28
-
29
-
30
-
31
-
32
-
33
-
34
-
35
-
36
-
37
-
38
-
39
-
40
-
41
-
42
-
43
-
44
-
45
-
46
-
47
-
48
-
49
-
50
-
51
-
52
-
53
-
54
-
55
-
56
-
57
-
58
-
59
-
60
-
61
-
62
-
63
-
64
-
65
-
66
-
67
-
68
-
69
-
70
-
71
-
72
-
73
-
74
-
75
-
76
-
77
-
78
-
79
-
80
-
81
-
82
-
83
-
84
-
85
-
86
-
87
-
88
-
89
-
90
-
91
-
92
-
93
-
94
-
95
-
96
-
97
-
98
-
99
-
100
-
101
-
102
-
103
-
104
-
105
-
106
-
107
-
108
-
109
-
110
-
111
-
112
-
113
-
114
-
115
-
116
-
117
-
118
-
119
-
120
-
121
-
122
-
123
-
124
-
125
-
126
-
127
-
128
-
129
-
130
-
131
-
132
-
133
-
134
-
135
-
136
-
137
-
138
-
139
-
140
-
141
-
142
-
143
-
144
-
145
-
146
-
 147
147 -
 148
148 -
 149
149 -
 150
150 -
 151
151 -
 152
152 -
 153
153 -
 154
154 -
 155
155 -
 156
156 -
 157
157 -
158
-
159
-
160
-
161
-
162
-
163
-
164
-
165
-
166
-
167
-
168
-
169
-
170
-
171
-
172
-
173
-
174
-
175
-
176
-
177
-
178
-
179
-
180
-
181
-
182
-
183
-
184
-
185
-
186
-
187
-
188
-
189
-
190
-
191
-
192
-
193
-
194
-
195
-
196
-
197
-
198
-
199
-
200
-
201
-
202
-
203
-
204
-
205
-
206
-
207
-
208
-
209
-
210
-
211
-
212
-
213
-
214
-
215
-
216
-
217
-
218
-
219
-
220
-
221
-
222
-
223
-
224
-
225
-
226
-
227
-
228
-
229
-
230
-
231
-
232
-
233
-
234
-
235
-
236
-
237
-
238
-
239
-
240
-
241
-
242
-
243
-
244
-
245
-
246
-
247
-
248
-
249
-
250
-
251
-
252
-
253
-
254
-
255
-
256
-
257
-
258
-
259
-
260
-
261
-
262
-
263
-
264
-
265
-
266
-
267
-
268
-
269
-
270
-
271
-
272
-
273
-
274
-
275
-
276
-
277
-
278
-
279
-
280
-
281
-
282
-
283
-
284
-
285
 |
 |