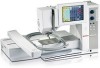
Bernina Artista 730E User Guide - Page 260
Embroidery Menu Ready to Sewing
 |
View all Bernina Artista 730E manuals
Add to My Manuals
Save this manual to your list of manuals |
Page 260 highlights
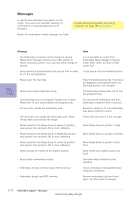
Messages In special cases messages may appear on the screen. They serve as a reminder, warning, or confirmation of selected applications and functions. • Possible Messages regarding the sewing computer see page 189 Below, the embroidery module messages are listed. Message • The embroidery computer cannot change to sewing. Please finish the layer and press the «Edit» button to return to previous screen. You may now safely change to sewing. • Hoop cannot be parked because the presser foot or needle is in the wrong position. • Please lower the feed dog. • Please use a larger embroidery hoop. • Card exchange was not accepted. Possible loss of data! Please refer to your manual before exchanging cards. • The point lies outside the embroidery area. • The next stitch lies outside the embroidery area. Please rehoop fabric and relocate the design. • Please reposition the Mega-Hoop to Upper (1) position, raise presser foot and press OK to start calibration. • Please reposition the Mega-Hoop to Middle (2) position, raise presser foot and press OK to start calibration. • Please reposition the Mega-Hoop to Lower (3) position, raise presser foot and press OK to start calibration. • Please change the needle to the highest position. • Please attach embroidery module. • Embroidery module communication NOT working! • Embroidery design card NOT working. Note It is not possible to switch from Embroidery Menu (Ready) to Sewing mode. Press «Edit» to return to Edit screen first. Check presser foot and needle position. Press the feed-dog drop key. The message disappears automatically when the feed-dog position was changed. The embroidery design does not fit into the attached hoop. Do not remove embroidery card from embroidery computer when in process. Reposition design to fit into embroidery area before starting to stitch. Follow the instructions in the message. Move Mega-Hoop to position 1 (top). Move Mega-Hoop to position 2 (center). Move Mega-Hoop to position 3 (bottom). Place needle into highest position by hand. The embroidery module must be attached. Check embroidery module/embroidery computer connection. Remove embroidery card and insert again. Try other card if necessary. 256 Embroidery Support - Messages
-
 1
1 -
2
-
3
-
4
-
5
-
6
-
7
-
8
-
9
-
10
-
11
-
12
-
13
-
14
-
15
-
16
-
17
-
18
-
19
-
20
-
21
-
22
-
23
-
24
-
25
-
26
-
27
-
28
-
29
-
30
-
31
-
32
-
33
-
34
-
35
-
36
-
37
-
38
-
39
-
40
-
41
-
42
-
43
-
44
-
45
-
46
-
47
-
48
-
49
-
50
-
51
-
52
-
53
-
54
-
55
-
56
-
57
-
58
-
59
-
60
-
61
-
62
-
63
-
64
-
65
-
66
-
67
-
68
-
69
-
70
-
71
-
72
-
73
-
74
-
75
-
76
-
77
-
78
-
79
-
80
-
81
-
82
-
83
-
84
-
85
-
86
-
87
-
88
-
89
-
90
-
91
-
92
-
93
-
94
-
95
-
96
-
97
-
98
-
99
-
100
-
101
-
102
-
103
-
104
-
105
-
106
-
107
-
108
-
109
-
110
-
111
-
112
-
113
-
114
-
115
-
116
-
117
-
118
-
119
-
120
-
121
-
122
-
123
-
124
-
125
-
126
-
127
-
128
-
129
-
130
-
131
-
132
-
133
-
134
-
135
-
136
-
137
-
138
-
139
-
140
-
141
-
142
-
143
-
144
-
145
-
146
-
147
-
148
-
149
-
150
-
151
-
152
-
153
-
154
-
155
-
156
-
157
-
158
-
159
-
160
-
161
-
162
-
163
-
164
-
165
-
166
-
167
-
168
-
169
-
170
-
171
-
172
-
173
-
174
-
175
-
176
-
177
-
178
-
179
-
180
-
181
-
182
-
183
-
184
-
185
-
186
-
187
-
188
-
189
-
190
-
191
-
192
-
193
-
194
-
195
-
196
-
197
-
198
-
199
-
200
-
201
-
202
-
203
-
204
-
205
-
206
-
207
-
208
-
209
-
210
-
211
-
212
-
213
-
214
-
215
-
216
-
217
-
218
-
219
-
220
-
221
-
222
-
223
-
224
-
225
-
226
-
227
-
228
-
229
-
230
-
231
-
232
-
233
-
234
-
235
-
236
-
237
-
238
-
239
-
240
-
241
-
242
-
243
-
244
-
245
-
246
-
247
-
248
-
249
-
250
-
251
-
252
-
253
-
254
-
 255
255 -
 256
256 -
 257
257 -
 258
258 -
 259
259 -
 260
260 -
 261
261 -
 262
262 -
 263
263 -
 264
264 -
 265
265 -
266
-
267
-
268
-
269
-
270
-
271
-
272
-
273
-
274
-
275
-
276
-
277
-
278
-
279
-
280
-
281
-
282
-
283
-
284
-
285
 |
 |
