HP J5780 User Guide - Macintosh - Page 248
Solution, To load an original on the scanner glass, Cause, Autocrop, HP Scan Pro
 |
UPC - 882780940253
View all HP J5780 manuals
Add to My Manuals
Save this manual to your list of manuals |
Page 248 highlights
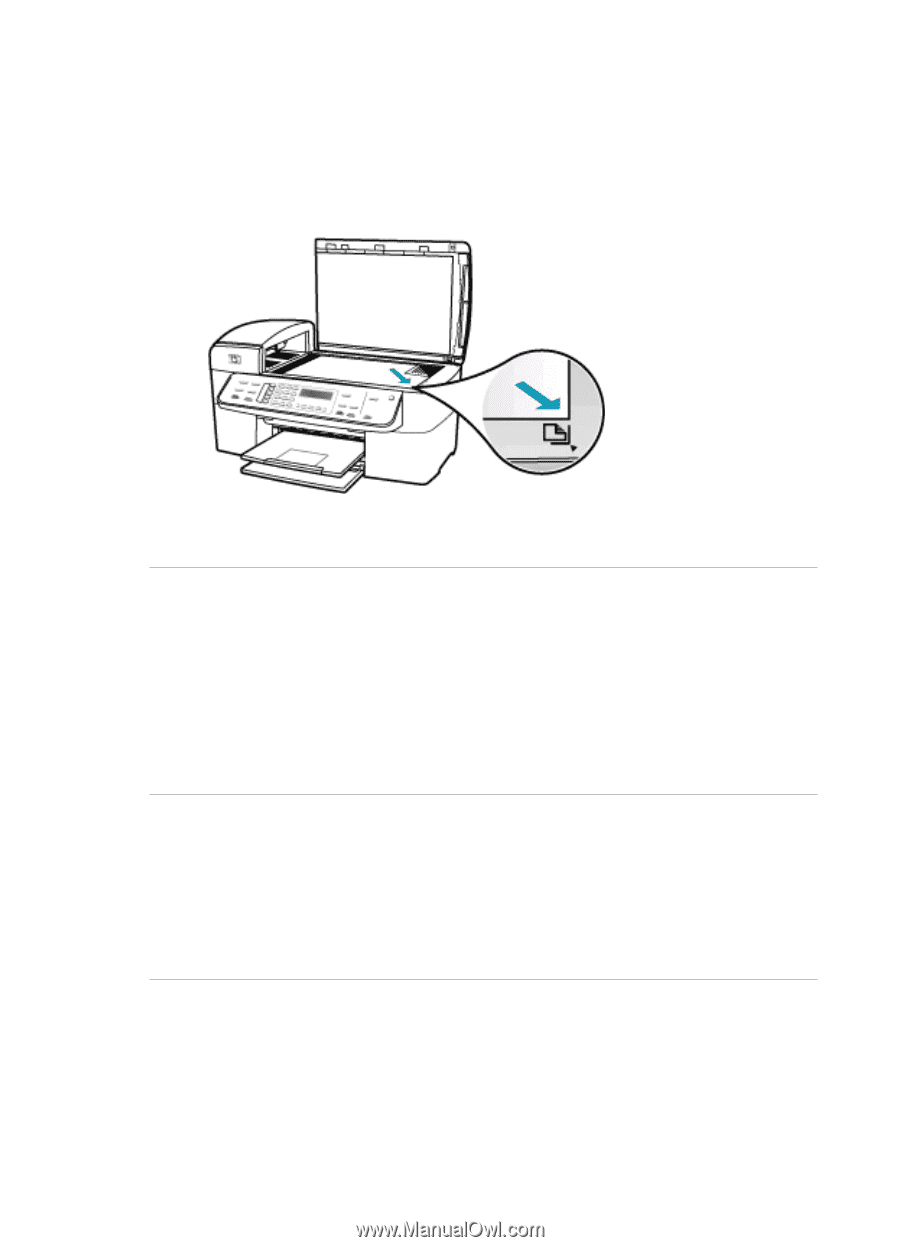
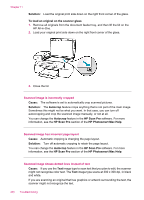
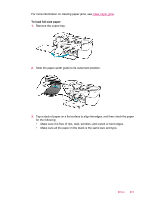
Chapter 11 Solution: Load the original print side down on the right front corner of the glass. To load an original on the scanner glass 1. Remove all originals from the document feeder tray, and then lift the lid on the HP All-in-One. 2. Load your original print side down on the right front corner of the glass. 3. Close the lid. Scanned image is incorrectly cropped Cause: The software is set to automatically crop scanned pictures. Solution: The Autocrop feature crops anything that is not part of the main image. Sometimes this might not be what you want. In that case, you can turn off autocropping and crop the scanned image manually, or not at all. You can change the Autocrop feature in the HP Scan Pro software. For more information, see the HP Scan Pro section of the HP Photosmart Mac Help. Scanned image has incorrect page layout Cause: Automatic cropping is changing the page layout. Solution: Turn off automatic cropping to retain the page layout. You can change the Autocrop feature in the HP Scan Pro software. For more information, see the HP Scan Pro section of the HP Photosmart Mac Help. Scanned image shows dotted lines instead of text Cause: If you use the Text image type to scan text that you plan to edit, the scanner might not recognize color text. The Text image type scans at 300 x 300 dpi, in black and white. If you are scanning an original that has graphics or artwork surrounding the text, the scanner might not recognize the text. 246 Troubleshooting
-
 1
1 -
2
-
3
-
4
-
5
-
6
-
7
-
8
-
9
-
10
-
11
-
12
-
13
-
14
-
15
-
16
-
17
-
18
-
19
-
20
-
21
-
22
-
23
-
24
-
25
-
26
-
27
-
28
-
29
-
30
-
31
-
32
-
33
-
34
-
35
-
36
-
37
-
38
-
39
-
40
-
41
-
42
-
43
-
44
-
45
-
46
-
47
-
48
-
49
-
50
-
51
-
52
-
53
-
54
-
55
-
56
-
57
-
58
-
59
-
60
-
61
-
62
-
63
-
64
-
65
-
66
-
67
-
68
-
69
-
70
-
71
-
72
-
73
-
74
-
75
-
76
-
77
-
78
-
79
-
80
-
81
-
82
-
83
-
84
-
85
-
86
-
87
-
88
-
89
-
90
-
91
-
92
-
93
-
94
-
95
-
96
-
97
-
98
-
99
-
100
-
101
-
102
-
103
-
104
-
105
-
106
-
107
-
108
-
109
-
110
-
111
-
112
-
113
-
114
-
115
-
116
-
117
-
118
-
119
-
120
-
121
-
122
-
123
-
124
-
125
-
126
-
127
-
128
-
129
-
130
-
131
-
132
-
133
-
134
-
135
-
136
-
137
-
138
-
139
-
140
-
141
-
142
-
143
-
144
-
145
-
146
-
147
-
148
-
149
-
150
-
151
-
152
-
153
-
154
-
155
-
156
-
157
-
158
-
159
-
160
-
161
-
162
-
163
-
164
-
165
-
166
-
167
-
168
-
169
-
170
-
171
-
172
-
173
-
174
-
175
-
176
-
177
-
178
-
179
-
180
-
181
-
182
-
183
-
184
-
185
-
186
-
187
-
188
-
189
-
190
-
191
-
192
-
193
-
194
-
195
-
196
-
197
-
198
-
199
-
200
-
201
-
202
-
203
-
204
-
205
-
206
-
207
-
208
-
209
-
210
-
211
-
212
-
213
-
214
-
215
-
216
-
217
-
218
-
219
-
220
-
221
-
222
-
223
-
224
-
225
-
226
-
227
-
228
-
229
-
230
-
231
-
232
-
233
-
234
-
235
-
236
-
237
-
238
-
239
-
240
-
241
-
242
-
 243
243 -
 244
244 -
 245
245 -
 246
246 -
 247
247 -
 248
248 -
 249
249 -
 250
250 -
 251
251 -
 252
252 -
 253
253 -
254
-
255
-
256
-
257
-
258
-
259
-
260
-
261
-
262
-
263
-
264
-
265
-
266
-
267
-
268
-
269
-
270
-
271
-
272
-
273
-
274
-
275
-
276
-
277
-
278
-
279
-
280
-
281
-
282
-
283
-
284
-
285
-
286
-
287
-
288
-
289
-
290
-
291
-
292
-
293
-
294
-
295
-
296
 |
 |