HP ProBook 4540s HP ProtectTools Getting Started - Page 59
Central Management, Advanced, Setting your preferences
 |
View all HP ProBook 4540s manuals
Add to My Manuals
Save this manual to your list of manuals |
Page 59 highlights
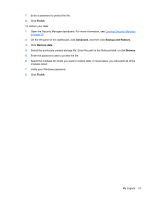
Central Management The Central Management page displays tabs for accessing information about central management of security solutions with DigitalPersona Pro, as well as scheduling product updates and online messages. NOTE: If there is no Central Management link in the lower-left portion of the dashboard, it has been disabled by the administrator of this computer. ● Business Solutions tab 1. Open the Security Manager dashboard. For more information, see Opening Security Manager on page 33. 2. Click Administration, click Central Management, and then click Business Solutions. Information about central management of HP ProtectTools with DigitalPersona Pro is displayed. 3. If your computer is connected to the Internet, you can watch a demo video, or you can navigate to DigitalPersona's manageability website: http://www.protecttools.com. ● Updates and Messages 1. Open the Security Manager dashboard. For more information, see Opening Security Manager on page 33. 2. Click Administration, click Central Management, and then click Updates and Messages. 3. To request information about new applications and updates, select the check box for Keep me informed about new applications and updates. 4. To set up a schedule for automatic updates, select the number of days. 5. To check for updates, click Check Now. Advanced You can access the following options by clicking Advanced in the lower-left panel of the dashboard: ● Preferences-Allows you to personalize settings for Security Manager. ● Backup and Restore-Allows you to back up and restore your Security Manager data. ● About-Displays version information about Security Manager Setting your preferences You can personalize settings for HP ProtectTools Security Manager. From the Security Manager dashboard, click Advanced, and then click Preferences. Available settings are displayed on two tabs: General and Fingerprint. General tab Appearance-Show icon in taskbar notification area ● To enable displaying the icon on the taskbar, select the check box. ● To disable displaying the icon on the taskbar, clear the check box. My Logons 49
-
 1
1 -
2
-
3
-
4
-
5
-
6
-
7
-
8
-
9
-
10
-
11
-
12
-
13
-
14
-
15
-
16
-
17
-
18
-
19
-
20
-
21
-
22
-
23
-
24
-
25
-
26
-
27
-
28
-
29
-
30
-
31
-
32
-
33
-
34
-
35
-
36
-
37
-
38
-
39
-
40
-
41
-
42
-
43
-
44
-
45
-
46
-
47
-
48
-
49
-
50
-
51
-
52
-
53
-
 54
54 -
 55
55 -
 56
56 -
 57
57 -
 58
58 -
 59
59 -
 60
60 -
 61
61 -
 62
62 -
 63
63 -
 64
64 -
65
-
66
-
67
-
68
-
69
-
70
-
71
-
72
-
73
-
74
-
75
-
76
-
77
-
78
-
79
-
80
-
81
-
82
-
83
-
84
-
85
-
86
-
87
-
88
-
89
-
90
-
91
-
92
-
93
-
94
-
95
-
96
-
97
-
98
-
99
-
100
-
101
-
102
-
103
-
104
-
105
-
106
-
107
-
108
-
109
-
110
-
111
-
112
-
113
-
114
-
115
-
116
-
117
-
118
-
119
-
120
-
121
-
122
-
123
-
124
-
125
-
126
-
127
-
128
-
129
-
130
-
131
-
132
-
133
-
134
-
135
-
136
-
137
-
138
 |
 |