Konica Minolta bizhub 25e bizhub 25e Message Board Guide - Page 78
Setting an internet time
 |
View all Konica Minolta bizhub 25e manuals
Add to My Manuals
Save this manual to your list of manuals |
Page 78 highlights
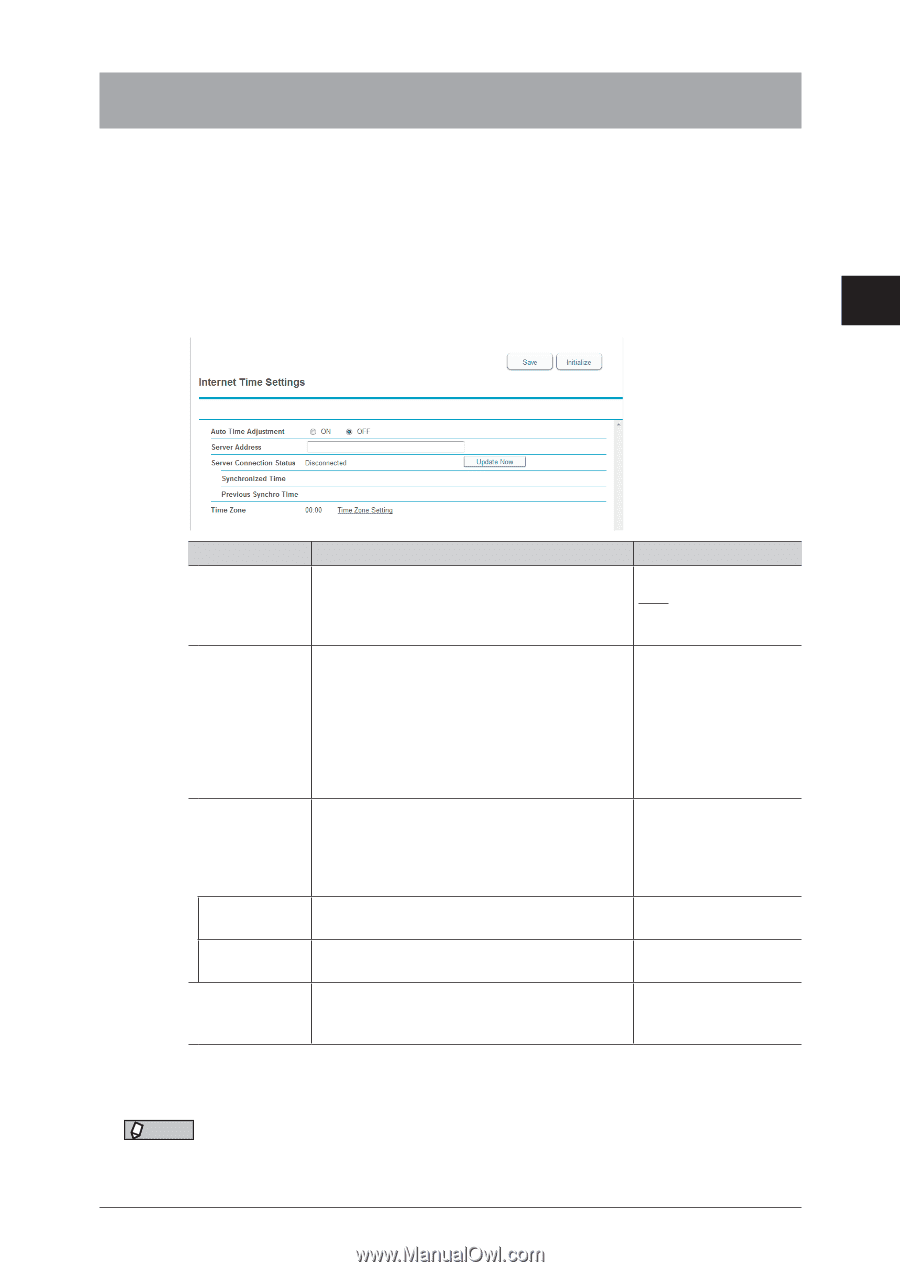
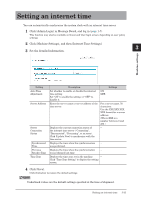
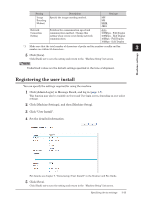
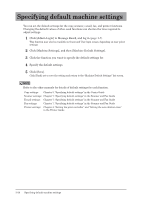
Setting an internet time You can automatically synchronize the system clock with an internet time server. 1 1 Click [Admin Login] in Message Board, and log in (page 1-7). This function may also be available on Guest and User login screen, depending on user policy settings. 2 2 Click [Machine Settings], and then [Internet Time Settings]. 3 3 Set the detailed information. Machine settings Setting Auto Time Adjustment Server Address Server Connection Status Synchronized Time Previous Synchro Time Time Zone Description Settings Set whether to enable or disable the internet time setting. Set "ON" to enable the setting, or "OFF" to disable it. ON OFF Enter the server name or server address of the time server. For a server name, 50 characters. Use the XXX.XXX.XXX. XXX format for a server address. (Where XXX is a number between 0 and 255.) Displays the current connection status of − the internet time server ("Connecting", "Disconnected", "Processing", or an error). Click [Update Now] to synchronize with the time server. Displays the time when the synchronization − was performed. Displays the time when the synchronization − was performed last time. Displays the time zone set in the machine. − Click "Time Zone Setting" to display the setting screen. 4 Click [Save]. Click [Initialize] to restore the default settings. NOTE Underlined values are the default settings specified at the time of shipment. Setting an internet time 3-21
-
 1
1 -
2
-
3
-
4
-
5
-
6
-
7
-
8
-
9
-
10
-
11
-
12
-
13
-
14
-
15
-
16
-
17
-
18
-
19
-
20
-
21
-
22
-
23
-
24
-
25
-
26
-
27
-
28
-
29
-
30
-
31
-
32
-
33
-
34
-
35
-
36
-
37
-
38
-
39
-
40
-
41
-
42
-
43
-
44
-
45
-
46
-
47
-
48
-
49
-
50
-
51
-
52
-
53
-
54
-
55
-
56
-
57
-
58
-
59
-
60
-
61
-
62
-
63
-
64
-
65
-
66
-
67
-
68
-
69
-
70
-
71
-
72
-
 73
73 -
 74
74 -
 75
75 -
 76
76 -
 77
77 -
 78
78 -
 79
79 -
 80
80 -
 81
81 -
 82
82 -
 83
83 -
84
-
85
-
86
-
87
-
88
-
89
-
90
-
91
-
92
-
93
-
94
-
95
-
96
-
97
-
98
-
99
-
100
-
101
-
102
-
103
-
104
-
105
-
106
-
107
-
108
-
109
-
110
-
111
-
112
-
113
-
114
-
115
-
116
-
117
-
118
-
119
-
120
-
121
-
122
-
123
-
124
-
125
-
126
-
127
-
128
-
129
-
130
-
131
-
132
-
133
-
134
-
135
-
136
-
137
-
138
-
139
-
140
 |
 |