Samsung SGH-I727 User Manual (user Manual) (ver.f7) (English(north America)) - Page 63
First name, Phone number, Mobile, Email address, Email, address, Google Talk, Instant msg
 |
View all Samsung SGH-I727 manuals
Add to My Manuals
Save this manual to your list of manuals |
Page 63 highlights
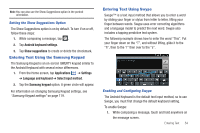
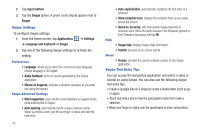
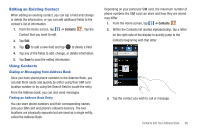
3. Tap the First name and Last name fields and use the onscreen keypad to enter names for each entry. For more information, refer to "Entering Text" on page 51. 4. Tap next to the Last name field to display additional name fields. 5. Tap the Phone number field. The numerical keypad is displayed. The Mobile button Mobile initially displays next to the Phone number field. If you want to add a phone number that is not a mobile number, tap the Mobile button and select from Mobile, Home, Work, Work fax, Home Fax, Pager, Other, Custom (add your own label), or Callback. 6. Enter the phone number. Tap to add another Phone number field or tap to delete a field. 7. Tap the Email address field. The keypad is displayed. The Work button Work initially displays next to the Email address field. If you want to add an Email address that is not a Home email address, tap the Work button and select from Work, Home, Mobile, Other, or Custom (add your own label). 8. Enter the Email address. Tap to add another Email address field or tap to delete a field. 9. Tap the IM field. The QWERTY keypad is displayed. The Google Talk button GoogleTalk initially displays next to the Instant msg field. If you want to add an instant message address that is not Google Talk, tap the Google Talk button and select from Google Talk, AIM, Windows Live, Yahoo!, Skype, QQ, ICQ, Jabber, or Custom (add your own label). 10. Enter the IM address. Tap to add another Instant msg address field or tap to delete a field. Contacts and Your Address Book 58
-
 1
1 -
2
-
3
-
4
-
5
-
6
-
7
-
8
-
9
-
10
-
11
-
12
-
13
-
14
-
15
-
16
-
17
-
18
-
19
-
20
-
21
-
22
-
23
-
24
-
25
-
26
-
27
-
28
-
29
-
30
-
31
-
32
-
33
-
34
-
35
-
36
-
37
-
38
-
39
-
40
-
41
-
42
-
43
-
44
-
45
-
46
-
47
-
48
-
49
-
50
-
51
-
52
-
53
-
54
-
55
-
56
-
57
-
 58
58 -
 59
59 -
 60
60 -
 61
61 -
 62
62 -
 63
63 -
 64
64 -
 65
65 -
 66
66 -
 67
67 -
 68
68 -
69
-
70
-
71
-
72
-
73
-
74
-
75
-
76
-
77
-
78
-
79
-
80
-
81
-
82
-
83
-
84
-
85
-
86
-
87
-
88
-
89
-
90
-
91
-
92
-
93
-
94
-
95
-
96
-
97
-
98
-
99
-
100
-
101
-
102
-
103
-
104
-
105
-
106
-
107
-
108
-
109
-
110
-
111
-
112
-
113
-
114
-
115
-
116
-
117
-
118
-
119
-
120
-
121
-
122
-
123
-
124
-
125
-
126
-
127
-
128
-
129
-
130
-
131
-
132
-
133
-
134
-
135
-
136
-
137
-
138
-
139
-
140
-
141
-
142
-
143
-
144
-
145
-
146
-
147
-
148
-
149
-
150
-
151
-
152
-
153
-
154
-
155
-
156
-
157
-
158
-
159
-
160
-
161
-
162
-
163
-
164
-
165
-
166
-
167
-
168
-
169
-
170
-
171
-
172
-
173
-
174
-
175
-
176
-
177
-
178
-
179
-
180
-
181
-
182
-
183
-
184
-
185
-
186
-
187
-
188
-
189
-
190
-
191
-
192
-
193
-
194
-
195
-
196
-
197
-
198
-
199
-
200
-
201
-
202
-
203
-
204
-
205
-
206
 |
 |