Samsung SGH-I727 User Manual (user Manual) (ver.f7) (English(north America)) - Page 69
Groups, Contacts, Join contact, Send contact information, Add to favorites, Add to group
 |
View all Samsung SGH-I727 manuals
Add to My Manuals
Save this manual to your list of manuals |
Page 69 highlights
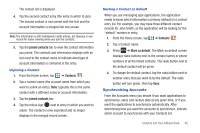
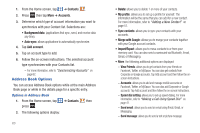
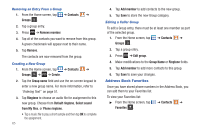
- SIM Management: allows you to copy contacts from your phone to your SIM card or from your SIM card to your phone. - Display options: You can choose to only display contacts that have phone numbers, sort by first or last name, display contacts by first name first or last name first, display contacts stored on your phone, and/or display contacts stored to other accounts. Tap a selection and tap Done. - Settings: allows you to choose where to save your new contacts, display or edit your service numbers, or send contact information by Bluetooth. Options at Selected Contact Screen 1. From the Home screen, tap ➔ Contacts . 2. Touch and hold a contact. - or - Tap a contact and at the contact's display screen, press . 3. The following options display depending on whether your contact is saved to your phone or your SIM card: • Edit: allows you to edit the selected contact's information. • Delete: allows you to delete the contact from your Address Book. • Join contact: allows you to join contacts with other contacts (only displays when contact is saved to SIM). • Send contact information: allows you to send a contacts information in a message. • Add to favorites: allows you to add the contact to your favorites list. • Add to group: allows you to add the contact to a pre-defined group such as Family, Friends, or Work. see "Adding an Entry to a Group" on page 64. • Add to/Remove from blacklist: allows you to add this contact to your blacklist. If they call, the call will be sent directly to Voicemail. If the contact has already been added to your blacklist, this option will allow you to remove the contact from your blacklist. • Send namecard via: allows you to send the contact's information via Bluetooth, Email, Gmail, or Messaging. • Print namecard: allows you to print the contact's namecard to a Samsung printer using Wi-Fi. Groups Adding an Entry to a Group 1. From the Home screen, tap ➔ Contacts . 2. Press and hold the contact name that you want to add to a group. 3. Tap Add to group. 4. Tap a group entry. The contact is added to the group. Contacts and Your Address Book 64
-
 1
1 -
2
-
3
-
4
-
5
-
6
-
7
-
8
-
9
-
10
-
11
-
12
-
13
-
14
-
15
-
16
-
17
-
18
-
19
-
20
-
21
-
22
-
23
-
24
-
25
-
26
-
27
-
28
-
29
-
30
-
31
-
32
-
33
-
34
-
35
-
36
-
37
-
38
-
39
-
40
-
41
-
42
-
43
-
44
-
45
-
46
-
47
-
48
-
49
-
50
-
51
-
52
-
53
-
54
-
55
-
56
-
57
-
58
-
59
-
60
-
61
-
62
-
63
-
 64
64 -
 65
65 -
 66
66 -
 67
67 -
 68
68 -
 69
69 -
 70
70 -
 71
71 -
 72
72 -
 73
73 -
 74
74 -
75
-
76
-
77
-
78
-
79
-
80
-
81
-
82
-
83
-
84
-
85
-
86
-
87
-
88
-
89
-
90
-
91
-
92
-
93
-
94
-
95
-
96
-
97
-
98
-
99
-
100
-
101
-
102
-
103
-
104
-
105
-
106
-
107
-
108
-
109
-
110
-
111
-
112
-
113
-
114
-
115
-
116
-
117
-
118
-
119
-
120
-
121
-
122
-
123
-
124
-
125
-
126
-
127
-
128
-
129
-
130
-
131
-
132
-
133
-
134
-
135
-
136
-
137
-
138
-
139
-
140
-
141
-
142
-
143
-
144
-
145
-
146
-
147
-
148
-
149
-
150
-
151
-
152
-
153
-
154
-
155
-
156
-
157
-
158
-
159
-
160
-
161
-
162
-
163
-
164
-
165
-
166
-
167
-
168
-
169
-
170
-
171
-
172
-
173
-
174
-
175
-
176
-
177
-
178
-
179
-
180
-
181
-
182
-
183
-
184
-
185
-
186
-
187
-
188
-
189
-
190
-
191
-
192
-
193
-
194
-
195
-
196
-
197
-
198
-
199
-
200
-
201
-
202
-
203
-
204
-
205
-
206
 |
 |