Samsung SGH-I727 User Manual (user Manual) (ver.f7) (English(north America)) - Page 68
Address Book Options
 |
View all Samsung SGH-I727 manuals
Add to My Manuals
Save this manual to your list of manuals |
Page 68 highlights
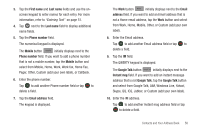
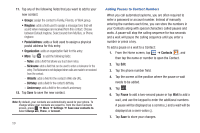
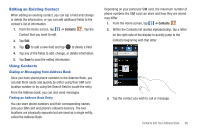
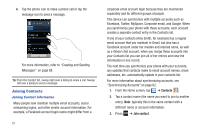
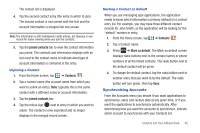
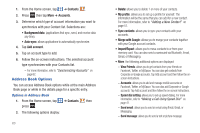
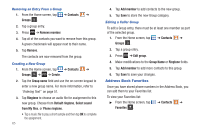
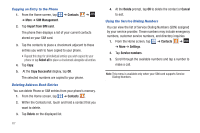
1. From the Home screen, tap ➔ Contacts . 2. Press then tap More ➔ Accounts. 3. Determine which type of account information you want to synchronize with your Contact list. Selections are: • Background data: (applications that sync, send, and receive data any time). • Auto-sync: allows applications to automatically synchronize. 4. Tap Add account. 5. Tap an account type to add. 6. Follow the on-screen instructions. The selected account type synchronizes with your Contacts list. - For more information, refer to "Synchronizing Accounts" on page 62. Address Book Options You can access Address Book options while at the main Address Book page or while in the details page for a specific entry. Options in Address Book 1. From the Home screen, tap ➔ Contacts then press . 2. The following options display: 63 • Delete: allows you to delete 1 or more of your contacts. • My profile: allows you to set up a profile for yourself. The information will be the same that you can add for a new contact. For more information, refer to "Adding a New Contact" on page 57. • Sync contacts: allows you to sync your contacts with your accounts. • Merge with Google: allows you to merge your contacts together with your Google account contacts. • Import/Export: allows you to move contacts to or from your memory card. You can also send a namecard via Bluetooth, Email, Gmail, or Messaging. • More: the following additional options are displayed: - View Friends: allows you to get contacts from your friends on Facebook, Twitter, or MySpace. You can also get contacts from Corporate or Google accounts. Tap Add account and then follow the onscreen instructions. - Accounts: allows you to add and manage mobile accounts on Facebook, Twitter, or MySpace. You can also add Corporate or Google accounts. Tap Add account and then follow the on-screen instructions. - Speed dial setting: allows you to set up speed-dialing. For more information, refer to "Making a Call Using Speed Dial" on page 41. - Send email: allows you to send an email using Email, Gmail, or Messaging. - Send message: allows you to send a text or picture message.
-
 1
1 -
2
-
3
-
4
-
5
-
6
-
7
-
8
-
9
-
10
-
11
-
12
-
13
-
14
-
15
-
16
-
17
-
18
-
19
-
20
-
21
-
22
-
23
-
24
-
25
-
26
-
27
-
28
-
29
-
30
-
31
-
32
-
33
-
34
-
35
-
36
-
37
-
38
-
39
-
40
-
41
-
42
-
43
-
44
-
45
-
46
-
47
-
48
-
49
-
50
-
51
-
52
-
53
-
54
-
55
-
56
-
57
-
58
-
59
-
60
-
61
-
62
-
 63
63 -
 64
64 -
 65
65 -
 66
66 -
 67
67 -
 68
68 -
 69
69 -
 70
70 -
 71
71 -
 72
72 -
 73
73 -
74
-
75
-
76
-
77
-
78
-
79
-
80
-
81
-
82
-
83
-
84
-
85
-
86
-
87
-
88
-
89
-
90
-
91
-
92
-
93
-
94
-
95
-
96
-
97
-
98
-
99
-
100
-
101
-
102
-
103
-
104
-
105
-
106
-
107
-
108
-
109
-
110
-
111
-
112
-
113
-
114
-
115
-
116
-
117
-
118
-
119
-
120
-
121
-
122
-
123
-
124
-
125
-
126
-
127
-
128
-
129
-
130
-
131
-
132
-
133
-
134
-
135
-
136
-
137
-
138
-
139
-
140
-
141
-
142
-
143
-
144
-
145
-
146
-
147
-
148
-
149
-
150
-
151
-
152
-
153
-
154
-
155
-
156
-
157
-
158
-
159
-
160
-
161
-
162
-
163
-
164
-
165
-
166
-
167
-
168
-
169
-
170
-
171
-
172
-
173
-
174
-
175
-
176
-
177
-
178
-
179
-
180
-
181
-
182
-
183
-
184
-
185
-
186
-
187
-
188
-
189
-
190
-
191
-
192
-
193
-
194
-
195
-
196
-
197
-
198
-
199
-
200
-
201
-
202
-
203
-
204
-
205
-
206
 |
 |