Epson DFX-8500 User Manual - Page 54
Changing the printer driver settings, Details, Job Default, Set Up, Options, Cancel
 |
View all Epson DFX-8500 manuals
Add to My Manuals
Save this manual to your list of manuals |
Page 54 highlights
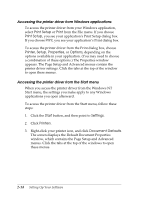
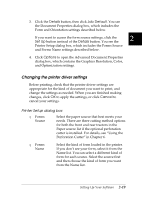
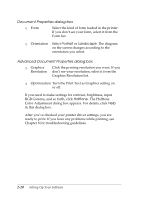
3. Click the Details button, then click Job Default. You see the Document Properties dialog box, which includes the Form and Orientation settings described below. If you want to access the form source settings, click the Set Up button instead of the Details button. You see the 2 Printer Setup dialog box, which includes the Forms Source and Forms Name settings described below. 4. Click Options to open the Advanced Document Properties dialog box, which contains the Graphics Resolution, Color, and Optimization settings. Changing the printer driver settings Before printing, check that the printer driver settings are appropriate for the kind of document you want to print, and change the settings as needed. When you are finished making changes, click OK to apply the settings, or click Cancel to cancel your settings. Printer Setup dialog box T Forms Source Select the paper source that best meets your needs. There are three cutting method options for both the front and rear tractors in the Paper source list if the optional perforation cutter is installed. For details, see "Using the Perforation Cutter" in Chapter 6. T Forms Name Select the kind of form loaded in the printer. If you don't see your form, select it from the Name list. You can select a different kind of form for each source. Select the source first and then choose the kind of form you want from the Name list. Setting Up Your Software 2-19
-
 1
1 -
2
-
3
-
4
-
5
-
6
-
7
-
8
-
9
-
10
-
11
-
12
-
13
-
14
-
15
-
16
-
17
-
18
-
19
-
20
-
21
-
22
-
23
-
24
-
25
-
26
-
27
-
28
-
29
-
30
-
31
-
32
-
33
-
34
-
35
-
36
-
37
-
38
-
39
-
40
-
41
-
42
-
43
-
44
-
45
-
46
-
47
-
48
-
 49
49 -
 50
50 -
 51
51 -
 52
52 -
 53
53 -
 54
54 -
 55
55 -
 56
56 -
 57
57 -
 58
58 -
 59
59 -
60
-
61
-
62
-
63
-
64
-
65
-
66
-
67
-
68
-
69
-
70
-
71
-
72
-
73
-
74
-
75
-
76
-
77
-
78
-
79
-
80
-
81
-
82
-
83
-
84
-
85
-
86
-
87
-
88
-
89
-
90
-
91
-
92
-
93
-
94
-
95
-
96
-
97
-
98
-
99
-
100
-
101
-
102
-
103
-
104
-
105
-
106
-
107
-
108
-
109
-
110
-
111
-
112
-
113
-
114
-
115
-
116
-
117
-
118
-
119
-
120
-
121
-
122
-
123
-
124
-
125
-
126
-
127
-
128
-
129
-
130
-
131
-
132
-
133
-
134
-
135
-
136
-
137
-
138
-
139
-
140
-
141
-
142
-
143
-
144
-
145
-
146
-
147
-
148
-
149
-
150
-
151
-
152
-
153
-
154
-
155
-
156
-
157
-
158
-
159
-
160
-
161
-
162
-
163
-
164
-
165
-
166
-
167
-
168
-
169
-
170
-
171
-
172
-
173
-
174
-
175
-
176
-
177
-
178
-
179
-
180
-
181
-
182
-
183
-
184
-
185
-
186
-
187
-
188
-
189
-
190
-
191
-
192
-
193
-
194
-
195
-
196
-
197
-
198
-
199
-
200
-
201
-
202
-
203
-
204
-
205
-
206
-
207
-
208
-
209
-
210
-
211
-
212
-
213
-
214
-
215
-
216
-
217
-
218
-
219
-
220
-
221
-
222
-
223
-
224
-
225
-
226
-
227
-
228
-
229
-
230
-
231
-
232
-
233
-
234
-
235
-
236
-
237
-
238
-
239
-
240
-
241
-
242
-
243
-
244
-
245
-
246
-
247
-
248
-
249
-
250
-
251
 |
 |
