Epson Stylus Scan 2000 User Manual - Page 106
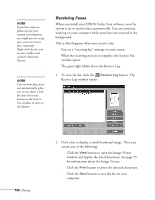
your screen after the first is scanned. Click, to scan more s or
 |
View all Epson Stylus Scan 2000 manuals
Add to My Manuals
Save this manual to your list of manuals |
Page 106 highlights
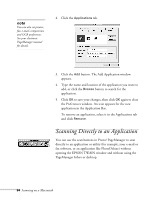
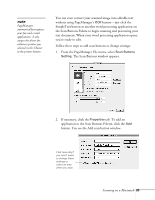
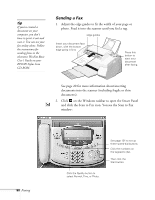
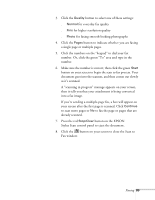
3. Click the Quality button to select one of these settings: s Normal for everyday fax quality s Fine for higher resolution quality s Photo for faxing smooth-looking photographs 4. Click the Pages button to indicate whether you are faxing a single page or multiple pages. 5. Click the numbers on the "keypad" to dial your fax number. Or, click the green "To" area and type in the number. 6. Make sure the number is correct; then click the green Start button on your screen to begin the scan to fax process. Your document goes into the scanner, and then comes out slowly as it's scanned. A "scanning in progress" message appears on your screen, then it tells you that your attachment is being converted into a fax image. If you're sending a multiple-page fax, a box will appear on your screen after the first page is scanned. Click Continue to scan more pages or No to fax the page or pages that are already scanned. 7. Press the red Stop/Clear button on the EPSON Stylus Scan control panel to eject the document. 8. Click the button on your screen to close the Scan to Fax window. Faxing 99
-
 1
1 -
2
-
3
-
4
-
5
-
6
-
7
-
8
-
9
-
10
-
11
-
12
-
13
-
14
-
15
-
16
-
17
-
18
-
19
-
20
-
21
-
22
-
23
-
24
-
25
-
26
-
27
-
28
-
29
-
30
-
31
-
32
-
33
-
34
-
35
-
36
-
37
-
38
-
39
-
40
-
41
-
42
-
43
-
44
-
45
-
46
-
47
-
48
-
49
-
50
-
51
-
52
-
53
-
54
-
55
-
56
-
57
-
58
-
59
-
60
-
61
-
62
-
63
-
64
-
65
-
66
-
67
-
68
-
69
-
70
-
71
-
72
-
73
-
74
-
75
-
76
-
77
-
78
-
79
-
80
-
81
-
82
-
83
-
84
-
85
-
86
-
87
-
88
-
89
-
90
-
91
-
92
-
93
-
94
-
95
-
96
-
97
-
98
-
99
-
100
-
 101
101 -
 102
102 -
 103
103 -
 104
104 -
 105
105 -
 106
106 -
 107
107 -
 108
108 -
 109
109 -
 110
110 -
 111
111 -
112
-
113
-
114
-
115
-
116
-
117
-
118
-
119
-
120
-
121
-
122
-
123
-
124
-
125
-
126
-
127
-
128
-
129
-
130
-
131
-
132
-
133
-
134
-
135
-
136
-
137
-
138
-
139
-
140
-
141
-
142
-
143
-
144
-
145
-
146
-
147
-
148
-
149
-
150
-
151
-
152
-
153
-
154
-
155
-
156
-
157
-
158
-
159
-
160
 |
 |