Epson Stylus Scan 2000 User Manual - Page 116
Using the Control Panel, Running a Nozzle Check, Maintaining Your EPSON Stylus Scan
 |
View all Epson Stylus Scan 2000 manuals
Add to My Manuals
Save this manual to your list of manuals |
Page 116 highlights
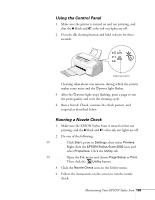
Using the Control Panel 1. Make sure the printer is turned on and not printing, and that the B black and A color ink out lights are off. 2. Press the R cleaning button and hold it down for three seconds. cleaning button Cleaning takes about one minute, during which the printer makes some noise and the Ppower light flashes. 3. After the Ppower light stops flashing, print a page to test the print quality and reset the cleaning cycle. 4. Run a Nozzle Check, examine the check pattern, and respond as described below. Running a Nozzle Check 1. Make sure the EPSON Stylus Scan is turned on but not printing, and the B black and A color ink out lights are off. 2. Do one of the following: W s Click Start, point to Settings, then select Printers. Right-click the EPSON Stylus Scan 2000 icon and select Properties. Click the Utility tab. M s Open the File menu and choose Page Setup or Print. Then click the Utility button. 3. Click the Nozzle Check icon on the Utility menu. 4. Follow the instructions on the screen to run the nozzle check. Maintaining Your EPSON Stylus Scan 109
-
 1
1 -
2
-
3
-
4
-
5
-
6
-
7
-
8
-
9
-
10
-
11
-
12
-
13
-
14
-
15
-
16
-
17
-
18
-
19
-
20
-
21
-
22
-
23
-
24
-
25
-
26
-
27
-
28
-
29
-
30
-
31
-
32
-
33
-
34
-
35
-
36
-
37
-
38
-
39
-
40
-
41
-
42
-
43
-
44
-
45
-
46
-
47
-
48
-
49
-
50
-
51
-
52
-
53
-
54
-
55
-
56
-
57
-
58
-
59
-
60
-
61
-
62
-
63
-
64
-
65
-
66
-
67
-
68
-
69
-
70
-
71
-
72
-
73
-
74
-
75
-
76
-
77
-
78
-
79
-
80
-
81
-
82
-
83
-
84
-
85
-
86
-
87
-
88
-
89
-
90
-
91
-
92
-
93
-
94
-
95
-
96
-
97
-
98
-
99
-
100
-
101
-
102
-
103
-
104
-
105
-
106
-
107
-
108
-
109
-
110
-
 111
111 -
 112
112 -
 113
113 -
 114
114 -
 115
115 -
 116
116 -
 117
117 -
 118
118 -
 119
119 -
 120
120 -
 121
121 -
122
-
123
-
124
-
125
-
126
-
127
-
128
-
129
-
130
-
131
-
132
-
133
-
134
-
135
-
136
-
137
-
138
-
139
-
140
-
141
-
142
-
143
-
144
-
145
-
146
-
147
-
148
-
149
-
150
-
151
-
152
-
153
-
154
-
155
-
156
-
157
-
158
-
159
-
160
 |
 |
