Epson Stylus Scan 2000 User Manual - Page 128
Running a Printer Check, Stylus Scan.
 |
View all Epson Stylus Scan 2000 manuals
Add to My Manuals
Save this manual to your list of manuals |
Page 128 highlights
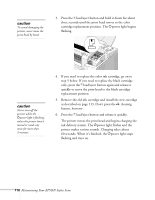
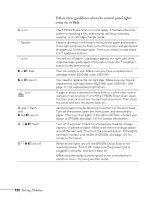
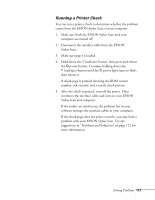
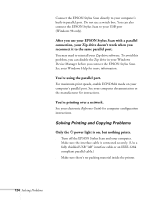
Running a Printer Check You can run a printer check to determine whether the problem comes from the EPSON Stylus Scan or your computer. 1. Make sure both the EPSON Stylus Scan and your computer are turned off. 2. Disconnect the interface cable from the EPSON Stylus Scan. 3. Make sure paper is loaded. 4. Hold down the E load/eject button, then press and release the P power button. Continue holding down the E load/eject button until the Ppower light starts to flash, then release it. A check page is printed, showing the ROM version number, ink counter, and a nozzle check pattern. 5. After the check is printed, turn off the power. Then reconnect the interface cable and turn on your EPSON Stylus Scan and computer. s If the results are satisfactory, the problem lies in your software settings, the interface cable, or your computer. s If the check page does not print correctly, you may have a problem with your EPSON Stylus Scan. Try the suggestions in "Problems and Solutions" on page 122 for more information. Solving Problems 121
-
 1
1 -
2
-
3
-
4
-
5
-
6
-
7
-
8
-
9
-
10
-
11
-
12
-
13
-
14
-
15
-
16
-
17
-
18
-
19
-
20
-
21
-
22
-
23
-
24
-
25
-
26
-
27
-
28
-
29
-
30
-
31
-
32
-
33
-
34
-
35
-
36
-
37
-
38
-
39
-
40
-
41
-
42
-
43
-
44
-
45
-
46
-
47
-
48
-
49
-
50
-
51
-
52
-
53
-
54
-
55
-
56
-
57
-
58
-
59
-
60
-
61
-
62
-
63
-
64
-
65
-
66
-
67
-
68
-
69
-
70
-
71
-
72
-
73
-
74
-
75
-
76
-
77
-
78
-
79
-
80
-
81
-
82
-
83
-
84
-
85
-
86
-
87
-
88
-
89
-
90
-
91
-
92
-
93
-
94
-
95
-
96
-
97
-
98
-
99
-
100
-
101
-
102
-
103
-
104
-
105
-
106
-
107
-
108
-
109
-
110
-
111
-
112
-
113
-
114
-
115
-
116
-
117
-
118
-
119
-
120
-
121
-
122
-
 123
123 -
 124
124 -
 125
125 -
 126
126 -
 127
127 -
 128
128 -
 129
129 -
 130
130 -
 131
131 -
 132
132 -
 133
133 -
134
-
135
-
136
-
137
-
138
-
139
-
140
-
141
-
142
-
143
-
144
-
145
-
146
-
147
-
148
-
149
-
150
-
151
-
152
-
153
-
154
-
155
-
156
-
157
-
158
-
159
-
160
 |
 |
