HP Xw4550 HP xw4550 Workstation - Service and Technical Reference Guide - Page 135
Configuring RAID devices, Introduction, Installing drives, Enabling RAID - workstation pdf
 |
UPC - 883585505951
View all HP Xw4550 manuals
Add to My Manuals
Save this manual to your list of manuals |
Page 135 highlights
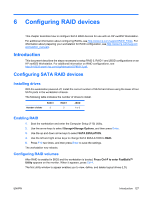
6 Configuring RAID devices This chapter describes how to configure SATA RAID devices for use with an HP xw4550 Workstation. For additional information about configuring RAIDs, see http://www.hp.com/support/RAID_FAQs. For information about preparing your workstation for RAID configuration, see http://www.hp.com/support/ workstation_manuals. Introduction This document describes the steps necessary to setup RAID 0, RAID 1 and JBOD configurations on an HP xw4550 Workstation. For additional information on RAID configurations, see http://h10032.www1.hp.com/ctg/Manual/c00786213.pdf. Configuring SATA RAID devices Installing drives With the workstation powered off, install the correct number of SATA hard drives using the lower of four SATA ports in the workstation chassis. The following table indicates the number of drives to install. Number of disks RAID 0 2 RAID 1 2 JBOD 1 or 2 Enabling RAID 1. Boot the workstation and enter the Computer Setup (F10) Utility. 2. Use the arrow keys to select Storage>Storage Options, and then press Enter. 3. Use the up and down arrow keys to select SATA EMULATION. 4. Use the left and right arrow keys to change SATA EMULATION to RAID. 5. Press F10 two times, and then press Enter to save the settings. The workstation now reboots. Configuring RAID volumes After RAID is enabled in BIOS and the workstation is booted, Press Ctrl-F to enter FastBuild™ Utility appears on the monitor. When it appears, press Ctrl-F. The first utility window to appear enables you to view, define, and delete logical drives (LD). ENWW Introduction 127
-
 1
1 -
2
-
3
-
4
-
5
-
6
-
7
-
8
-
9
-
10
-
11
-
12
-
13
-
14
-
15
-
16
-
17
-
18
-
19
-
20
-
21
-
22
-
23
-
24
-
25
-
26
-
27
-
28
-
29
-
30
-
31
-
32
-
33
-
34
-
35
-
36
-
37
-
38
-
39
-
40
-
41
-
42
-
43
-
44
-
45
-
46
-
47
-
48
-
49
-
50
-
51
-
52
-
53
-
54
-
55
-
56
-
57
-
58
-
59
-
60
-
61
-
62
-
63
-
64
-
65
-
66
-
67
-
68
-
69
-
70
-
71
-
72
-
73
-
74
-
75
-
76
-
77
-
78
-
79
-
80
-
81
-
82
-
83
-
84
-
85
-
86
-
87
-
88
-
89
-
90
-
91
-
92
-
93
-
94
-
95
-
96
-
97
-
98
-
99
-
100
-
101
-
102
-
103
-
104
-
105
-
106
-
107
-
108
-
109
-
110
-
111
-
112
-
113
-
114
-
115
-
116
-
117
-
118
-
119
-
120
-
121
-
122
-
123
-
124
-
125
-
126
-
127
-
128
-
129
-
 130
130 -
 131
131 -
 132
132 -
 133
133 -
 134
134 -
 135
135 -
 136
136 -
 137
137 -
 138
138 -
 139
139 -
 140
140 -
141
-
142
-
143
-
144
-
145
-
146
-
147
-
148
-
149
-
150
-
151
-
152
-
153
-
154
 |
 |
