HP Xw4550 HP xw4550 Workstation - Service and Technical Reference Guide - Page 42
Updating and managing software, HP Client Manager Software
 |
UPC - 883585505951
View all HP Xw4550 manuals
Add to My Manuals
Save this manual to your list of manuals |
Page 42 highlights
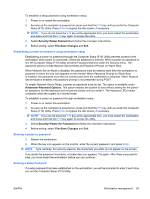
4. As soon as the workstation powers on, press and hold the F10 key until you enter the Computer Setup (F10) Utility. Press Enter to bypass the title screen, if necessary. NOTE: If you do not press the F10 key at the appropriate time, you must restart the workstation and press and hold the F10 key again to access the utility. 5. If you are using a diskette or other storage device, insert it now. 6. Select File>Replicated Setup>Save to Removable Media. Follow the instructions on the screen to create the configuration diskette. 7. Download a BIOS utility for replicating setup (repset.exe) and copy it onto the configuration diskette. To obtain this utility, see: http://www.hp.com/support/workstation_swdriversand enter the model number of the workstation. 8. On the configuration diskette, create an autoexec.bat file containing: repset.exe cpqsetup.txt. 9. Power off the workstation to be configured. Insert the configuration diskette, and power on the workstation. The configuration utility runs automatically. 10. Restart the workstation when the configuration is complete. Updating and managing software HP provides several tools for managing and updating software on desktops and workstations-HP Client Manager Software, Altiris Client Management Solutions, System Software Manager, Proactive Change Notification, and Subscriber's Choice. HP Client Manager Software HP Client Manager Software (HP CMS) assists HP customers in managing the hardware aspects of their client workstations with features that include: ● Detailed views of hardware inventory for asset management ● PC health check monitoring and diagnostics ● Proactive notification of changes in the hardware environment ● Web-accessible reporting of business-critical details such as machines with thermal warnings, memory alerts, and more ● Remote updating of system software such as device drivers and ROM BIOS ● Remote changing of boot order ● Configuring the system BIOS settings For more information on the HP Client Manager, see: http://www.hp.com/go/ssm. 34 Chapter 3 System management ENWW
-
 1
1 -
2
-
3
-
4
-
5
-
6
-
7
-
8
-
9
-
10
-
11
-
12
-
13
-
14
-
15
-
16
-
17
-
18
-
19
-
20
-
21
-
22
-
23
-
24
-
25
-
26
-
27
-
28
-
29
-
30
-
31
-
32
-
33
-
34
-
35
-
36
-
 37
37 -
 38
38 -
 39
39 -
 40
40 -
 41
41 -
 42
42 -
 43
43 -
 44
44 -
 45
45 -
 46
46 -
 47
47 -
48
-
49
-
50
-
51
-
52
-
53
-
54
-
55
-
56
-
57
-
58
-
59
-
60
-
61
-
62
-
63
-
64
-
65
-
66
-
67
-
68
-
69
-
70
-
71
-
72
-
73
-
74
-
75
-
76
-
77
-
78
-
79
-
80
-
81
-
82
-
83
-
84
-
85
-
86
-
87
-
88
-
89
-
90
-
91
-
92
-
93
-
94
-
95
-
96
-
97
-
98
-
99
-
100
-
101
-
102
-
103
-
104
-
105
-
106
-
107
-
108
-
109
-
110
-
111
-
112
-
113
-
114
-
115
-
116
-
117
-
118
-
119
-
120
-
121
-
122
-
123
-
124
-
125
-
126
-
127
-
128
-
129
-
130
-
131
-
132
-
133
-
134
-
135
-
136
-
137
-
138
-
139
-
140
-
141
-
142
-
143
-
144
-
145
-
146
-
147
-
148
-
149
-
150
-
151
-
152
-
153
-
154
 |
 |
