IBM 4230 User Guide - Page 111
right roller, assembly, finger grips, platen rod
 |
View all IBM 4230 manuals
Add to My Manuals
Save this manual to your list of manuals |
Page 111 highlights
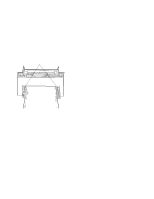
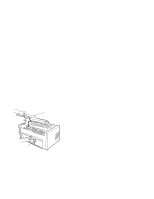
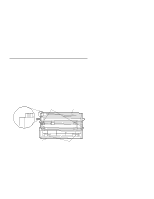
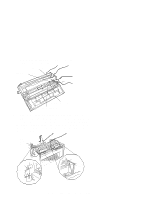
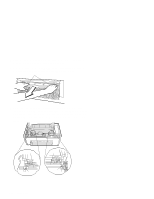
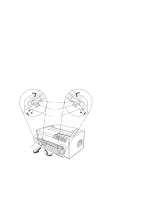
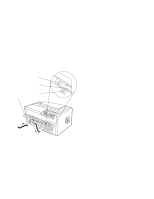
2. Unlock the blue locking lever and move the right roller assembly to the extreme right. B lu e L o c k in g L e v e r R ig h t R o lle r A s s e m b ly B o tto m o f F o rm s D e v ic e B lu e S lid in g G u id e 3. Hold the device at the top with the F3 in the upper left corner facing you. The finger grips should be at the bottom and should enter the printer first. Lower the device into the printer behind the platen rod and align the ends of the device with the slots in the frame. Continue to lower the device until the ends of the device rest in the slots of the frame. To p o f F o rm s D e v ic e E nd of D e v ic e S lo t in F ra m e P la te n R o d E nd of D e v ic e S lo t in F ra m e Chapter 1. Setting Up the 4230 Printer 1-89
-
 1
1 -
2
-
3
-
4
-
5
-
6
-
7
-
8
-
9
-
10
-
11
-
12
-
13
-
14
-
15
-
16
-
17
-
18
-
19
-
20
-
21
-
22
-
23
-
24
-
25
-
26
-
27
-
28
-
29
-
30
-
31
-
32
-
33
-
34
-
35
-
36
-
37
-
38
-
39
-
40
-
41
-
42
-
43
-
44
-
45
-
46
-
47
-
48
-
49
-
50
-
51
-
52
-
53
-
54
-
55
-
56
-
57
-
58
-
59
-
60
-
61
-
62
-
63
-
64
-
65
-
66
-
67
-
68
-
69
-
70
-
71
-
72
-
73
-
74
-
75
-
76
-
77
-
78
-
79
-
80
-
81
-
82
-
83
-
84
-
85
-
86
-
87
-
88
-
89
-
90
-
91
-
92
-
93
-
94
-
95
-
96
-
97
-
98
-
99
-
100
-
101
-
102
-
103
-
104
-
105
-
 106
106 -
 107
107 -
 108
108 -
 109
109 -
 110
110 -
 111
111 -
 112
112 -
 113
113 -
 114
114 -
 115
115 -
 116
116 -
117
-
118
-
119
-
120
-
121
-
122
-
123
-
124
-
125
-
126
-
127
-
128
-
129
-
130
-
131
-
132
-
133
-
134
-
135
-
136
-
137
-
138
-
139
-
140
-
141
-
142
-
143
-
144
-
145
-
146
-
147
-
148
-
149
-
150
-
151
-
152
-
153
-
154
-
155
-
156
-
157
-
158
-
159
-
160
-
161
-
162
-
163
-
164
-
165
-
166
-
167
-
168
-
169
-
170
-
171
-
172
-
173
-
174
-
175
-
176
-
177
-
178
-
179
-
180
-
181
-
182
-
183
-
184
-
185
-
186
-
187
-
188
-
189
-
190
-
191
-
192
-
193
-
194
-
195
-
196
-
197
-
198
-
199
-
200
-
201
-
202
-
203
-
204
-
205
-
206
-
207
-
208
-
209
-
210
-
211
-
212
-
213
-
214
-
215
-
216
-
217
-
218
-
219
-
220
-
221
-
222
-
223
-
224
-
225
-
226
-
227
-
228
-
229
-
230
-
231
-
232
-
233
-
234
-
235
-
236
-
237
-
238
-
239
-
240
-
241
-
242
-
243
-
244
-
245
-
246
-
247
-
248
-
249
-
250
-
251
-
252
-
253
-
254
-
255
-
256
-
257
-
258
-
259
-
260
-
261
-
262
-
263
-
264
-
265
-
266
-
267
-
268
-
269
-
270
-
271
-
272
-
273
-
274
-
275
-
276
-
277
-
278
-
279
-
280
-
281
-
282
-
283
-
284
-
285
-
286
-
287
-
288
-
289
-
290
-
291
-
292
-
293
-
294
-
295
-
296
-
297
-
298
-
299
-
300
-
301
-
302
-
303
-
304
-
305
-
306
-
307
-
308
-
309
-
310
-
311
-
312
-
313
-
314
-
315
-
316
-
317
-
318
-
319
-
320
 |
 |
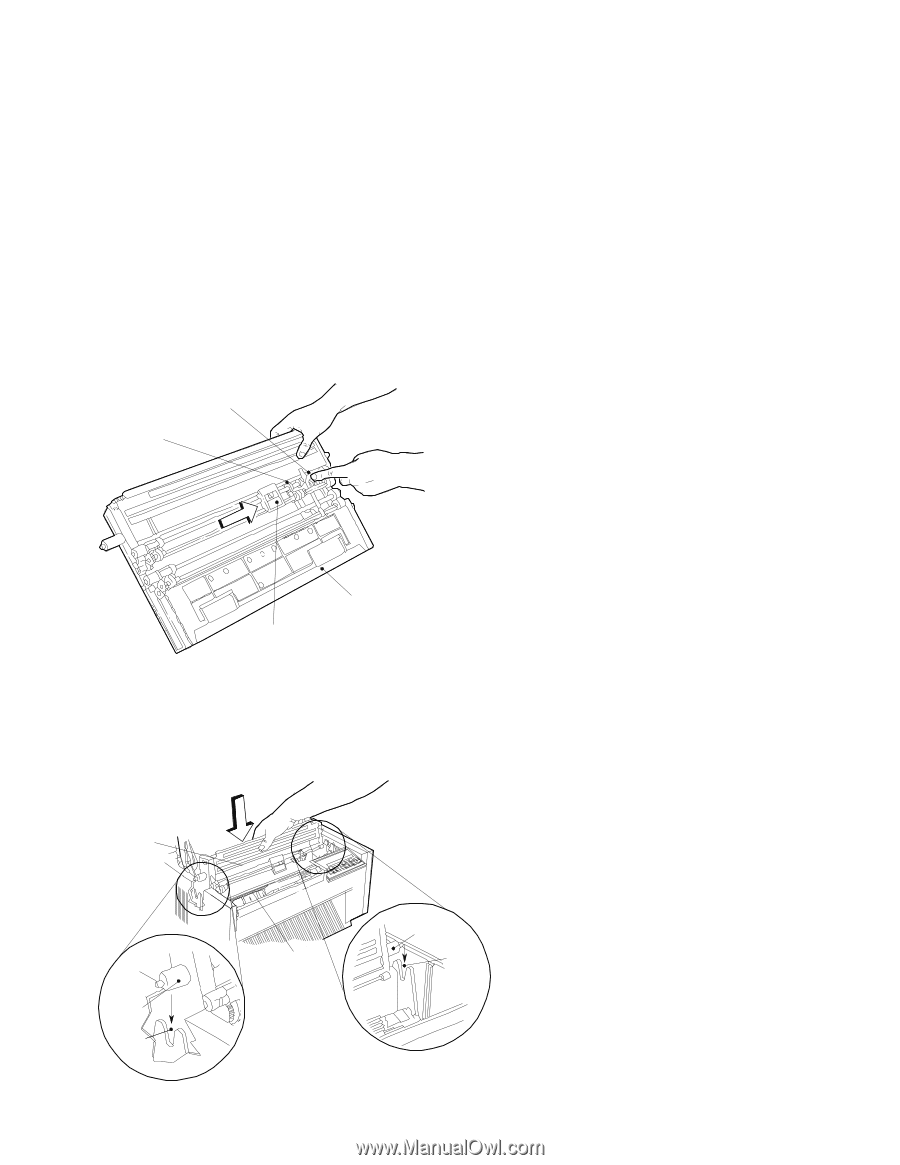
2. Unlock the
blue locking lever
and move the
right roller
assembly
to the extreme right.
B
lue
Locking
Lever
R
ight
R
o lle r
A
ssem
b ly
Bottom
of
Form
s
D
evice
B
lu e
S
lid in g
G
uide
3. Hold the device at the top with the
F3
in the upper left corner
facing you.
The
finger grips
should be at the bottom and should
enter the printer first.
Lower the device into the printer behind
the
platen rod
and align the ends of the device with the slots in
the frame.
Continue to lower the device until the ends of the
device rest in the slots of the frame.
End
of
D
e v ic e
End
of
D
e v ic e
S lo t
in
Fram
e
S lo t
in
Fram
e
Top
of
Form
s
D
e v ic e
P la te n
R
od
Chapter 1.
Setting Up the 4230 Printer
1-89