IBM 4230 User Guide - Page 189
Starting a Print Job - - 4s3 printer ribbon
 |
View all IBM 4230 manuals
Add to My Manuals
Save this manual to your list of manuals |
Page 189 highlights
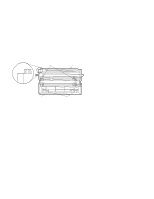
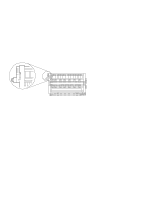
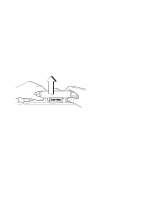
Starting a Print Job To start a print job, follow this checklist: 1. Be sure a ribbon cartridge is installed (see "Installing the Ribbon Cartridge and Guide" on page 1-6 or Chapter 4, "Replacing Your Ribbon"). 2. Be sure the desired forms device is installed. See "Installing and Using the Continuous Forms Device (F1)" on page 1-21, or See "Installing and Using the Dual Purpose Forms Device (F2)" on page 1-55, or See "Installing and Using the Document Insertion Device (F3)" on page 1-88, or See "Setting Up Your 4230 Printer with ASF" in IBM 4230 Printer Auto Sheet Feeder General Information for information on using the Auto Sheet Feeder. 3. Be sure that the parameter values agree with the application you are to print. See the procedures for setting your parameter values in IBM 4230 Printer Models 101, 1S2, 201, 2S2, 4S3, and 5S3 Operator Panel Instructions. 4. Load forms. When you load forms, be sure that you use the correct forms loading procedure and do all of the following: a. Set the correct forms device setting. b. Set the top of form position. c. Adjust the left margin (if needed). d. Adjust the forms tension (Continuous Forms Device [F1] only). 5. Verify that the computer is ready to send information to the printer. Chapter 3. Getting to Know Your Printer 3-25
-
 1
1 -
2
-
3
-
4
-
5
-
6
-
7
-
8
-
9
-
10
-
11
-
12
-
13
-
14
-
15
-
16
-
17
-
18
-
19
-
20
-
21
-
22
-
23
-
24
-
25
-
26
-
27
-
28
-
29
-
30
-
31
-
32
-
33
-
34
-
35
-
36
-
37
-
38
-
39
-
40
-
41
-
42
-
43
-
44
-
45
-
46
-
47
-
48
-
49
-
50
-
51
-
52
-
53
-
54
-
55
-
56
-
57
-
58
-
59
-
60
-
61
-
62
-
63
-
64
-
65
-
66
-
67
-
68
-
69
-
70
-
71
-
72
-
73
-
74
-
75
-
76
-
77
-
78
-
79
-
80
-
81
-
82
-
83
-
84
-
85
-
86
-
87
-
88
-
89
-
90
-
91
-
92
-
93
-
94
-
95
-
96
-
97
-
98
-
99
-
100
-
101
-
102
-
103
-
104
-
105
-
106
-
107
-
108
-
109
-
110
-
111
-
112
-
113
-
114
-
115
-
116
-
117
-
118
-
119
-
120
-
121
-
122
-
123
-
124
-
125
-
126
-
127
-
128
-
129
-
130
-
131
-
132
-
133
-
134
-
135
-
136
-
137
-
138
-
139
-
140
-
141
-
142
-
143
-
144
-
145
-
146
-
147
-
148
-
149
-
150
-
151
-
152
-
153
-
154
-
155
-
156
-
157
-
158
-
159
-
160
-
161
-
162
-
163
-
164
-
165
-
166
-
167
-
168
-
169
-
170
-
171
-
172
-
173
-
174
-
175
-
176
-
177
-
178
-
179
-
180
-
181
-
182
-
183
-
 184
184 -
 185
185 -
 186
186 -
 187
187 -
 188
188 -
 189
189 -
 190
190 -
 191
191 -
 192
192 -
 193
193 -
 194
194 -
195
-
196
-
197
-
198
-
199
-
200
-
201
-
202
-
203
-
204
-
205
-
206
-
207
-
208
-
209
-
210
-
211
-
212
-
213
-
214
-
215
-
216
-
217
-
218
-
219
-
220
-
221
-
222
-
223
-
224
-
225
-
226
-
227
-
228
-
229
-
230
-
231
-
232
-
233
-
234
-
235
-
236
-
237
-
238
-
239
-
240
-
241
-
242
-
243
-
244
-
245
-
246
-
247
-
248
-
249
-
250
-
251
-
252
-
253
-
254
-
255
-
256
-
257
-
258
-
259
-
260
-
261
-
262
-
263
-
264
-
265
-
266
-
267
-
268
-
269
-
270
-
271
-
272
-
273
-
274
-
275
-
276
-
277
-
278
-
279
-
280
-
281
-
282
-
283
-
284
-
285
-
286
-
287
-
288
-
289
-
290
-
291
-
292
-
293
-
294
-
295
-
296
-
297
-
298
-
299
-
300
-
301
-
302
-
303
-
304
-
305
-
306
-
307
-
308
-
309
-
310
-
311
-
312
-
313
-
314
-
315
-
316
-
317
-
318
-
319
-
320
 |
 |