IBM 4230 User Guide - Page 143
Diagnostics In Progress, <a>, Diagnostics Complete, ²15 Communications Check, Check Cable,
 |
View all IBM 4230 manuals
Add to My Manuals
Save this manual to your list of manuals |
Page 143 highlights
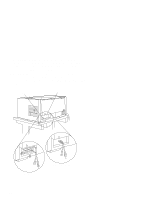
To set the printer address, follow these steps: a. Turn the power On (|). All indicators and blocks on the display light, and the alarm beeps. The printer then displays DIAGNOSTICS IN PROGRESS DIAGNOSTICS COMPLETE and an error message displays. b. Press Stop. The printer displays 15 COMMUNICATIONS CHECK CHECK CABLE c. Press Menu. Then press Scroll ↑ or Scroll ↓ until the printer displays CONFIGURATION MENU Printer Address d. Press Enter. The printer displays Printer Address ᑍ Chapter 2. Attaching the 4230 Printer to Your Computer 2-3
-
 1
1 -
2
-
3
-
4
-
5
-
6
-
7
-
8
-
9
-
10
-
11
-
12
-
13
-
14
-
15
-
16
-
17
-
18
-
19
-
20
-
21
-
22
-
23
-
24
-
25
-
26
-
27
-
28
-
29
-
30
-
31
-
32
-
33
-
34
-
35
-
36
-
37
-
38
-
39
-
40
-
41
-
42
-
43
-
44
-
45
-
46
-
47
-
48
-
49
-
50
-
51
-
52
-
53
-
54
-
55
-
56
-
57
-
58
-
59
-
60
-
61
-
62
-
63
-
64
-
65
-
66
-
67
-
68
-
69
-
70
-
71
-
72
-
73
-
74
-
75
-
76
-
77
-
78
-
79
-
80
-
81
-
82
-
83
-
84
-
85
-
86
-
87
-
88
-
89
-
90
-
91
-
92
-
93
-
94
-
95
-
96
-
97
-
98
-
99
-
100
-
101
-
102
-
103
-
104
-
105
-
106
-
107
-
108
-
109
-
110
-
111
-
112
-
113
-
114
-
115
-
116
-
117
-
118
-
119
-
120
-
121
-
122
-
123
-
124
-
125
-
126
-
127
-
128
-
129
-
130
-
131
-
132
-
133
-
134
-
135
-
136
-
137
-
 138
138 -
 139
139 -
 140
140 -
 141
141 -
 142
142 -
 143
143 -
 144
144 -
 145
145 -
 146
146 -
 147
147 -
 148
148 -
149
-
150
-
151
-
152
-
153
-
154
-
155
-
156
-
157
-
158
-
159
-
160
-
161
-
162
-
163
-
164
-
165
-
166
-
167
-
168
-
169
-
170
-
171
-
172
-
173
-
174
-
175
-
176
-
177
-
178
-
179
-
180
-
181
-
182
-
183
-
184
-
185
-
186
-
187
-
188
-
189
-
190
-
191
-
192
-
193
-
194
-
195
-
196
-
197
-
198
-
199
-
200
-
201
-
202
-
203
-
204
-
205
-
206
-
207
-
208
-
209
-
210
-
211
-
212
-
213
-
214
-
215
-
216
-
217
-
218
-
219
-
220
-
221
-
222
-
223
-
224
-
225
-
226
-
227
-
228
-
229
-
230
-
231
-
232
-
233
-
234
-
235
-
236
-
237
-
238
-
239
-
240
-
241
-
242
-
243
-
244
-
245
-
246
-
247
-
248
-
249
-
250
-
251
-
252
-
253
-
254
-
255
-
256
-
257
-
258
-
259
-
260
-
261
-
262
-
263
-
264
-
265
-
266
-
267
-
268
-
269
-
270
-
271
-
272
-
273
-
274
-
275
-
276
-
277
-
278
-
279
-
280
-
281
-
282
-
283
-
284
-
285
-
286
-
287
-
288
-
289
-
290
-
291
-
292
-
293
-
294
-
295
-
296
-
297
-
298
-
299
-
300
-
301
-
302
-
303
-
304
-
305
-
306
-
307
-
308
-
309
-
310
-
311
-
312
-
313
-
314
-
315
-
316
-
317
-
318
-
319
-
320
 |
 |

To set the printer address, follow these steps:
a. Turn the power On (|).
All indicators and blocks on the
display light, and the alarm beeps.
The printer then displays
and an error message displays.
b. Press
Stop
.
The printer displays
c. Press
Menu
.
Then press
Scroll
↑
or
Scroll
↓
until the
printer displays
d. Press
Enter
.
The printer displays
DIAGNOSTICS IN PROGRESS
<A>
DIAGNOSTICS COMPLETE
<A>
²15 COMMUNICATIONS CHECK
CHECK CABLE
CONFIGURATION MENU
Printer Address
Printer Address
冗 ²²²
Chapter 2.
Attaching the 4230 Printer to Your Computer
2-3