IBM 4840-544 Service Guide - Page 133
drawer
 |
View all IBM 4840-544 manuals
Add to My Manuals
Save this manual to your list of manuals |
Page 133 highlights
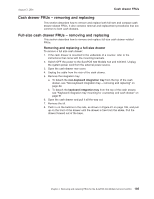
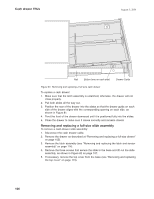
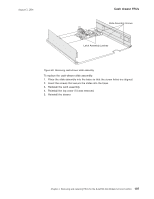
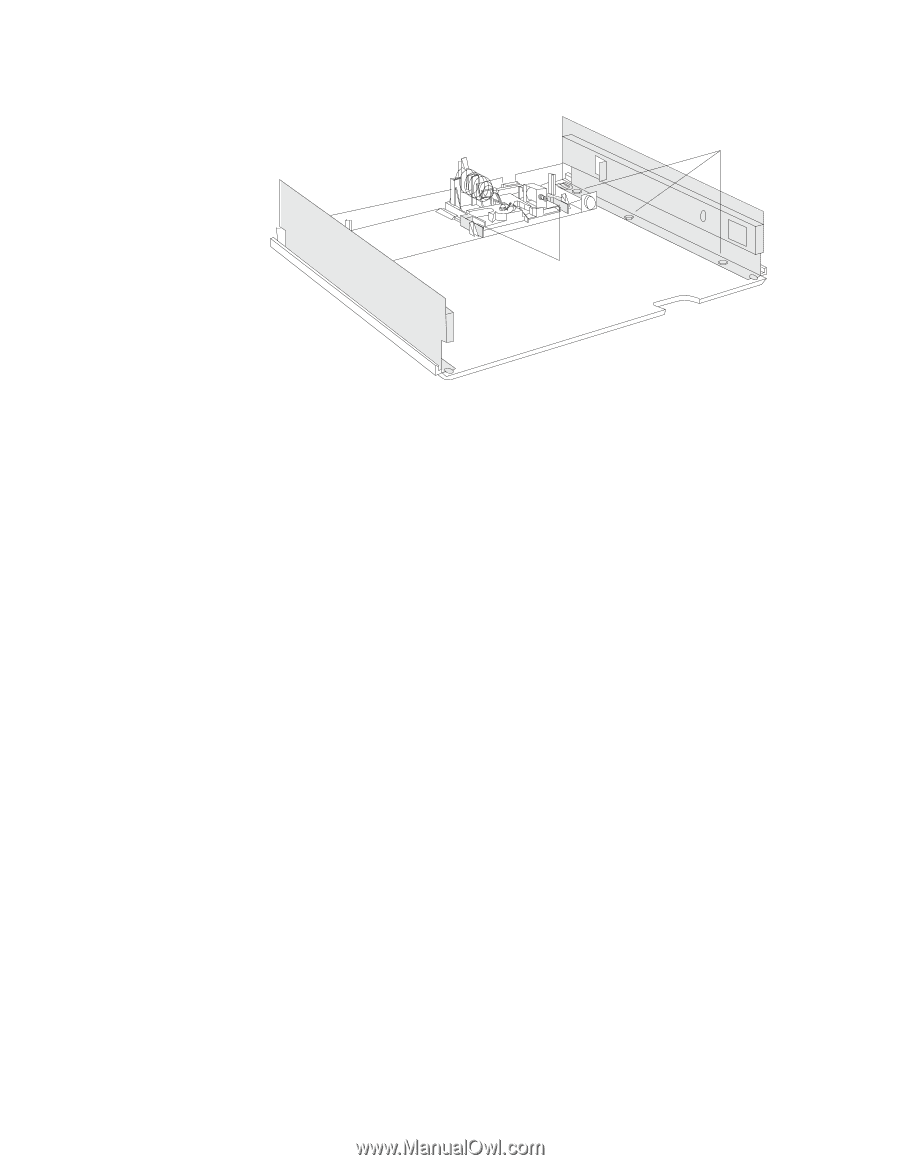
August 3, 2006 Cash drawer FRUs Slide Assembly Screws Latch Assembly Latches Figure 82. Removing cash-drawer slide assembly To replace the cash-drawer slide assembly: 1. Place the slide assembly into the base so that the screw holes are aligned. 2. Insert the screws that secure the slides into the base. 3. Reinstall the latch assembly. 4. Reinstall the top cover if it was removed. 5. Reinstall the drawer. Chapter 4. Removing and replacing FRUs for the SurePOS 500 Models 5x3 and 544/564 107
-
 1
1 -
2
-
3
-
4
-
5
-
6
-
7
-
8
-
9
-
10
-
11
-
12
-
13
-
14
-
15
-
16
-
17
-
18
-
19
-
20
-
21
-
22
-
23
-
24
-
25
-
26
-
27
-
28
-
29
-
30
-
31
-
32
-
33
-
34
-
35
-
36
-
37
-
38
-
39
-
40
-
41
-
42
-
43
-
44
-
45
-
46
-
47
-
48
-
49
-
50
-
51
-
52
-
53
-
54
-
55
-
56
-
57
-
58
-
59
-
60
-
61
-
62
-
63
-
64
-
65
-
66
-
67
-
68
-
69
-
70
-
71
-
72
-
73
-
74
-
75
-
76
-
77
-
78
-
79
-
80
-
81
-
82
-
83
-
84
-
85
-
86
-
87
-
88
-
89
-
90
-
91
-
92
-
93
-
94
-
95
-
96
-
97
-
98
-
99
-
100
-
101
-
102
-
103
-
104
-
105
-
106
-
107
-
108
-
109
-
110
-
111
-
112
-
113
-
114
-
115
-
116
-
117
-
118
-
119
-
120
-
121
-
122
-
123
-
124
-
125
-
126
-
127
-
 128
128 -
 129
129 -
 130
130 -
 131
131 -
 132
132 -
 133
133 -
 134
134 -
 135
135 -
 136
136 -
 137
137 -
 138
138 -
139
-
140
-
141
-
142
-
143
-
144
-
145
-
146
-
147
-
148
-
149
-
150
-
151
-
152
-
153
-
154
-
155
-
156
-
157
-
158
-
159
-
160
-
161
-
162
-
163
-
164
-
165
-
166
-
167
-
168
-
169
-
170
-
171
-
172
-
173
-
174
-
175
-
176
-
177
-
178
-
179
-
180
-
181
-
182
-
183
-
184
-
185
-
186
-
187
-
188
-
189
-
190
-
191
-
192
-
193
-
194
-
195
-
196
-
197
-
198
-
199
-
200
-
201
-
202
-
203
-
204
-
205
-
206
-
207
-
208
-
209
-
210
-
211
-
212
-
213
-
214
-
215
-
216
-
217
-
218
-
219
-
220
-
221
-
222
-
223
-
224
-
225
-
226
-
227
-
228
-
229
-
230
-
231
-
232
-
233
-
234
-
235
-
236
-
237
-
238
-
239
-
240
-
241
-
242
-
243
-
244
-
245
-
246
-
247
-
248
-
249
-
250
-
251
-
252
-
253
-
254
-
255
-
256
-
257
-
258
 |
 |
To
replace
the
cash-drawer
slide
assembly:
1.
Place
the
slide
assembly
into
the
base
so
that
the
screw
holes
are
aligned.
2.
Insert
the
screws
that
secure
the
slides
into
the
base.
3.
Reinstall
the
latch
assembly.
4.
Reinstall
the
top
cover
if
it
was
removed.
5.
Reinstall
the
drawer.
Latch Assembly Latches
Slide Assembly Screws
Figure
82.
Removing
cash-drawer
slide
assembly
Cash
drawer
FRUs
August
3,
2006
Chapter
4.
Removing
and
replacing
FRUs
for
the
SurePOS
500
Models
5x3
and
544/564
107