IBM 4840-544 Service Guide - Page 156
SurePoint, Solution, Model, removal, keyboard, integration
 |
View all IBM 4840-544 manuals
Add to My Manuals
Save this manual to your list of manuals |
Page 156 highlights
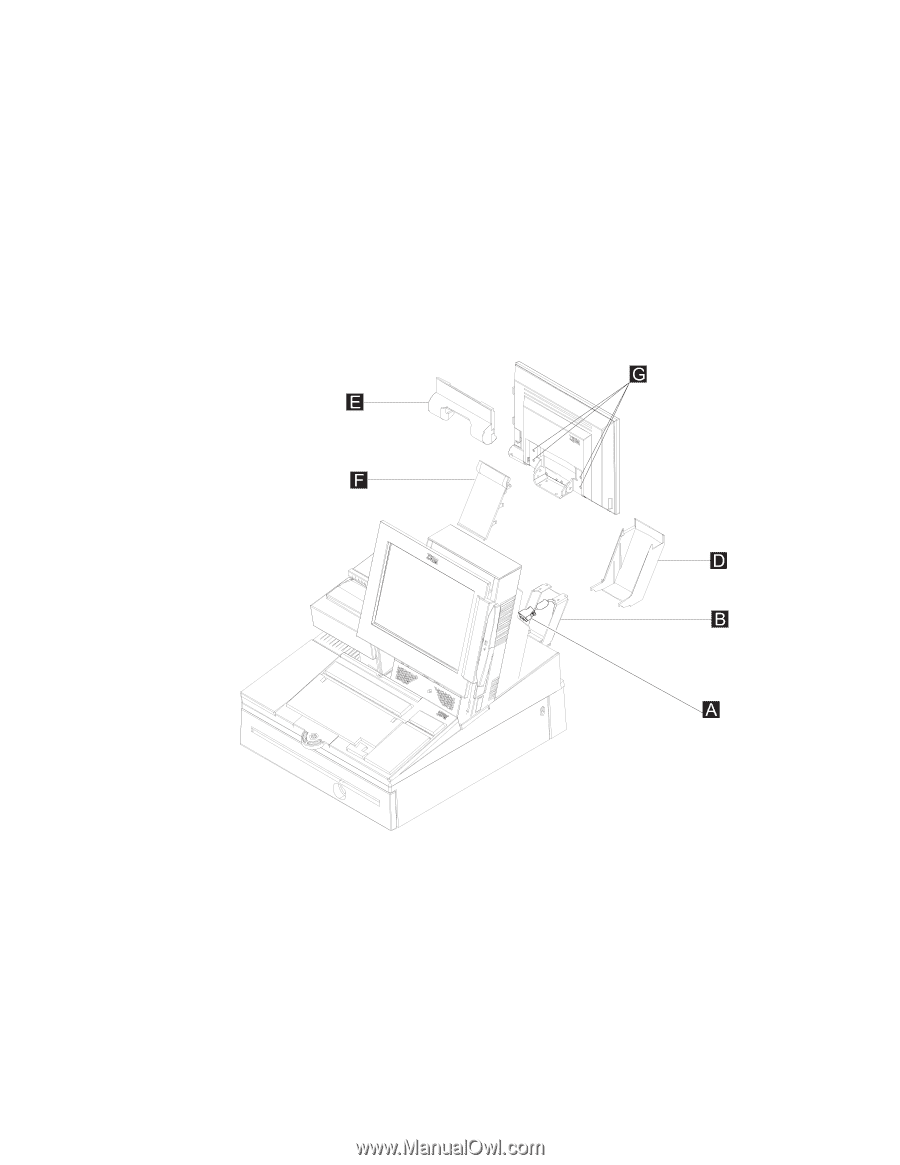
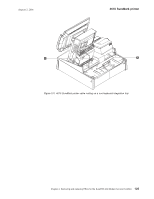
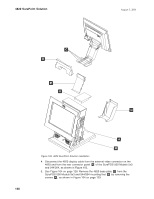
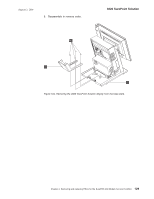
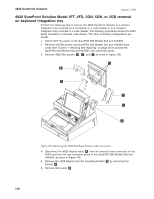
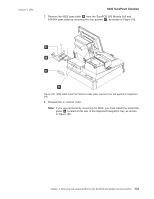
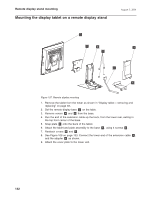
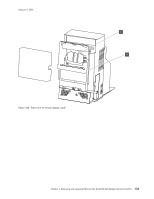
4820 SurePoint Solution August 3, 2006 4820 SurePoint Solution Model 4FT, 4FD, 2GN, 5GN, or 2GB removal on keyboard integration tray Perform the following step to remove the 4820 SurePoint Solution to a full-size integration tray mounted on a countertop or a cash drawer or to a compact integration tray mounted to a cash drawer. The following procedure shows the 4820 being mounted to a full-size cash drawer. The other mounting configurations are similar. 1. Switch OFF the power at the SurePOS 500 Models 5x3 and 544/564. 2. Remove the filler panels and SurePOS 500 Models 5x3 and 544/564 base cover (see "Covers - removing and replacing" on page 36) to access the SurePOS 500 Models 5x3 and 544/564 rear connector panel. 3. Remove 4820 filler panels D , E , and F as show in Figure 105. Figure 105. Removing the 4820 SurePoint Solution cable and covers 4. Disconnect the 4820 display cable A from the external video connector on the 4820 and from the rear connector panel of the SurePOS 500 Models 5x3 and 544/564, as show in Figure 105. 5. Remove the 4820 display from the mounting bracket B by removing four screws G . 6. Remove filler panel D . 130
-
 1
1 -
2
-
3
-
4
-
5
-
6
-
7
-
8
-
9
-
10
-
11
-
12
-
13
-
14
-
15
-
16
-
17
-
18
-
19
-
20
-
21
-
22
-
23
-
24
-
25
-
26
-
27
-
28
-
29
-
30
-
31
-
32
-
33
-
34
-
35
-
36
-
37
-
38
-
39
-
40
-
41
-
42
-
43
-
44
-
45
-
46
-
47
-
48
-
49
-
50
-
51
-
52
-
53
-
54
-
55
-
56
-
57
-
58
-
59
-
60
-
61
-
62
-
63
-
64
-
65
-
66
-
67
-
68
-
69
-
70
-
71
-
72
-
73
-
74
-
75
-
76
-
77
-
78
-
79
-
80
-
81
-
82
-
83
-
84
-
85
-
86
-
87
-
88
-
89
-
90
-
91
-
92
-
93
-
94
-
95
-
96
-
97
-
98
-
99
-
100
-
101
-
102
-
103
-
104
-
105
-
106
-
107
-
108
-
109
-
110
-
111
-
112
-
113
-
114
-
115
-
116
-
117
-
118
-
119
-
120
-
121
-
122
-
123
-
124
-
125
-
126
-
127
-
128
-
129
-
130
-
131
-
132
-
133
-
134
-
135
-
136
-
137
-
138
-
139
-
140
-
141
-
142
-
143
-
144
-
145
-
146
-
147
-
148
-
149
-
150
-
 151
151 -
 152
152 -
 153
153 -
 154
154 -
 155
155 -
 156
156 -
 157
157 -
 158
158 -
 159
159 -
 160
160 -
 161
161 -
162
-
163
-
164
-
165
-
166
-
167
-
168
-
169
-
170
-
171
-
172
-
173
-
174
-
175
-
176
-
177
-
178
-
179
-
180
-
181
-
182
-
183
-
184
-
185
-
186
-
187
-
188
-
189
-
190
-
191
-
192
-
193
-
194
-
195
-
196
-
197
-
198
-
199
-
200
-
201
-
202
-
203
-
204
-
205
-
206
-
207
-
208
-
209
-
210
-
211
-
212
-
213
-
214
-
215
-
216
-
217
-
218
-
219
-
220
-
221
-
222
-
223
-
224
-
225
-
226
-
227
-
228
-
229
-
230
-
231
-
232
-
233
-
234
-
235
-
236
-
237
-
238
-
239
-
240
-
241
-
242
-
243
-
244
-
245
-
246
-
247
-
248
-
249
-
250
-
251
-
252
-
253
-
254
-
255
-
256
-
257
-
258
 |
 |