HP 4100n HP LaserJet 4100 Series - User Guide - Page 58
Loading envelopes in tray 1, envelope stack without bending
 |
View all HP 4100n manuals
Add to My Manuals
Save this manual to your list of manuals |
Page 58 highlights
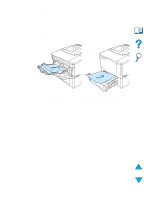
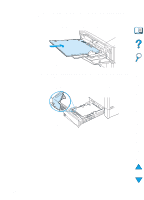
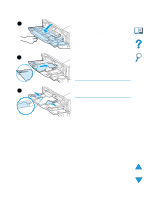
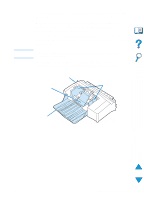
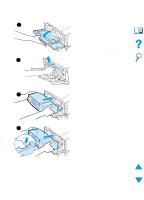
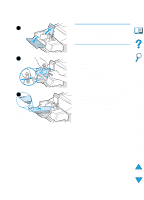
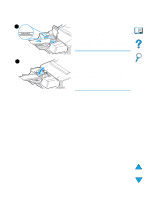
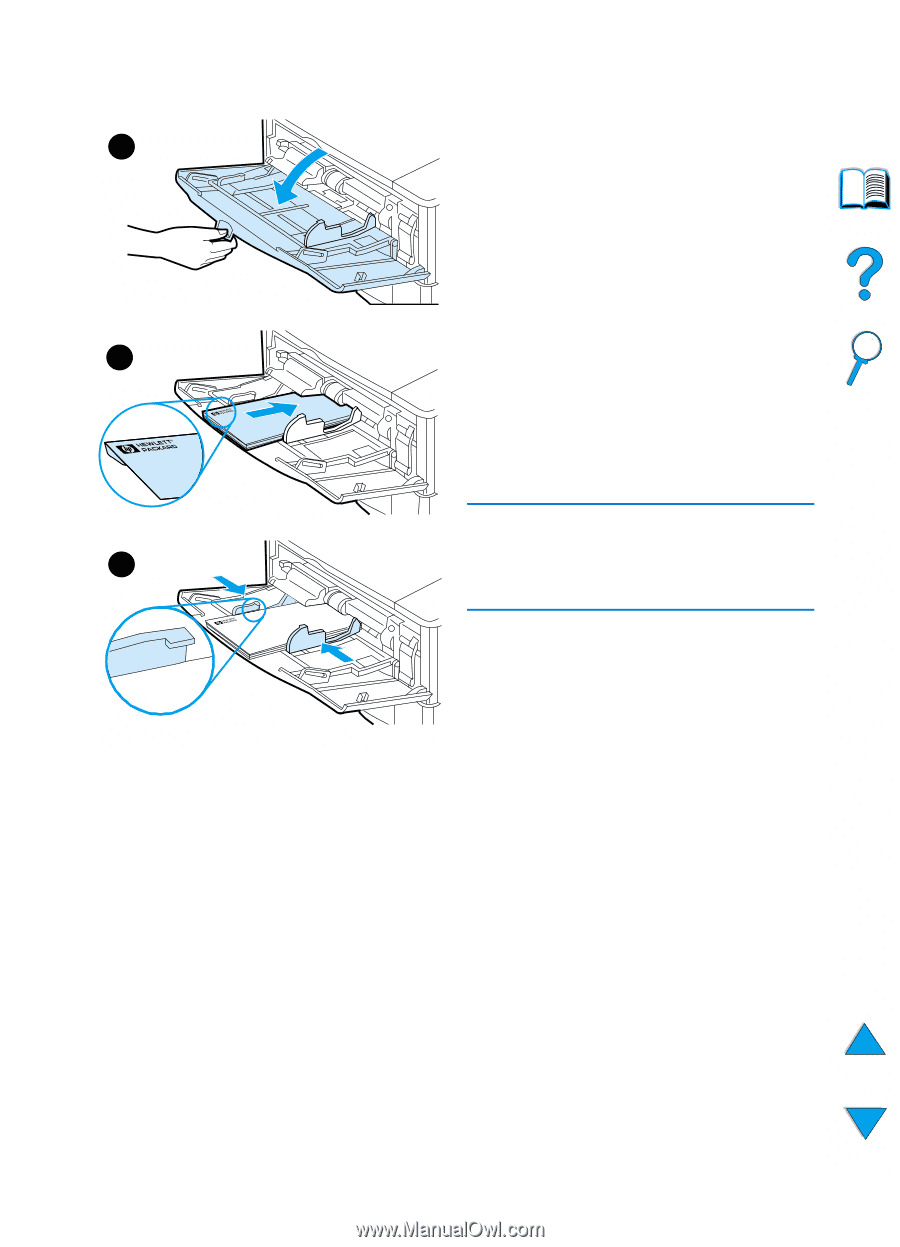
Loading envelopes in tray 1 1 Open tray 1, but do not pull out the 1 extension. (Most envelopes feed best without the extension. However, oversize envelopes might need the extension.) 2 Load up to 10 envelopes in the center of tray 1 with the side-to-be- printed facing up, and the postage- end toward the printer. Slide the 2 envelopes into the printer as far as they will go without forcing them. 3 Adjust the guides to touch the envelope stack without bending the envelopes. Make sure the envelopes fit under the tabs on the guides. Note If envelopes curl, use the rear output bin 3 (see "Printing to the rear output bin" on page 45). 56 Chapter 2 - Printing tasks EN
-
 1
1 -
2
-
3
-
4
-
5
-
6
-
7
-
8
-
9
-
10
-
11
-
12
-
13
-
14
-
15
-
16
-
17
-
18
-
19
-
20
-
21
-
22
-
23
-
24
-
25
-
26
-
27
-
28
-
29
-
30
-
31
-
32
-
33
-
34
-
35
-
36
-
37
-
38
-
39
-
40
-
41
-
42
-
43
-
44
-
45
-
46
-
47
-
48
-
49
-
50
-
51
-
52
-
 53
53 -
 54
54 -
 55
55 -
 56
56 -
 57
57 -
 58
58 -
 59
59 -
 60
60 -
 61
61 -
 62
62 -
 63
63 -
64
-
65
-
66
-
67
-
68
-
69
-
70
-
71
-
72
-
73
-
74
-
75
-
76
-
77
-
78
-
79
-
80
-
81
-
82
-
83
-
84
-
85
-
86
-
87
-
88
-
89
-
90
-
91
-
92
-
93
-
94
-
95
-
96
-
97
-
98
-
99
-
100
-
101
-
102
-
103
-
104
-
105
-
106
-
107
-
108
-
109
-
110
-
111
-
112
-
113
-
114
-
115
-
116
-
117
-
118
-
119
-
120
-
121
-
122
-
123
-
124
-
125
-
126
-
127
-
128
-
129
-
130
-
131
-
132
-
133
-
134
-
135
-
136
-
137
-
138
-
139
-
140
-
141
-
142
-
143
-
144
-
145
-
146
-
147
-
148
-
149
-
150
-
151
-
152
-
153
-
154
-
155
-
156
-
157
-
158
-
159
-
160
-
161
-
162
-
163
-
164
-
165
-
166
-
167
-
168
-
169
-
170
-
171
-
172
-
173
-
174
-
175
-
176
-
177
-
178
-
179
-
180
-
181
-
182
-
183
-
184
-
185
-
186
-
187
-
188
-
189
-
190
-
191
-
192
-
193
-
194
-
195
-
196
-
197
-
198
-
199
-
200
-
201
-
202
-
203
-
204
-
205
-
206
-
207
-
208
-
209
-
210
-
211
-
212
-
213
-
214
-
215
-
216
-
217
-
218
-
219
-
220
-
221
-
222
-
223
-
224
-
225
-
226
-
227
-
228
-
229
-
230
-
231
-
232
-
233
-
234
-
235
-
236
-
237
-
238
-
239
-
240
-
241
-
242
-
243
-
244
-
245
-
246
-
247
-
248
-
249
-
250
-
251
-
252
-
253
-
254
-
255
-
256
-
257
-
258
-
259
-
260
-
261
-
262
-
263
-
264
-
265
-
266
-
267
-
268
-
269
-
270
-
271
-
272
-
273
-
274
-
275
-
276
-
277
-
278
 |
 |
56
Chapter
2 - Printing tasks
EN
Loading envelopes in tray 1
1
Open tray 1, but do not pull out the
extension. (Most envelopes feed
best without the extension. However,
oversize envelopes might need the
extension.)
2
Load up to 10 envelopes in the
center of tray 1 with the side-to-be-
printed facing up, and the postage-
end toward the printer. Slide the
envelopes into the printer as far as
they will go without forcing them.
3
Adjust the guides to touch the
envelope stack without bending the
envelopes. Make sure the envelopes
fit under the tabs on the guides.
Note
If envelopes curl, use the rear output bin
(see “Printing to the rear output bin” on
page 45).
1
2
3