Lenovo ThinkPad 380ED User's Guide for TP 380XD, TP 385XD - Page 62
memory size appears at the upper left corner of
 |
View all Lenovo ThinkPad 380ED manuals
Add to My Manuals
Save this manual to your list of manuals |
Page 62 highlights
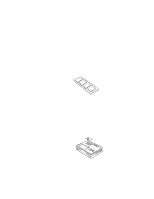
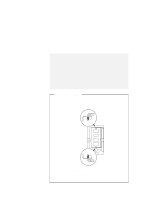
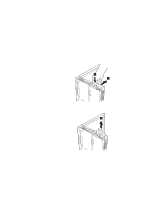
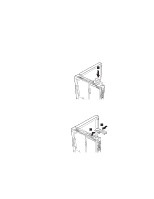
Increasing Memory Capacity 5 Place the memory slot cover over the memory slot; then install the screw back into its place. 6 Turn the computer over again and confirm that the new memory size appears at the upper left corner of the screen. For example, if you install a 32-MB DIMM, you should see the following: 6496 KB OK You have finished installing the DIMM. Reconnect all cables. How to Calculate Total Memory Size Calculate your total memory size in kilobytes (KB) by adding the DIMM memory size to the base memory size (32192 KB). For example, if you installed a 32-MB DIMM, calculate the total memory size as follows: Note: 1 MB=1024 KB [32(MB) x 1 24(KB)/(MB)] + 32192(KB) = 6496 (KB) Notes: 1. If either a 2 1 error code appears under the memory count, 48576 KB OK 21 or the total memory size is not the same as the value you calculated, turn off the computer, reinstall the DIMM (see page 40) and do the memory test with Easy-Setup (see page 29). 42 IBM ThinkPad 380XD/385XD User's Guide
-
 1
1 -
2
-
3
-
4
-
5
-
6
-
7
-
8
-
9
-
10
-
11
-
12
-
13
-
14
-
15
-
16
-
17
-
18
-
19
-
20
-
21
-
22
-
23
-
24
-
25
-
26
-
27
-
28
-
29
-
30
-
31
-
32
-
33
-
34
-
35
-
36
-
37
-
38
-
39
-
40
-
41
-
42
-
43
-
44
-
45
-
46
-
47
-
48
-
49
-
50
-
51
-
52
-
53
-
54
-
55
-
56
-
 57
57 -
 58
58 -
 59
59 -
 60
60 -
 61
61 -
 62
62 -
 63
63 -
 64
64 -
 65
65 -
 66
66 -
 67
67 -
68
-
69
-
70
-
71
-
72
-
73
-
74
-
75
-
76
-
77
-
78
-
79
-
80
-
81
-
82
-
83
-
84
-
85
-
86
-
87
-
88
-
89
-
90
-
91
-
92
-
93
-
94
-
95
-
96
-
97
-
98
-
99
-
100
-
101
-
102
-
103
-
104
-
105
-
106
-
107
-
108
-
109
-
110
-
111
-
112
-
113
-
114
-
115
-
116
-
117
-
118
-
119
-
120
-
121
-
122
-
123
-
124
-
125
-
126
-
127
-
128
-
129
-
130
-
131
-
132
-
133
-
134
-
135
-
136
-
137
-
138
-
139
-
140
-
141
-
142
-
143
-
144
-
145
-
146
-
147
-
148
-
149
-
150
-
151
-
152
-
153
-
154
-
155
-
156
-
157
-
158
-
159
-
160
-
161
-
162
-
163
-
164
-
165
-
166
-
167
-
168
-
169
-
170
-
171
-
172
-
173
-
174
-
175
-
176
-
177
-
178
-
179
-
180
-
181
-
182
-
183
-
184
-
185
-
186
-
187
-
188
-
189
-
190
-
191
-
192
-
193
-
194
-
195
-
196
-
197
-
198
-
199
-
200
-
201
-
202
-
203
-
204
-
205
-
206
-
207
-
208
-
209
-
210
-
211
-
212
-
213
-
214
-
215
-
216
-
217
-
218
-
219
-
220
-
221
-
222
 |
 |